Showing posts with label ice cream. Show all posts

Monday, June 22, 2015

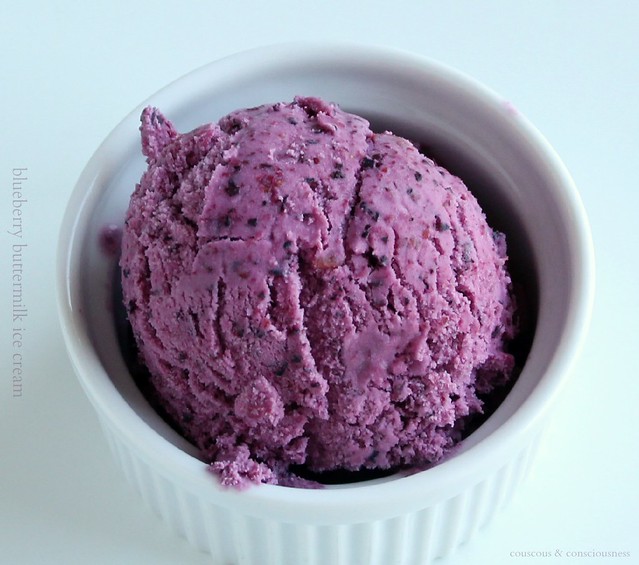
Blueberry Buttermilk Ice Cream

Blueberry Buttermilk Ice Cream 2

I'm sure you all know this feeling ... you come across a recipe - on another blog, in a book, in a magazine, wherever - and you're utterly captivated by it.  The picture makes it look beautiful, the recipe sounds great, but then somehow it just fails to live up to expectations, leaving you feeling more than a little disappointed.

So let me tell you - this ice cream was not good, not good at all.  Was I disappointed, however? - no, on the contrary, because this ice cream exceeded my expectations - it wasn't just good, it was fabulous.  I love ice cream any time of year (case in point, it is currently the middle of winter in my part of the world), and this ice cream offered the sweet freshness of blueberries (reminding me that summer will come again), the tang of lemon, and thanks to the buttermilk was surprisingly fresh and light.

How did I stumble across this frozen scoop of joy?  Well, as those of you who visit regularly will know, I like to play along at the Secret Recipe Club.  If that's new to you then let me explain.  The club has over a hundred members, divided into four groups, and each month one member is assigned (in secret) to another member from their group.  That person then selects a recipe (or more) to make, photograph, and prepare a blog post - all in secret.  Then everyone in the group posts their recipe on the same day, and of course the secret is then out.  It's a always a thrill to find out who has posted something from your own blog, and is a great way to meet and discover some new blogs.   If you are a food blogger and interested in joining the Secret Recipe Club, be sure to check out the Join SRC page.

This month I was assigned to A Calculated Whisk, hosted by the lovely Becky.  Becky's blog features loads of creative gluten free and paleo recipes, so I knew I would have no problem finding the kind of healthy food that I like to enjoy - even treat food that is on the healthy side.  Her blog features a great recipe index, which makes finding just what your heart desires ever so easy, and her passion for food styling and photography is evident in the gorgeous images that grace all her recipes.  With her love for good healthy eating and practising yoga, Becky and I clearly have a great deal in common - it's such a shame that a great ocean divides us, as I would love to be able to roll out my mat and do some yoga with Becky, before heading to the kitchen to whip up some special post-practice treats.  But stranger things have happened and who knows when the opportunity to do just that might arise.  Until then, I can keep Becky close in the kitchen by cooking some of her recipes, and I can tell you there are quite a few that have been bookmarked for the weeks ahead:  Roasted Cauliflower with Creamy Cilantro Pesto, because cauliflower is one vegetable I can never get enough of;  Zucchini Lasagne, just take a look - you will want it too;  Kale & Bacon Quiches with Hash Brown Crust, hello?! - if you're not hooked at bacon, I defy you to get past the hash brown crust;  and Lemon Cheesecake Truffles, look so utterly divine I can't wait to try them.

But in the end, being the ice cream addict I am, I couldn't go past Becky's Blueberry Buttermilk Ice Cream, and I was certainly not disappointed.  This ice cream is light and luscious, and in the depths of winter reminded me of the possibility of summer days ahead.  I made very minimal changes to the original recipe.  Because the buttermilk is low in fat and there are no eggs in this recipe, Becky used gelatine in her version to add a little creaminess - I didn't have any gelatine on hand, but I did have half a can of sweetened condensed milk that needed to be used up, so I used that instead and cut back the honey in the original recipe a little bit.  Becky also used some lemon liqueur which I didn't have, so I subbed in a whole fresh lemon.  I hope you'll give this recipe a try and enjoy it as much as I am.
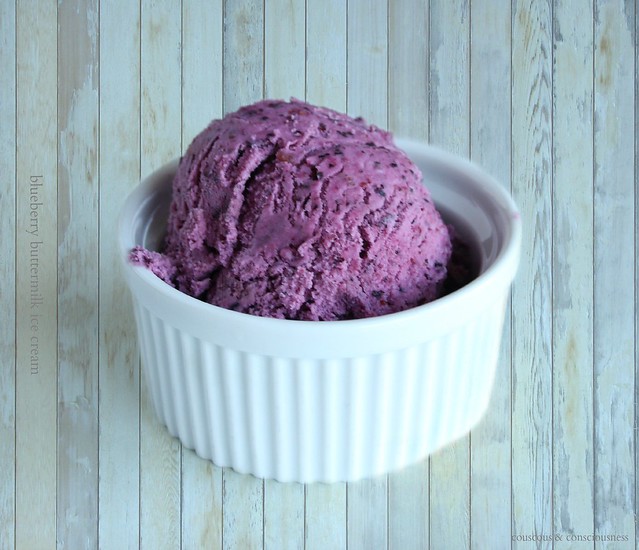
Blueberry Buttermilk Ice Cream 1

Blueberry Buttermilk Ice Cream
Adapted from this recipe
from A Calculated Whisk
Click here for a printable copy of this recipe

1-1/2 cups buttermilk
1/3 cup sweetened condensed milk
1 tablespoon honey
1x lemon, washed
2 cups frozen blueberries (do not defrost)
2/3 cup cream
1 teaspoon vanilla extract
pinch of  sea salt

Place 1/2 cup of the buttermilk into a small saucepan and set over low heat and warm gently - keep an eye on it and do not allow the mixture to come to a simmer.  Remove from the heat and whisk in the condensed milk and honey, stirring until dissolved.

Cut the lemon into smallish chunks, flick out any seeds, and then put all the lemon chunks (yes, skin and all) into the food processor and blitz until very finely chopped, almost a puree.

Add the buttermilk mixture to the food processor, along with the blueberries, cream, vanilla and salt.  Process until smooth, then transfer to a jug and refrigerate for a few hours.

Remove chilled mixture from the fridge and churn in an ice cream maker, according to manufacturer's instructions.  Dive in straight away, or transfer to a freezer-proof container and freeze for several hours to firm up.

I hope you enjoy this dish as much as I did, and visit the links below to check out all the other great dishes my Secret Recipe Club friends made.


Saturday, October 18, 2014

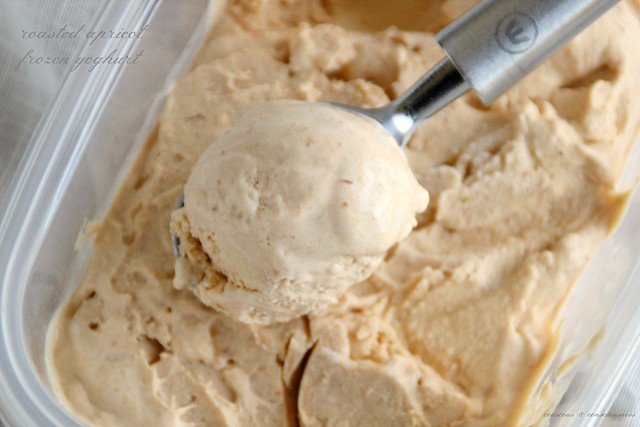
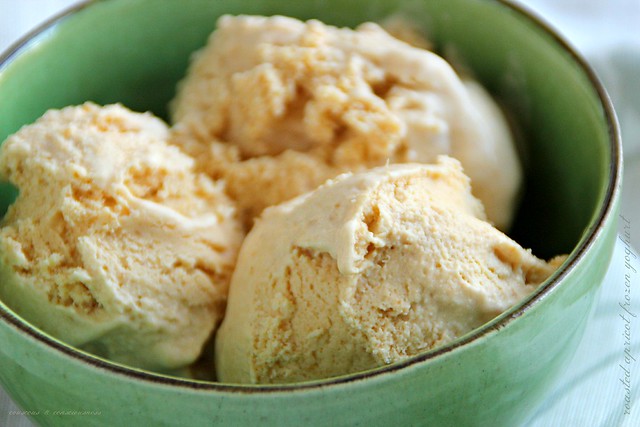
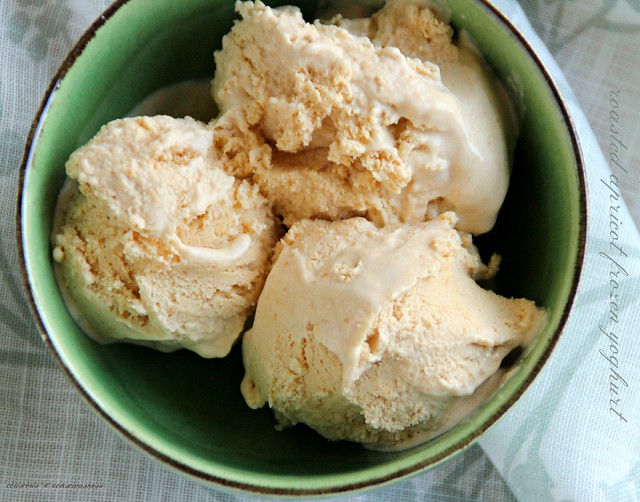
Roasted Apricot Frozen Yoghurt

Roasted Apricot Frozen Yoghurt 2

It's not that we're giving the gorgeous Diana Henry the cold shoulder so early in our relationship at I Heart Cooking Clubs, but we are giving her a bit of a frosty reception this week.  Yes, we're going "Icy Cold" and coming up with all manner of icy, chilled and frozen treats.

Now, I've told you before, I'm sure, that my dessert of choice pretty much any time of year is a frozen one, so I needed little encouragement to break the ice cream maker out of the cupboard and get churning.  Since I love ice cream, and Diana has loads of ice cream and sorbet recipes in her repertoire, making a bit of frozen magic together seemed inevitable.

My favourite new cookbook, A Change of Appetite, offered lots of gorgeous sorbets which have now been bookmarked, but it was the Greek yoghurt and apricot ice cream that took my fancy.

When apricots are at the height of the season, I usually roast them in batches with a little butter and brown sugar.  The butter and brown sugar more or less turns to caramel and the flavour of the apricots really intensifies.  Then I freeze them in batches to use in ice creams and smoothies all year long.

Roasted Apricot Gelato 2

In the original recipe Diana uses dried apricots and stews them in apple juice, before pureeing and mixing with the yoghurt.  With summer (and apricot season) just around the corner, it seemed like the perfect opportunity to use up one of my remaining bags of roasted apricots.  Diana recommends straining the pureed apricots, to avoid getting "bits" in the ice cream, but I'm personally a bit of a fan of the bits - it reminds me that I'm eating something with real fruit in it - so my apricots got a simple blitz with the food processor only.

When I made this Roasted Apricot Gelato, way back when, I didn't really think it could be improved on.  But I can honestly say that this frozen yoghurt version is a distinct improvement.  I love the slight tartness of the yoghurt with the richness of the roasted apricots.  The yoghurt and creme fraiche provide all the creaminess you would normally get from a custard based ice cream, and is a whole lot quicker and easier to make.  I also like to think that this is a healthier option than a regular ice cream - that may possibly be deluded, but I like to believe it.

Roasted Apricot Frozen Yoghurt 1

Roasted Apricot Frozen Yoghurt Recipe
Adapted from recipe by Diana Henry
from A Change of Appetite
Click here for the free recipe card

6x medium-large fresh apricots
brown sugar
butter

400g (14 oz) Greek yoghurt
4 tablespoons creme fraiche
2 tablespoons runny honey

Preheat oven to 180 degrees C (350 degrees F).  Cut apricots in half - remove and discard the stones.  Place apricots cut side up in an ovenproof dish that is just big enough to fit them quite snugly.  Sprinkle each apricot half with a little brown sugar, and top each with a small knob of butter.

Roasted Apricot Gelato 1

Place in hot oven and roast until the apricots have softened and started to collapse, and the sugar and butter have merged with the oozing fruit juices to become almost the consistency of caramel sauce.

This will take about 30 minutes, and it is helpful to baste the fruit with the juices half way through.  Allow to cool completely then, using a food processor or stick blender, blitz to a puree.

Add yoghurt and creme fraiche to the apricot puree and blitz again until combined.

Churn the mixture in a ice cream maker according to manufacturer's instruction.  Halfway through the churning process, drizzle in the honey.  Serve straight away or freeze for a few hours to firm up.

Roasted Apricot Frozen Yoghurt 3

If you would like to get to know Diana Henry a little better, and to see what everyone else has cooked up this week, then do go and visit my friends at I Heart Cooking Clubs and check out the links (who knows, you might even want to join the journey and cook along with us) ...

Diana Henry badge 1A

... or check out A Change of Appetite and Diana's many other great titles available from Amazon USA, Amazon UK, or Fishpond NZ.

I will also be submitting this post to Sweet New Zealand.  Inspired by Alessandra Zecchini, and hosted this month by Lesley at eat, etc ..., Sweet New Zealand is an event for all Kiwi bloggers (whether living at home or abroad), or all foreign bloggers living in New Zealand, to link up their sweet treats.

Sweet New Zealand Badge A


Sunday, August 24, 2014

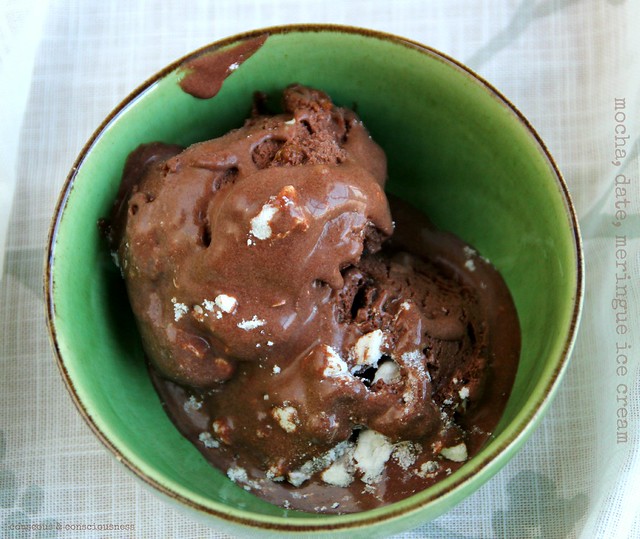
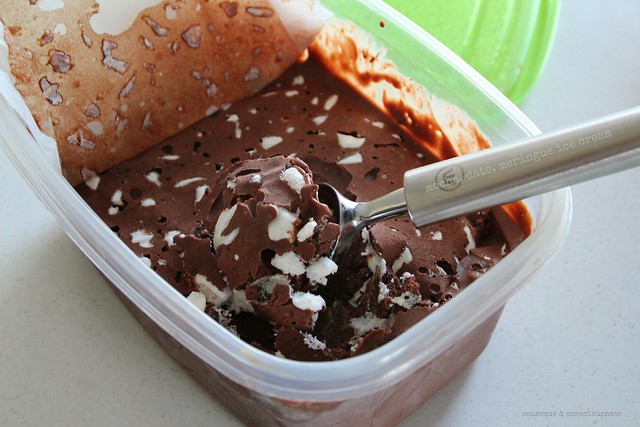
Mocha, Date & Meringue Ice Cream

Mocha, Date & Meringue Ice Cream 2

Pot Luck week at I Heart Cooking Clubs is always one of my favourite weeks, because it means that we get to cook with any one of our ten IHCC chefs.  For me that usually means the irresistible opportunity to catch up once again with my favourite chef, Yotam Ottolenghi.

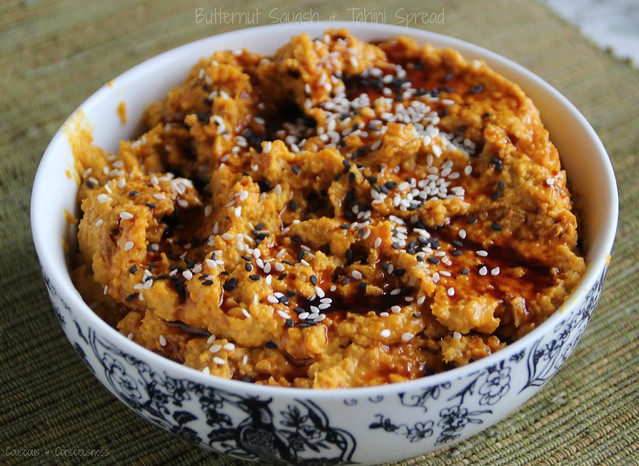
This is timely, because this month at Tasting Jerusalem** we are exploring cooking with date syrup, through the lens of Ottolenghi's book Jerusalem.  I've use date syrup a few times before in dishes such as this Butternut Squash & Tahini Spread, which is finished off with a drizzle of date syrup.

Butternut Squash & Tahini Spread 2

Date syrup has a consistency similar to maple syrup, agave nectar, brown rice syrup or runny honey, and makes a great substitute anywhere you would use any of those ingredients, but the flavour is so much more, for want of a better word, "exotic" and complex than any of them.  The sticky sweetness of dates, combined with the intense flavour and aroma of rosewater, makes for an ingredient that will transport you to places far flung.

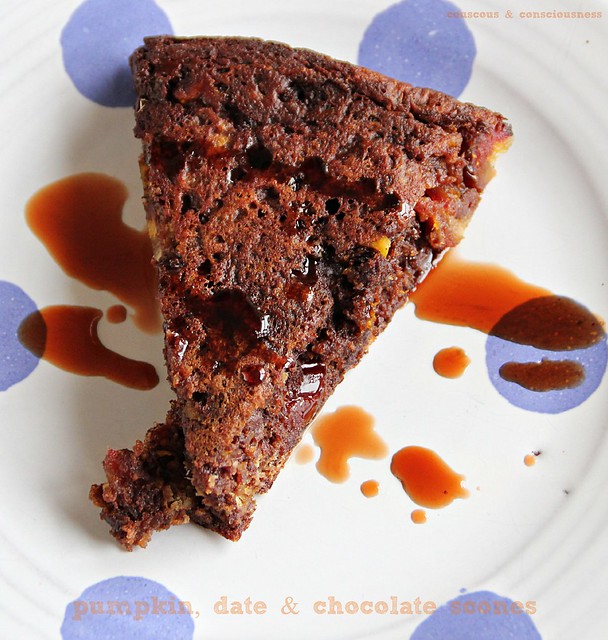
I've also used date syrup in these Pumpkin, Date & Chocolate Scones ...

Pumpkin, Date & Chocolate Scones 4

... but today I wanted to come up with something that was altogether more indulgent and which really played to the exotic nature of this ingredient.

Doing a little research, I found my inspiration in Ottolenghi's recipe for Chocolate, Rose & Walnut Ice Cream.  This seemed like a good starting point, and I thought I could come up with my own version.

To start with, I simplified the whole process by using a combination of coconut cream, condensed milk, and melted dark chocolate, instead of the typical custard base used in the original recipe.  Since I had decided I was going to work date syrup into the recipe, I didn't need rose water, as that flavour is already sufficiently pronounced in the syrup.  I also wanted actual dates in the ice cream, as well as the syrup, so I soaked them in some freshly brewed espresso to soften them, before swirling into the ice cream.  And for that all important crunch, I replaced the walnuts and digestive biscuits Ottolenghi used, with some crumbled meringues.  I love the way they hold their texture, and keep that little bit of "chewiness" even once frozen.  I did think about also including some cacao nibs, but I think it would have been an ingredient too far, and the depth of chocolate flavour here is more than sufficient without it.

Ottolenghi served his ice cream with chocolate sauce drizzled over the top, which seemed a bit unnecessary in the circumstances, and some little cubes of Turkish delight sprinkled over the top.  I think this would have been delightful, but I didn't have any on hand.  He also finished with a little sprinkling of dried rose petals - another delightful touch, which I did have and would have added, but the ice cream was melting and for the life of me I couldn't find them in the cupboard (note to self:  time to give the cupboard a clean out!)

In the end, this ice cream is everything I wanted it to be.  Rich and chocolatey and almost fudgy;  there are delightful little of nuggets of chewy dates and crunchy meringues;  the date and rose flavours really come through without overpowering, and linger long enough on the palate to tantalise the mind with thoughts of far flung places.  I think I should have called this Magic Carpet Ice Cream.

Mocha, Date & Meringue Ice Cream 1

Mocha, Date & Meringue Ice Cream Recipe
Inspired by a recipe by Yotam Ottolenghi
Makes about 1 litre
Download the free recipe card here

1/2 cup finely chopped, dried dates
3 tablespoons freshly brewed espresso
1 tablespoon date syrup
400ml (13.5 fl oz) coconut milk
2/3 cup sweetened condensed milk
200g dark chocolate, melted (I used Whittaker's Dark Ghana)
40g (1-1/2 oz) crumbled meringues

Place chopped dates in a small bowl.  Pour over the hot espresso and date syrup.  Stir to combine, and set aside until the dates have softened, and mixture has cooled.

Break chocolate into smallish pieces.  Place in a bowl over a pot of gently simmering water, making sure the water is not actually touching the bowl.  Stir from time to time, until the chocolate is melted and glossy.  Set aside and allow to cool completely, but without re-solidifying.

In another bowl, beat together the coconut milk, condensed milk and melted chocolate, until everything is well combined.

Churn in an ice cream maker according to manufacturer's instructions.

Empty ice cream into a freezer safe container.  Stir in the softened dates and crumbled meringues.  Cover the surface of the ice cream with a piece of non-stick baking paper, and put in the freezer to firm up.

Serve generously whenever you have itchy feet.

If you would like to get to know Yotam Ottolenghi a little better or any one of our other IHCC chefs, then do go and visit my friends at I Heart Cooking Clubs and see what they've all cooked up for Pot Luck week.

IHCC Ottolenghi Leek Badge resized

** Tasting Jerusalem is a virtual cooking community exploring the vibrant flavors and cuisine of the Middle East through the lens of Jerusalem: A Cookbook by Ottolenghi and Tamimi published by Ten Speed Press. You can follow along and cook with us by subscribing to omgyummy.com, following the hashtag #TastingJrslm on Twitter and Instagram, liking our Facebook page or joining our Google+ Community and finally checking out all of our groups’ dishes on Pinterest.

I'll also be sharing this post at See Ya In the Gumbo hosted by the lovely, and very amusing, Michelle at Ms. enPlace, at Weekend Cooking hosted by Beth Fish Reads, and at Foodie Friday hosted by Designs by Gollam.


See Ya in The Gumbo Badge      Weekend Cooking Badge    

I will also be submitting this post to Sweet New Zealand.  Inspired by Alessandra Zecchini, and hosted this month by Michelle at Munch Cooking, Sweet New Zealand is an event for all Kiwi bloggers (whether living at home or abroad), or all foreign bloggers living in New Zealand, to link up their sweet treats.

Sweet New Zealand Badge A


Sunday, August 17, 2014

Pina Colada Ice Cream

Pina Colada Ice  Cream 2

I don't wish to whine, but it's not been the best of times around here the last couple of weeks.  Long story short, and I'm sure I've mentioned this here before, our house got flooded in a big storm a couple of months ago.  I arrived home from work to find the dining room and kitchen floors resembling a lake and, as water is wont to work its way downwards, the water had filled up the ceilings and floor of the two bedrooms below.  Not a pretty sight.  Anyway, after several weeks of not much happening, the insurance company finally realised that the problem was way more serious than they had originally anticipated, launched themselves into "emergency action" as a result, and sent in a team of people to start ripping the house apart.  Walls and ceilings have been removed downstairs, and big machines brought in to try and dry the place out.  The kitchen and dining room ceiling will have to be removed, likewise the floor, and there is even talk of the possibility of the whole kitchen having to be pulled out.  Needless to say, there is plenty of chaos around here and not too much cooking going on, so please bear with me if I'm not posting as regularly here as I'd like to over the next couple of months.

Still, life isn't all grim ... the magnolias and daffodils are out, and the tui which always comes to our garden at the start of spring, and enchants us throughout the summer, has arrived.  A wonderful reminder that spring is officially only 14 days away.  For those of you who don't know, the tui is a native New Zealand bird, notable for its vibrant green plumage and the two white feathers at its throat.  As a child I was always delighted by this Maori legend as to how the kiwi became a flightless bird and the tui got its white feathers.

Tui Collage

The other great thing about this time of year is the abundance of citrus fruit in season.  I always have huge bowls of lemons, oranges and mandarins on my kitchen bench right now, and it's the time when I launch into production of preserved lemons and lemon curd.  Marmalade making is just around the corner.

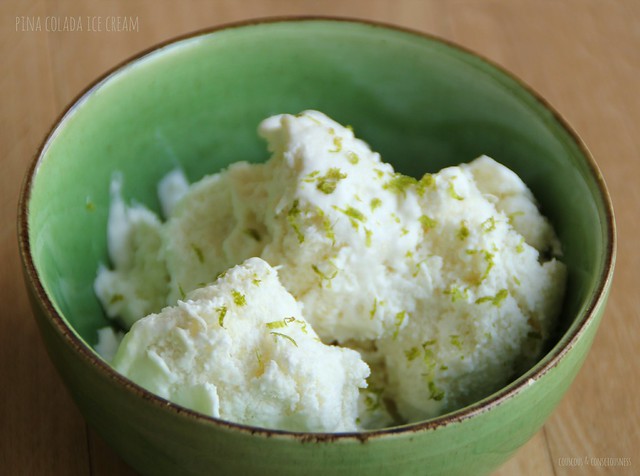
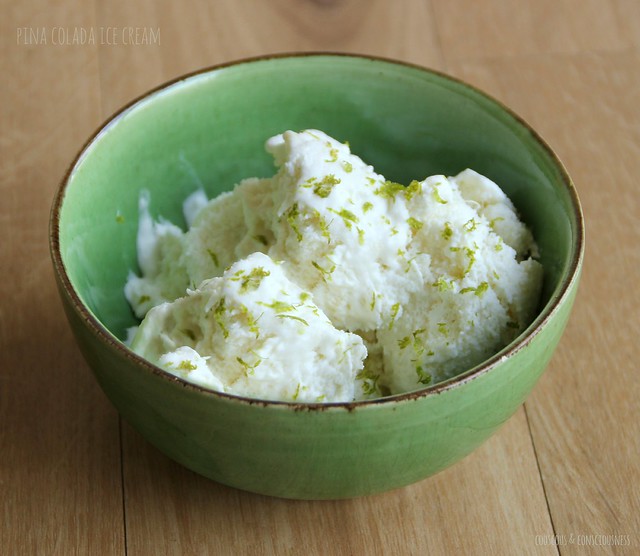
The fact, therefore, that this week we are Zesting It Up with Nigel Slater at I Heart Cooking Clubs, really brightened my week, and with days warming up a little it definitely seemed like ice cream was the way to go.  Though, in truth, I eat ice cream all year round - no excuse of warmer days ahead needed.   Trawling around on the internet I came across Nigel's Lime Mascarpone Sorbet.  I really liked the sound of that, and in fact I had a couple of limes in the house.  I didn't, however, have any mascarpone, wasn't feeling inclined to head to the supermarket to buy some, and easy enough though it is to make time wasn't on my side.  Poking around in the pantry, I came across a tin of coconut milk and figured I could do something with that.  I also stumbled across a tin of pineapple chunks that had been sitting in the pantry for goodness knows how long, and for the life of me I can't imagine how I ever came to be in possession of a tin of pineapple in the first place.  Then I remembered half a tin of condensed milk that had been sitting in the fridge for probably at least as long as the pineapple had been around, and thus this ice cream was born.  It's a simple as blitzing up the coconut milk, pineapple chunks, condensed milk, and lime zest in a blender, and then churning in an ice cream maker.

The resulting ice cream is light and refreshing, and a beautiful combination of flavours.  This is definitely one I will be repeating a lot this summer.  Thanks for the inspiration, Nigel.

Pina Colada Ice Cream

Pina Colada Ice Cream Recipe
Click here for a printable copy of this recipe

1x 400ml (13.5 fl oz) can Trade Aid coconut milk
1x 450g (16 oz) can pineapple chunks in natural juice
1/2 can condensed milk
grated zest of 1x lime

Place all ingredients in blender, and blitz until the pineapple is completely crushed and everything is well combined.

Pour everything into an ice cream maker and churn according to manufacturer's instructions.

Turn ice cream into freezer proof container, and place a piece of baking paper directly over the surface of the ice cream (helps to stop it turning icy).

Remove from freezer 10 to 15 minutes before serving to soften slightly.

If you would like to get to know Nigel Slater a little better, and to see what everyone else has cooked up this week, then do go and visit my friends at I Heart Cooking Clubs and check out the links ...


I will also be submitting this post to Sweet New Zealand.  Inspired by Alessandra Zecchini, and hosted this month by Michelle at Munch Cooking, Sweet New Zealand is an event for all Kiwi bloggers (whether living at home or abroad), or all foreign bloggers living in New Zealand, to link up their sweet treats.

Sweet New Zealand Badge A

I'll also be sharing this post this week at See Ya In the Gumbo hosted by the delightful Michelle at Ms. enPlace, at Weekend Cooking hosted by Beth Fish Reads, and at Foodie Fridays hosted by Designs by Gollum.

See Ya in The Gumbo Badge     Weekend Cooking Badge     Foodie Friday Badge

Thursday, March 28, 2013

Plum & Cardamom Cake

Plum & Cardamom Cake 2

The thing I love about plums - actually, there are several things I love about plums, this is just one of them - is the way they just seem to go on and on, one variety after another appearing each week at the market, so that plum season seems to linger well into autumn.  After all the other stone fruit  have finished for the season, the plums keep coming making it feel as though summer is lingering just that little bit longer.

After picking up a few kilos of plums at the market the other week, and having made a couple of batches of jam, I was in the mood for plum cake.  Flicking through Annabel Langbein's book More Taste Than Time, Fast Track Food for Busy People (a great book I've had in my collection for a long time), I came across her recipe for French Plum Cake.  Spiked with vanilla and lemon it sounded delicious, but it also seemed very "summery" and I was looking for something that felt a little more autumnal.

Plum & Cardamom Cake 3

Then it came to me.  Having been in the midst of preserving season, I had been looking around at lots of books on canning and preserving lately.  In my search, I had stumbled across Canning for a New Generation: Bold, Fresh Flavours for the Modern Pantry by Liana Krissof.  I've not added this one to the collection yet, though it's on the wishlist, but after reading all the reviews and all the raves for the plum cardamom jam, I've been obsessed with that flavour combination ever since.

This seemed like the perfect inspiration for "autumnising" my cake.  So I added in the cardamom, obviously; I also left out the lemon, and replaced the sugar with brown sugar for a little more depth of flavour.  This is a big recipe, and although the original recipe calls for baking in two round springform tins, I baked one large "slab" cake in a brownie tin.

This makes a delicious dessert cake - also fabulous for breakfast!  It's best eaten warm on the day it's baked, and I loved it with a dollop of thick Greek-style yoghurt or a drizzle of runny cream.  Would be wonderful too with some good vanilla ice cream.  As I mentioned, this makes a lot of cake, and unless you're feeding a pretty big crowd you're going to have a lot of leftover cake.  This is not a bad thing, as this cake freezes exceptionally well.  Baking in a rectangular tin, meant that it was easy to cut into perfect, serving-size squares, with a plum half in each portion.  Once cut into portions, I wrapped each one in clingfilm and stashed them in the freezer - once thawed, 30 seconds in the microwave is all it takes for the perfect breakfast on the run or a quick mid-week dessert.

Plum & Cardamom Cake 4


Plum & Cardamom Cake
Adapted from a recipe by Annabel Langbein from
Click here for a printable copy of this recipe

8x fresh plums
1/4 cup brown sugar
1/4 teaspoon ground cardamom

1-1/2 cups brown sugar
300g (10-1/2 oz) butter
3x free-range eggs
1 teaspoon vanilla paste (I used Heilala)
1 cup milk
3-1/2 cups flour
1 teaspoon baking powder
1/4 teaspoon ground cardamom

Preheat your oven to 180 degrees C (350 degrees F).  Lightly grease a 22cm x 32cm (8-1/2" x 12-1/2") brownie pan, and line tin with parchment paper - you want the parchment paper to overhang the sides a bit so that once cooked you can lift the cake out of the tin rather than inverting it.

In a small bowl combine the first measure of brown sugar and cardamom.  Halve the plums, remove the stones, and put the plum halves into a medium sized bowl.  Add the sugar and cardamom, and toss through the plums.  Set aside for about 45 minutes.

In another bowl, cream together the butter and the second measure of brown sugar.  Add the eggs one at a time, beating well after each addition to make sure each egg is full combined.  Stir in the vanilla paste.

Sift together the flour, baking powder, and second measure of ground cardamom.  Now add the milk and sifted dry ingredients in batches, alternating between the two.

Once everything has been incorporated, pour the batter into the prepared tin, and arrange the plums (cut side up) in rows on top of the batter.  Just sit them on top - as the cake cooks, they will sink down into the batter.   Drizzle any fruit and sugar juices from the plums over the top.

Bake in the preheated oven for 55-65 minutes, until a skewer inserted into the centre of the cake comes out clean.

Plum & Cardamom Cake 1

This will be my submission this month to Sweet New Zealand, inspired by Alessandra Zecchini and hosted this month by the lovely Lesley at eat, etc ... - can't wait to see what sweet treats everyone has come up with this month.

Sweet New Zealand Badge A

I'm also sharing this post at See Ya In the Gumbo hosted by the lovely Michelle at Ms. enPlace.

See Ya in The Gumbo Badge


Monday, January 14, 2013

Roasted Apricot Gelato

Roasted Apricot Gelato 3

I love this time of year, when the ice cream maker comes out of the cupboard and starts to work overtime, and beautiful summer berries and stone fruit are available in abundance.  Now I make and enjoy homemade ice creams and sorbets all year round, but this is the time when I really want to go to town churning out tubs full of luscious, deep flavoured, fruity gelato.

A bowlful of apricots I had on hand this week were destined for exactly this treatment I decided.  I actually used slightly under-ripe fruit because I wanted that little bit of tartness, but I was also looking for the depth of flavour that comes from fully ripe fruit, so achieved that by roasting the apricots first with a little brown sugar and butter.  The brown sugar and butter more or less turned into caramel, and the apricots really intensified in flavour.  Then it was just a matter of blitzing the roasted apricots to a puree.  This is a really good way of preserving apricots for use in ice cream throughout the year - simply freeze the pureed fruit in a snaplock bag in batches ready to whip out any time you want to make ice cream.  You can also do the same thing with nectarines and peaches.

I hope you'll give this a go - it's pretty darn good.  If you fancy a little extra texture, you could try serving this with crumbled amaretti biscuits sprinkled over the top.  Don't have an ice cream machine - take my advice and invest in one - I promise you it will be worth it.  I shared this with my good friends, Cliff & Clare, who came to stay on the weekend - they were so smitten Cliff was thinking that he would get Clare an ice cream maker for her birthday!

Roasted Apricot Gelato Recipe
Makes approximately 1 litre
Click here for a printable copy of this recipe

6x medium-large fresh apricots
brown sugar
butter

6x large egg yolks, free range
1/2 cup sugar
325 ml (11 fl oz) milk
100 ml (3.5 fl oz) cream
1x vanilla bean

Preheat oven to 180 degrees C (350 degrees F).  Cut apricots in half - remove and discard the stones.  Place apricots cut side up in an ovenproof dish that is just big enough to fit them quite snugly.  Sprinkle each apricot half with a little brown sugar, and top each with a small knob of butter.

Roasted Apricot Gelato 1

Place in hot oven and roast until the apricots have softened and started to collapse, and the sugar and butter have merged with the oozing fruit juices to become almost the consistency of caramel sauce.

Roasted Apricot Gelato 2

This will take about 30 minutes, and it is helpful to baste the fruit with the juices half way through.  Allow to cool completely then, using a food processor or stick blender, blitz to a puree.

Place egg yolks in a medium bowl with half of the sugar, and whisk until pale.  Set aside.

Put the remaining sugar in a medium sized, heavy bottomed pan, with the milk and cream.  Split the vanilla bean down the middle and scrape out the seeds, adding both the seeds and the bean to the pan with the milk and cream.  Set pan over moderate heat and bring just to a boil.  Remove from heat immediately.

Now, whisking constantly, slowly pour about half of the milk and cream mixture into the egg mixture.  Then return all of this mixture to the remaining milk and cream in the saucepan - keep whisking constantly as you go.

Return pan to a low heat, and stir constantly until the mixture begins to thicken.  A good indication that it's ready is when all the frothy bubbles from the surface disappear.  Also the mixture will coat the back of a spoon, and when you run your finger through the mixture the edges of the mixture will not run back together.

Remove from the heat and immediately strain through a sieve into a clean bowl set over an ice bath.  Keep stirring until the mixture has cooled completely.

Now stir the cooled apricot puree into the custard, add the vanilla bean which was strained out back into the custard, and refrigerate for 24 hours.  Now remove the vanilla bean (do not throw away), and churn the custard in an ice cream maker according to manufacturer's instructions.  Serve straight away or freeze for several hours to firm up.

Roasted Apricot Gelato 4

What to do with that vanilla bean?  There's plenty of flavour left in that bean so don't discard it.  Rinse thoroughly under cold water, then set on a paper towel on your kitchen window sill until dry.  Then put into your jar of caster sugar to have a constant supply of vanilla flavoured sugar.

This will be my submission to Sweet New Zealand, inspired by Alessandra Zecchini and hosted this month by the lovely Arfi at HomeMadeS.

Sweet New Zealand Badge A

Sunday, December 25, 2011

Rolled Almond Meringue with Christmas Mince Ice Cream & Cookbook Sundays # 3

Rolled Almond Meringue with Christmas Mince Ice Cream 1

Happy Christmas everyone - I hope you are all enjoying a lovely day with your families, and enjoying good food on your tables.  This year is a quiet Christmas for me, my partner being away in Australia for work, and finances being such that travelling to spend time with family or friends was just not an option this year.

Nevertheless, I am having a lovely relaxing day, and will certainly be enjoying my share of festive fare.  Dinner tonight will be a salad of crispy-skin, five-spice duck, with watercress, mango, sweet potato & crispy noodles, with a tamarind and sesame dressing.  Dessert will be this rolled almond meringue filled with a fruit mince ice cream.  The great thing about a dessert such as this is that I can cut off a slice (or three), and keep the rest frozen for another occasion.

This is an adaptation of a recipe from Jan Bilton's Fresh & Fancy Fare, a book I've had for about 25 years and haven't used nearly enough, so I thought this would be a great submission for this week's Cookbook Sundays.  The original recipe calls for a filling of whipped cream mixed with shredded coconut and oranges, but since I wanted to create something less perishable the ice cream filling instead of cream seemed the way to go.  And besides, who really needs an excuse to make ice cream?!

As luck would have it, I just happened to have half a jar of Christmas fruit mince left over from last year.  It was however looking a bit dried out and sad, but I remembered that it had been particularly good, so I felt sure that if I gave it a bit of love I could resurrect it and use it as the base for my ice cream.  I added a heaped tablespoon of my home-made Seville orange marmalade, 50g of chopped chocolate (I used Whittakers Dark Ghana), and a hefty slosh of my Damson gin.  Not only did that breathe new life into my old Christmas mince, but I think I successfully improved it.  Any good quality Christmas mince that you happen to have on hand will suffice here.

For my ice cream custard, I used David Lebovitz's base for his Brown Bread Ice Cream - well, him being the God of all things ice cream in my opinion, where else would I turn?

There is brown sugar and sour cream in the ice cream base which gives it a lovely caramel base flavour, with a hint of tartness, all of which married beautifully with the spices, bitter orange, chocolate and almond flavours coming through from the Christmas mince - utterly divine.  You can be sure there will be more than one batch of this whipped up over the summer - actually beautiful flavours for a winter ice cream too, which is not to be sniffed at since ice cream is (hands down) my favourite dessert all year round.

The meringue is beautifully chewy and marshmallowy (is that a real word? - you know what I mean), and the hint of almond adds yet another layer of flavour to those coming through from the ice cream.

Rolled Almond Meringue with Christmas Mince Ice Cream 2


Rolled Almond Meringue with Christmas Mince Ice Cream
Adaptations from recipe by Jan Bilton
Serves 6-8
Click here for a printable copy of this recipe

For the ice cream:
1 cup whole milk
1-1/2 cups cream
1/3 cup granulated sugar
1/3 cup light brown sugar
pinch of salt
225g (8 oz) sour cream
5 large egg yolks
1/2 teaspoon vanilla extract
2/3 cup good quality Christmas fruit mince

For the meringue:
5 egg whites
1 cup caster sugar (mine was vanilla infused)
1/2 teaspoon almond extract
1 teaspoon white vinegar
2 teaspoons cornflour

Begin by making the ice cream, and I suggest that you start this at least 24 hours before making the meringue.

First of all make an ice bath by putting ice cubes and a bit of water into a medium bowl.  Then put the sour cream and 1 cup of the cream into another medium sized bowl.  Stand this bowl in the ice bath and set everything aside.

Put the egg yolks into yet another bowl, whisk slightly to break up the yolks, and then set this aside also.

Put the milk, the remaining 1/2 cup of cream, the sugars and the salt into a medium-sized saucepan, and heat over a gentle heat.  Stir constantly until the sugar has dissolved completely and the mixture is warm.  Test by sticking your little finger into the mixture and when it is too hot to hold your finger there it is ready.

Remove from the heat, and gradually pour some of the milk mixture onto the egg yolks.  Whisk constantly as you pour - this is important or you will end up with scrambled eggs.  Once about half of the milk mixture is incorporated into the eggs, scrape the whole lot back into the saucepan, again whisking constantly.

Set the pan back over low heat, and stir constantly until the custard thickens enough to coat the back of a spatula.

Remove from the heat, and strain the mixture over the top of the cream and sour cream mixture resting in its ice bath.  Whisk constantly until the mixture is smooth and has cooled completely.  Stir in the vanilla.

Cover with cling film, pressing it right down onto the surface of the custard.  Refrigerate for several hours at least - ideally overnight.

Next day, churn in your ice cream maker according to the manufacturer's directions.  Remove the churned ice cream to a cold bowl, stir through the Christmas mince, then freeze until firm.

Now make the meringue.  Begin by preheating your oven to 180 degrees C (350 degrees F).  Lightly butter a Swiss-roll tin and line it with parchment paper.  Set aside.

In a scrupulously clean bowl, beat the egg whites until stiff.  Add the sugar, a little bit at a time, and continue beating until all the sugar is dissolve and the mixture is stiff and glossy.

Fold the almond extract, vinegar and cornflour gently into the meringue.

Spread the mixture into the prepared tin, and bake in the preheated oven for 15 minutes.

Meanwhile, spread another sheet of baking paper out onto your kitchen bench and dust it liberally with icing sugar.

Remove the cooked meringue from the oven, and turn it out onto the icing sugar dusted baking paper.  Allow to cool completely.

Spread ice cream over the centre of the meringue (soften your ice cream first if necessary), roll up from the long edge.  Wrap in parchment paper and freeze until you are ready to serve.

Enjoy and have a happy Christmas - for those of us here in New Zealand it's nearly over, but I know that for many of you it is only just beginning.

Cookbook Sundays Badge 

Earlier I mentioned Cookbook Sundays.  What is that all about, you are perhaps wondering.  Well, if you're anything like me you have dozens of cookbooks gathering dust on your bookshelves, some of which have never even been cooked from.  Sure I spent hours browsing through them when I first bought them, marking all the recipes I was going to make with little post-it notes, and yet still those books languish in the bookcase and never make it to the kitchen.  There are others from which I have made but one recipe which was such a resounding success that I've made it over and over again, and yet somehow I've never made anything else from that book.  Sound a bit familiar?!

Take comfort - you are not alone, and now Cookbook Sundays is your opportunity to change that.  Every Sunday I'm going to share with you a recipe that I haven't made before from one of my ever expanding collection of cookbooks.  And, because I know that if you have read this far then you are guilty of this too, I'm inviting you to join in with me.  Each week my Cookbook Sundays post will have a linky for you to share something you've cooked from one of your cookbooks.

The rules for joining in are simple:
  1. Your post must state the author and the title of the book your recipe has come from.
  2. Your post must mention Cookbook Sundays and link back to this post.  Including the Cookbook Sundays badge is optional, but always appreciated.
  3. You may submit as many entries as you like, and you may use the same cookbook as many times as you like.  Old posts are also welcome.
  4. Lastly,  remember that what goes around, comes around - one of the reasons you are participating in this is because you want people to read your posts, so do the right thing and go and visit a few of the other participants. 
Now, go and dust off those cookbooks and get cooking!  Use the linky tool at the end of this post to submit your entry/entries - simply scroll down to where it says "You are next ... Click here to enter", and then follow the instructions.  The linky will be open for one week.

Lastly, if you would like to use the Cookbook Sundays badge in your post, simply copy the code in the box beside the badge below and paste it into your post.  Feel free to also use it in your sidebar if you wish.

CookbookSundays

Sweet New Zealand Badge 

I am also sharing this post with Sweet New Zealand, a monthly blog event created by the very lovely Alessandra Zecchini, and which this month is hosted by the equally lovely and incredibly talented Bron Marshall. This is an opportunity for all Kiwi bloggers (whether you are living in New Zealand or overseas), as well as for non-Kiwi bloggers living in New Zealand, to connect and share some of those sweet treats from your kitchen.  So, head on over to Bron's and share something sweet.

I'm also sharing this at Bake with Bizzy.

Wednesday, February 9, 2011

Chocolate Cherry Ice Cream

Chocolate Cherry Ice Cream 3

This is hands-down the simplest and possibly the best chocolate ice cream you will ever come across.  Several months ago I came across a recipe for a Nutella ice cream on another blog, and I made it several times and absolutely loved it.  I use regular Nutella for this, although the original recipe called for vegan Nutella so you can certainly use that to make a vegan version.  I thought that I had originally found the recipe on a blog called Voracious (which was previously The Voracious Vegan), but on revisiting to link back to it I have been unable to find it.  So if you belong to the original copy of this recipe or know who does - please let me know so that I can link to it.

Most of the time, I make this just plain, but because I had a beautiful big bowl of fresh, fat, cherries to use, and inspired by the idea of Black Forest Gateau (let's face it cherries and chocolate are a marriage made in heaven), I stirred a pile of them into the freshly churned ice cream.

Chocolate Cherry Ice Cream 2


Now I've had chocolate ice cream before with cherries in, and the cherries have always stayed kind of soft - mine kind of froze.  I guess the difference (which I didn't think of at the time) is normally glace cherries would be used, and I'm assuming that because of the high sugar content they don't freeze.   So I realise that next time, if I'm to use fresh cherries, I probably need to poach them first in some sugar syrup.  Nevertheless, by the time the ice cream comes out of the freezer, and sits long enough to be "scoopable" (probably not a real word I know, but you understand what I mean), the cherries have also softened somewhat.

So how do you make this wonderful and simple ice cream?  You are not going to believe this.

Put equal quantities of Nutella (use vegan if that is your preference) and coconut cream - I used 1-1/2 cups of each - into a medium sized bowl and using an electric mixer beat until combined.  Pour the mixture into an ice cream maker and churn according to the manufacturers directions.  Once churned, remove to a plastic tub, stir in fruit if using, and put into freezer to firm up.  You could try a variety of different fruits in this - or even add chocolate chips and or nuts.

Chocolate Cherry Ice Cream 1

This post is a contribution to Make it with ... Mondays challenge Nutella - the linky will be open until Monday 14 February, so keep those Nutella posts coming, and don't forget to keep your almond posts coming too - the almond linky is open here and will remain open until Monday 21 February.

Make it with ..... Mondays

I'm also linking this to the Decidedly Healthy or Horridly Decadent Blog Hop.  Although I normally like to try and offer a reasonably healthy entry, it's all out decadence this week and I make no apology for it.

Wednesday, September 8, 2010

Pink Guava, White Chocolate & Macadamia Nut Ice Cream Recipe

Christchurch Earthquake 2, edited

At 4.30 on Saturday morning life as we know it here in Christchurch changed forever.  We were woken with the bed shaking violently and a loud rumbling sound - yes, we were in the grips of an earthquake.  Now here in New Zealand we live on the fault line and earthquakes are nothing new to us.  But it didn't take long for us to realise that this was something way bigger than we had experienced before and, once we could hear glass breaking and stuff crashing down all around our apartment, we knew it was time to get into a doorway - quick!  It turned out to be a 7.1 magnitude quake, and although it was all over in 15 seconds (apparently), those seconds were terrifying and seemed like minutes.  Equally terrifying have been the constant after shocks - over 100 of them now since the big one, and many of them in excess of 5 on the richter scale.

For all that, on a personal level, we have survived with nothing more than a bit of broken crockery and a few broken bottles which fell off the kitchen shelves - a shattered bottle of orange blossom water and a jar of teriyaki sauce that lost its lid and sprayed all over the kitchen walls - the combination of the two together left an interesting aroma in the kitchen!  So we have been incredibly lucky.
Christchurch Earthquake 3, edited

Many others have not been so lucky - there are many people who have had to be evacuated from their homes, and many who still have no power or running water.  Many of the old character and heritage buildings in the city, which give our city its particular charm, have been severely damaged and will almost certainly have to be demolished.  Our central business district, where many of these older buildings are located, is largely unsafe and has been completely closed off for the last four days.  Many of our smaller businesses (despite the immediate setting up of financial assistance by our government) will simply not survive.  Redevelopment and rebuilding of the city will doubtless take several years, and the character of our city will be very different, which is rather sad to contemplate. 

Christchurch Earthquake 1, edited

Miraculously, however, the human toll has been minimal.  Not one life has been lost, and despite quite a few minor injuries, there have been only two serious injuries.  I believe we are amazingly blessed to live in a city with a small population (we have only 330,000 people here), so we don't have buildings which are over-crowded;  we have relatively good building and construction standards in New Zealand;  and essential services have been able to swing into action with relative ease.  But the greatest miracle of all must surely be that the quake happened at a time of day when our city buildings and streets are largely deserted - even just a couple of hours earlier the results would have been catastrophic.

There's no doubt that an event like this, even when you come out of it largely unscathed, leaves you feeling shaken up and vulnerable.  It has clearly reminded me of the value of living from moment to moment - I definitely feel very uneasy, and every after shock scares the hell out of me, but all my yesterdays and tomorrows have never felt less relevant.  Despite my nervousness, right now, I am alive, I am safe, I am healthy - what more could I possibly ask for?!  I am grateful to have a yoga practice which sustains me at a time when I need it most, and I am also immensely grateful for all the emails and comments I have received from so many of you out there in "blog land" - that so many people from all over the world, who I've never even met, have taken the time to spare a thought for me and the other people of Christchurch is deeply humbling and I thank you all.  I will reply to you all, but please don't be offended if I haven't gotten to you yet.

And since I'm so grateful to you all, I thought I should share a recipe with you - would be rude not to, wouldn't it?!  To be honest, I haven't been cooking much the last few days, but I sure as heck have been "comfort eating".  Now when it comes to comfort food, favourites come in the form of chocolate, brownies and ice cream, and making a batch of ice cream seemed like just the thing to satisfy, as well as providing a good distraction.

I made this adapting my favourite vanilla ice cream recipe by David Lebovitz as my base - I left out the vanilla bean, although I did include the vanilla extract, and I added an extra egg yolk.  To this I added a couple of tins of pink guavas (pureed) and some chunks of macadamia nut white chocolate.  The result is a beautifully delicate flavour (I think next time I would cut the vanilla back a bit, as it does dominate the guava a little); a gorgeous, pale, pinky-peachy colour;  and, a smooth, creamy and luscious texture interspersed with hits of crunch from the white chocolate and macadamia nuts.  I will definitely make this again - perfect for a celebration meal, or when you just need a bit of comfort and indulgence.

Pink Guava, White Chocolate & Macadamia Nut Ice Cream 6, cropped & edited

Pink Guava, White Chocolate & Macadamia Nut Ice Cream Recipe
Makes about 1.5 litres
Click here for a printable copy of this recipe

250ml (1 cup) full-fat milk (preferably organic)
pinch of salt
150g (3/4 cup) sugar
500ml (2 cups) heavy cream
6 large egg yolks (preferably free range)
1 teaspoon pure vanilla extract (maybe reduce to 3/4 teaspoon)
2x 410g tins guava halves
1 tablespoon cassis (optional)
125g macadamia nut white chocolate, cut into small chunks

Pink Guava, White Chocolate & Macadamia Nut Ice Cream 5, cropped & edited

Drain guava halves of all their syrup. Using a food processor or stick blender, process the guavas until you have a smooth puree, then strain to remove the seeds (you could probably do this in a food mill if you prefer). Add the cassis, stir well, then cover and refrigerate for several hours, ideally overnight.

Pink Guava, White Chocolate & Macadamia Nut Ice Cream 3, edited

Next, strain the cream into a 2 litre bowl, and then stand that bowl in an ice bath.

Lightly whisk the egg yolks in a separate bowl and set aside.

Combine milk, salt and sugar in a small saucepan and gently heat. Then slowly pour about half of the warmed milk into the egg yolks, stirring constantly to ensure the eggs don't curdle.

Return the warmed egg yolks and milk to the saucepan.  Then cook over a low heat, stirring constantly, until the custard is thick enough to coat the back of a spoon or spatula.

Strain the custard into the cream, which is standing over its water bath, and keep stirring until the custard is completely cool.  Stir in the vanilla extract.

Cover with cling film, pressing it right down onto the surface of the custard, and then refrigerate for several hours, ideally overnight.

Pink Guava, White Chocolate & Macadamia Nut Ice Cream 2, edited

Mix the custard and the guava puree together, and then churn in your ice cream maker according to the manufacturer's instructions.

Pink Guava, White Chocolate & Macadamia Nut Ice Cream 1, edited

Remove churned ice cream to a cold bowl.  Stir through the chopped up chocolate.

Serve immediately, or freeze in a suitable container until ice cream has firmed to your desired consistency.

For ice cream inspiration and perfection, I recommend:

The Perfect Scoop: Ice Creams, Sorbets, Granitas, and Sweet Accompaniments


I'm submitting this post to the Two for Tuesdays blog hop.