Showing posts with label lime. Show all posts

Sunday, May 8, 2016

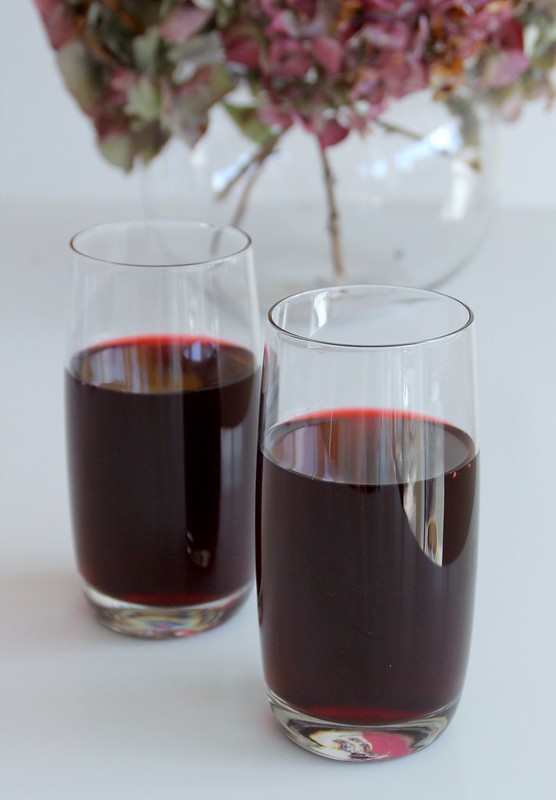
Strawberry Hibiscus Punch

Strawberry Hibiscus Punch 2

This week at I Heart Cooking Clubs, we're wetting our whistles, exploring Curtis Stone's repertoire of drinks and beverages.

Checking out the drinks section of Curtis' book Good Food, Good Life, I was actually immediately drawn to his Italian Rhubarb-Orange Soda - how good does that sound?!  Unfortunately, though I couldn't get my hands on any rhubarb.

I did however have everything I needed for the Strawberry-Hibiscus Punch.  Hibiscus flower is one of my favourite ingredients - I love the fresh, slightly astringent flavour it brings, and the colour it adds is gorgeous.

I made a couple of changes to the recipe.   Firstly, I halved the recipe, since a didn't need the slake the thirst of a whole party;  I further reduced the amount of sweetener by half, and replaced caster sugar with agave.  I also added a tiny pinch of salt - not enough to actually make it taste salty, but just enough to bring out all the flavours of the hibiscus and fruit.  Lastly I added the juice of a lime, which did a great job of balancing out the sweetness, and really brought that nice tropical vibe.

This is beautiful, refreshing drink, and for a special occasion (or really even just for the heck of it) you could mix this with prosecco for a bit of sparkle.  It would also mix well with soda water, coconut water, or even a bit of sake.

Strawberry Hibiscus Punch Recipe
Adapted from a recipe by Curtis Stone
from Good Food, Good Life
Click here for a printable copy of this recipe

2 cups water
1/4 cup agave
1/2 cup dried hibiscus flowers
1 cup strawberries
2.5cm (1 inch) piece ginger, thinly sliced
pinch salt

to serve
juice of 1x lime
2 cups water extra (or soda or prosecco)
extra strawberries

Put water and agave in a small saucepan and set over medium heat.  Stir until liquid just comes to a boil and the agave has fully dissolved.

Remove from heat, and add the hibiscus flowers, strawberries, ginger and salt.  Leave standing to infuse for about 2 hours.

Strain into a jug, and discard the solids.  Add extra water (or soda or prosecco) and lime juice.  Stir to mix thoroughly.

Serve over ice and garnish with extra strawberries.

If you would like to get to know Curtis Stone a little better, and would like to wet your whistle with all the fabulous beverages my friends have come up with this week, then do go visit I Heart Cooking Clubs and check out the links. 


I promised last week also to tell you a bit more about the training course which I've just done through the Matthew Kenney Culinary Academy - you can now find that post here.  I hope you find it inspiring.


Sunday, May 1, 2016

Quick Curry Noodle Soup

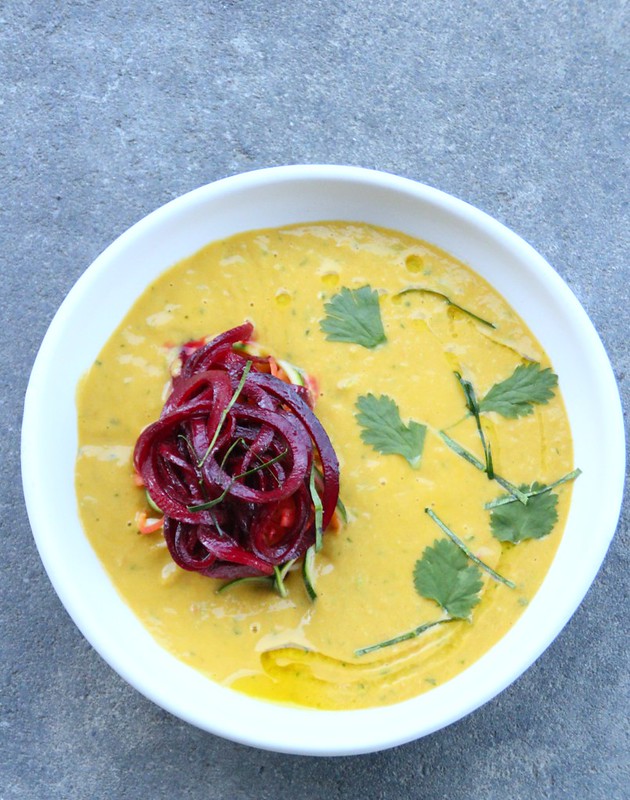
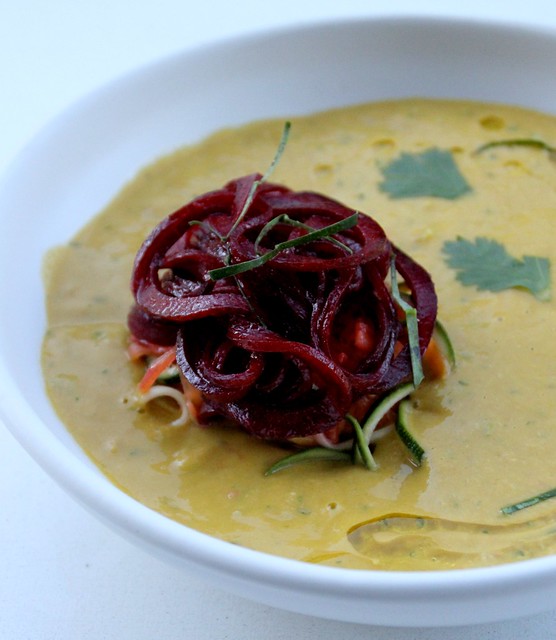
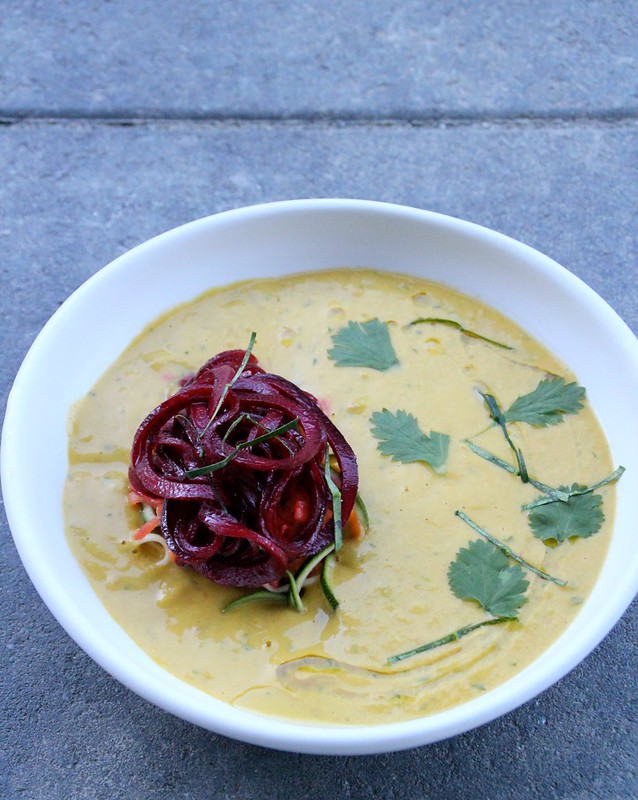
Quick Curry Noodle Soup 1

Regular visitors here will know that I like to cook along with my friends at I Heart Cooking Clubs, where each six months we choose a new chef and take an in-depth exploration of their recipes and cooking techniques.  What you won't know, because I'm shamefully guilty of not having posted for the last month, is that we have now moved onto our 14th IHCC chef - Curtis Stone.  Curtis is of Australian origin, pursued a cooking career in London (including working under Marco Pierre White, and, in addition to a number of popular television shows, he now has a well-known restaurant of his own in Beverley Hills, California.

This week at IHCC is actually Potluck Week, which means we actually get to choose any recipe we like from any one of the 14 chefs in the IHCC stable.  However, since I've yet to join in with cooking any of Curtis' dishes, it seemed only fair that I should dip into one of his many culinary tomes.

It was the Quick Curry Noodle Soup from Curtis' book Good Food, Good Life which provided my initial inspiration. Curtis' soup incorporates beautiful prawns and fresh fish in a rich coconut broth with lots of Thai flavours of lemongrass, ginger, coriander, and kaffir lime - delicious!!

However, as I've just spent the last month doing a Raw Food Chef's training course through the Matthew Kenney Culinary Academy (which I can honestly say has been truly amazing, and you can visit this post to find out about my experience and see what we made), I was inspired to see if I could make a raw version of this dish.  Further inspiration also came from a Bahian style soup which we made on the course.

Quick Curry Noodle Soup 3

I went about making my version of this soup by substituting the seafood for vegetable "noodles" - carrots, zucchini and beetroot - and whizzing up my coconut milk and loads of zingy flavourings in the blender instead of in a pot. Obviously, because this is a raw version, it's not a hot soup, but there's actually plenty of heat comes through from the chilli, so it was still plenty comforting even on an autumn evening.  The wild card I guess in my version was the beetroot - not something that you would generally expect to find with these bold Asian flavours, but the sweet yet earthy flavour of the beets actually worked surprisingly well, and there's no doubt that they certainly add some visual impact to the dish.  I would have no hesitation including them again.

You might not have thought about raw food before, but I urge you to try this dish - it just might surprise you.

Quick Curry Noodle Soup 2

Quick Curry Noodle Soup Recipe
Inspired by Curtis Stone & Matthew Kenney
Click here for a printable copy of this recipe

coconut milk
1 cup dessicated coconut
2 cups water

vegetables
1/2 medium carrot
1x small zucchini
1/2 medium beetroot
sea salt
2 teaspoons lemon juice

soup
1-1/2 cups coconut milk
1/3 cup carrot juice
5cm (2 in) piece spring onion, white part only, roughly chopped
2 tablespoons fresh coriander, leaves and stems, chopped
1 tablespoon freshly grated ginger
1x small clove garlic, minced
1/2 medium red chilli, remove seeds if you prefer less heat
1x lime, grated zest and juice
1/2 teaspoon salt
1x avocado
1x large tomato, seeds removed and diced

to serve
coriander leaves
kaffir lime leaf, finely shredded
lime cheek

Begin by making the coconut milk - pour the water over the dessicated coconut and leave to stand for at least 10 minutes.  (Go have a cup of coffee, put your feet up, have a snooze - nobody dies!!)  After a suitable rest period, add the coconut and water to a blender, blend thoroughly (really thoroughly), and strain.

Next prepare the vegetables.  You can run the vegetables through a spiraliser to create your noodles, or if you don't have a spiraliser, a vegetable peeler that creates fine juliennes or ribbons will do just fine.  Place the carrot and zucchini noodles in a bowl, sprinkle with a pinch of sea salt and a teaspoon lemon juice, toss well and set aside to soften slightly while you prepare the broth.  Do the same thing with the beetroot noodles, keeping them in a separate bowl from the other vegetables so that the beetroot doesn't turn everything pink.

Now, onto the broth.  Put all of the soup ingredients, except the avocado and tomato into a tall jug or deep bowl. Using an immersion blender, blend everything until smooth.  Add the avocado and blend again, at which point the broth will thicken up.  Lastly, add the tomatoes and blend until smooth.

To serve, arrange a pile of the vegetable noodles in a bowl, and pour the broth around the noodles. Garnish with a few coriander leaves and finely shredded kaffir lime leaf.  Serving a lime cheek on the side would also be a nice addition.

If you would like to get to know Curtis Stone a little better, and to see all the wonderful Potluck dishes my friends have come up with, then do go visit I Heart Cooking Clubs and check out the links. 


I'll also be sharing this post this week at Souper (Soup, Salad & Sammies) Sundays hosted by my lovely friend Deb at Kahakai Kitchen.

Souper Sundays Badge


Sunday, October 26, 2014

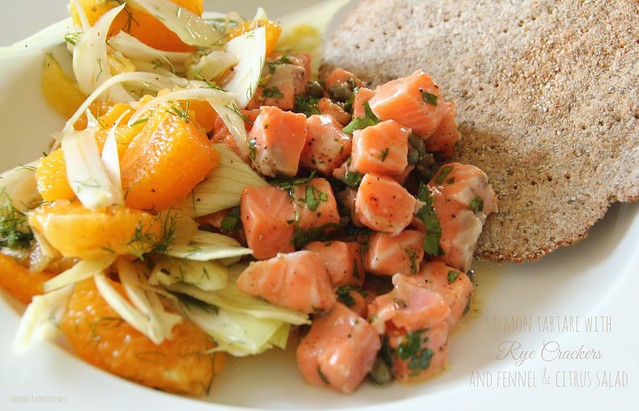
Salmon Tartare with Rye Crackers and Fennel & Citrus Salad

Salmon Tartare & Fennel & Citrus Salad 1

I don't know how things are in your household, but in mine we live on a pretty tight budget.  When you have a passion for food and "luxury" ingredients, that can be a bit challenging at times.  It doesn't mean, I believe, that you need to go without, you just need to be a bit creative about the ways in which you use those things.  In many ways this goes right to the heart of my whole philosophy about food.

Case in point ... chicken.  We only eat free range, organic chicken in our house - not just for ethical reasons, but because it also tastes a whole lot better than your average battery farmed chicken.  A free range chook will however set you back about twice as much as a cage raised bird.  With a little planning, however, we can usually manage to get three to four meals out of a chicken, and a batch of soup out of the carcass, which works out pretty budget friendly in the end.

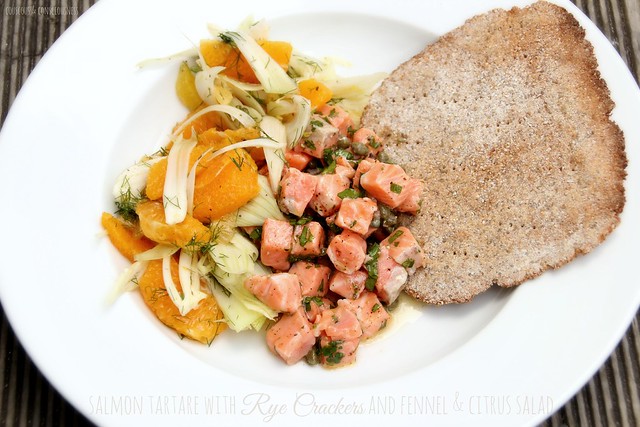
This salmon tartare is another great way of making a luxury ingredient go a long way.  A small salmon fillet, which would normally be a single serving as a main meal, becomes a sumptuous lunch for two, or even an appetiser for four.

It's Pot Luck week at I Heart Cooking Clubs, and we have the choice too cook with any one of our eleven IHCC chefs.  However, I'm still in the honeymoon phase of my relationship with our latest chef, Diana Henry, so I turned to Diana's book A Change of Appetite, where her Scandinavian inspired dish of Salmon Tartare with Pickled Cucumbers and Rye Crackers really caught my attention.

Salmon tartare is one of my favourite dishes, and I didn't make a great deal of changes to the recipe other than adding a slosh of vodka to the marinating salmon, because ... well ... just because, and leaving out the shallots as I didn't want anything to overwhelm the delicate flavour of the salmon.  A few snipped chives, had I had them, might have been nice.  In addition to the rye crackers, Diana serves this salmon tartare with a sweet and sour, pickled cucumber salad and dilled yoghurt.  I chose to make a refreshing fennel and citrus salad instead.

As far as the rye crackers go, I didn't make any changes to the recipe whatsoever, so I'm not going to reproduce the recipe in detail here for you - you'll just have to go get the book, and trust me when I tell you it is totally worth it.

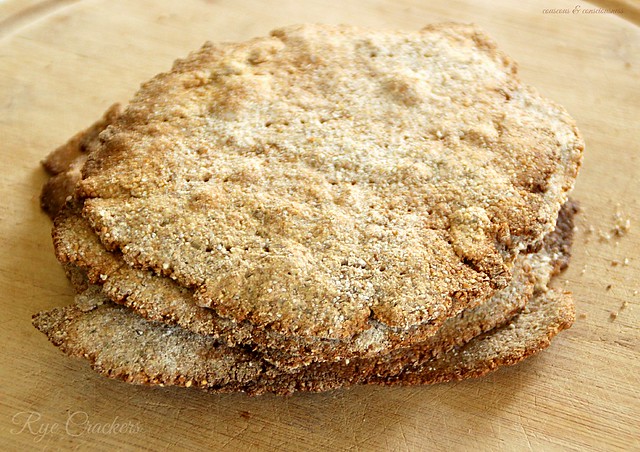
These crackers are so easy to make, and so delicious, you will wonder why you've ever bought crackers in your life.  Not only that, whipping up a batch of these will run out to a fraction of the cost of buying crackers.

Rye flour, along with a little salt, sugar and baking powder are mixed with a little chilled butter until the mixture resembles damp sand, then mixed with milk to form a soft dough - using the food processor makes fast and easy work of this.

Break off golf ball sized chunks, roll in a light dusting of extra rye flour, and then roll out as thin as you possibly can into something vaguely resembling a circle.

Rye Crackers 1

Place crackers on a large baking sheet lined with baking parchment, prick all over with a fork, and bake in a hot oven for up to 10 minutes, until crisp and golden.  Cool on a wire rack.

Rye Crackers 2

These crackers are a wonderful accompaniment to the salmon, in both flavour and texture, and I think next time a little sprinkling of fennel seeds and sea salt over the crackers before baking might be a nice touch to echo the flavours in the salad.  These crackers also make a great vehicle for a variety of cheeses and chutneys.  A batch of these in your store cupboard won't last long I can promise you.

What tips do you have for stretching the budget to accommodate luxury ingredients?

Salmon Tartare & Fennel & Citrus Salad 2

Salmon Tartare Recipe
Adapted from recipe by Diana Henry
from A Change of Appetite
Click here for the free recipe card

250g (8 oz) salmon, skin and bones removed
1 tablespoon capers, drained and rinsed
juice of 1x lemon
2 tablespoons extra virgin olive oil
1 tablespoon vodka
freshly ground black pepper
generous handful of flat leaf parsley, finely chopped

Cut salmon into tiny dice, about .5cm (1/4 inch) in size, and place in a small bowl with the remaining ingredients.  Mix together gently, and chill while you make the crackers and salad, or for up to two hours.  Before serving, taste and adjust any of the seasonings according to your palate.

Fennel & Citrus Salad Recipe

1x orange, peel and all white pith removed
1x grapefruit, peel and all white pith removed
(if you can get pink grapefruit so much the better)
1x lemon, peel and all white pith removed
1x lime, peel and all white pith removed
1x fennel bulb
generous handful of fennel fronds, finely chopped
extra virgin olive oil
flaky sea salt & freshly ground black pepper

Place a sieve over a medium sized bowl.  Hold the peeled orange over the sieve to catch any pips and, using a sharp knife, cut down between the membrane and segment of fruit on each side to separate the fruit entirely from the membrane, and let the fruit segments fall into the bowl.  Squeeze the membrane over the bowl, extracting as much juice from it as you can.  Repeat with the grapefruit, the lemon and the lime, in each case also squeezing all of the juice out of the membrane.

Remove the tough outer "leaves" from the fennel bulb.  Cut it into quarters lengthwise and slice the fennel as thinly as you possibly can - a mandoline is the ideal tool for this job if you have one.

Add the shaved fennel to the citrus segments, along with the fennel fronds.  Season generously with flaky sea salt, freshly ground pepper and a good drizzle of extra virgin olive oil.

Chill until you are ready to serve.

If you would like to get to know Diana Henry a little better, and to see what everyone else has cooked up this week, then do go and visit my friends at I Heart Cooking Clubs and check out the links (who knows, you might even want to join the journey and cook along with us) ...

Diana Henry badge 1A

... or check out A Change of Appetite and Diana's many other great titles available from Amazon USA, Amazon UK, or Fishpond NZ.


Sunday, August 17, 2014

Pina Colada Ice Cream

Pina Colada Ice  Cream 2

I don't wish to whine, but it's not been the best of times around here the last couple of weeks.  Long story short, and I'm sure I've mentioned this here before, our house got flooded in a big storm a couple of months ago.  I arrived home from work to find the dining room and kitchen floors resembling a lake and, as water is wont to work its way downwards, the water had filled up the ceilings and floor of the two bedrooms below.  Not a pretty sight.  Anyway, after several weeks of not much happening, the insurance company finally realised that the problem was way more serious than they had originally anticipated, launched themselves into "emergency action" as a result, and sent in a team of people to start ripping the house apart.  Walls and ceilings have been removed downstairs, and big machines brought in to try and dry the place out.  The kitchen and dining room ceiling will have to be removed, likewise the floor, and there is even talk of the possibility of the whole kitchen having to be pulled out.  Needless to say, there is plenty of chaos around here and not too much cooking going on, so please bear with me if I'm not posting as regularly here as I'd like to over the next couple of months.

Still, life isn't all grim ... the magnolias and daffodils are out, and the tui which always comes to our garden at the start of spring, and enchants us throughout the summer, has arrived.  A wonderful reminder that spring is officially only 14 days away.  For those of you who don't know, the tui is a native New Zealand bird, notable for its vibrant green plumage and the two white feathers at its throat.  As a child I was always delighted by this Maori legend as to how the kiwi became a flightless bird and the tui got its white feathers.

Tui Collage

The other great thing about this time of year is the abundance of citrus fruit in season.  I always have huge bowls of lemons, oranges and mandarins on my kitchen bench right now, and it's the time when I launch into production of preserved lemons and lemon curd.  Marmalade making is just around the corner.

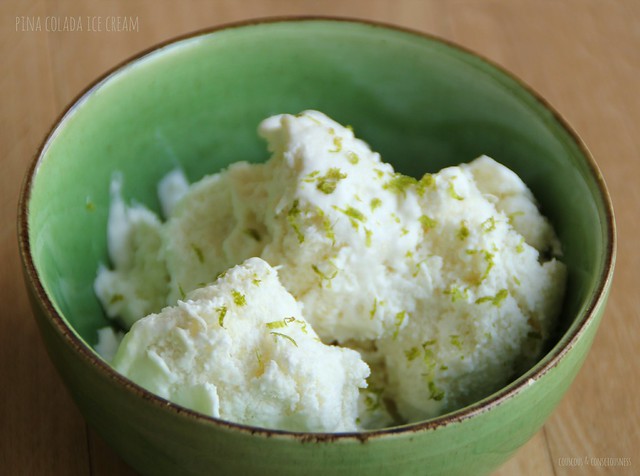
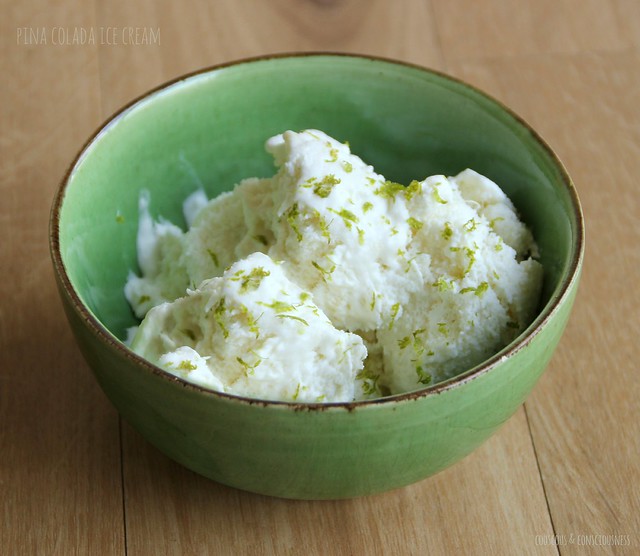
The fact, therefore, that this week we are Zesting It Up with Nigel Slater at I Heart Cooking Clubs, really brightened my week, and with days warming up a little it definitely seemed like ice cream was the way to go.  Though, in truth, I eat ice cream all year round - no excuse of warmer days ahead needed.   Trawling around on the internet I came across Nigel's Lime Mascarpone Sorbet.  I really liked the sound of that, and in fact I had a couple of limes in the house.  I didn't, however, have any mascarpone, wasn't feeling inclined to head to the supermarket to buy some, and easy enough though it is to make time wasn't on my side.  Poking around in the pantry, I came across a tin of coconut milk and figured I could do something with that.  I also stumbled across a tin of pineapple chunks that had been sitting in the pantry for goodness knows how long, and for the life of me I can't imagine how I ever came to be in possession of a tin of pineapple in the first place.  Then I remembered half a tin of condensed milk that had been sitting in the fridge for probably at least as long as the pineapple had been around, and thus this ice cream was born.  It's a simple as blitzing up the coconut milk, pineapple chunks, condensed milk, and lime zest in a blender, and then churning in an ice cream maker.

The resulting ice cream is light and refreshing, and a beautiful combination of flavours.  This is definitely one I will be repeating a lot this summer.  Thanks for the inspiration, Nigel.

Pina Colada Ice Cream

Pina Colada Ice Cream Recipe
Click here for a printable copy of this recipe

1x 400ml (13.5 fl oz) can Trade Aid coconut milk
1x 450g (16 oz) can pineapple chunks in natural juice
1/2 can condensed milk
grated zest of 1x lime

Place all ingredients in blender, and blitz until the pineapple is completely crushed and everything is well combined.

Pour everything into an ice cream maker and churn according to manufacturer's instructions.

Turn ice cream into freezer proof container, and place a piece of baking paper directly over the surface of the ice cream (helps to stop it turning icy).

Remove from freezer 10 to 15 minutes before serving to soften slightly.

If you would like to get to know Nigel Slater a little better, and to see what everyone else has cooked up this week, then do go and visit my friends at I Heart Cooking Clubs and check out the links ...


I will also be submitting this post to Sweet New Zealand.  Inspired by Alessandra Zecchini, and hosted this month by Michelle at Munch Cooking, Sweet New Zealand is an event for all Kiwi bloggers (whether living at home or abroad), or all foreign bloggers living in New Zealand, to link up their sweet treats.

Sweet New Zealand Badge A

I'll also be sharing this post this week at See Ya In the Gumbo hosted by the delightful Michelle at Ms. enPlace, at Weekend Cooking hosted by Beth Fish Reads, and at Foodie Fridays hosted by Designs by Gollum.

See Ya in The Gumbo Badge     Weekend Cooking Badge     Foodie Friday Badge

Saturday, June 15, 2013

Sweet Potato Galettes

Sweet Potato Galettes 3

This has been a week of surprises.

First of all I discovered how incredibly easy it is to make your own sour cream.  Simply add the juice of one lemon to one cup of cream.  Stir and you will feel it begin to thicken slightly almost immediately.  Leave out on your kitchen bench for three or four hours, giving it a bit of a stir from time to time.  It will become noticeably thicker during that time.  Now line a sieve with a clean piece of muslin.  Pour the cream into the cloth-lined sieve and set over a small bowl.  Put into the fridge overnight.  The next morning you will be rewarded with beautiful thick, tangy sour cream.

Speaking of rewards, my second surprise this week came in the form of a rolling pin.  Ever since losing my rolling pin in the Christchurch earthquake, I've been making doing with a wine bottle.  Now a wine bottle does a passable job, but it does have its limitations.  For example, you can't use a wine bottle as a substitute meat tenderiser to bash the bejeezus out of a chicken breast, or to smash up a bag of cookies for a cheesecake base.  I am a huge fan of Joseph Joseph kitchen gadgets - I love the range of gorgeously stylish products, that work every bit as well as they look.  I'm so enamoured of the "form meets functionality" of their products, that I have several items in my kitchen cupboards, and have for ages been coveting the adjustable rolling pin.  So it was a wonderful surprise when I was gifted this rolling pin as a reward for my efforts at work.  (For the record, although we sell these products in my workplace, no-one is paying me to tell you this - I'm sharing this with you solely because I absolutely love these products).  Oh, and by the way, for the benefit of my New Zealand readers, you can buy Joseph Joseph products at Stevens Homewares.

Rolling Pin Collage

You'd think that two surprises in one week would be enough.  But no, surprise number three came in the form of these Sweet Potato Galettes from, you guessed it Yotam Ottolenghi.  Of course I should not have been surprised - I know well enough by now, and you will too if you've been visiting here for a while, that Ottolenghi is capable of taking a few seemingly unsurprising ingredients and turning them into a flavour and texture explosion which is so much greater than you might expect.

Sweet Potato Galettes 2

At I Heart Cooking Clubs this week we're sharing A Little Bit of Sunshine with Ottolenghi dishes in sunny hues of orange and yellow.  These gorgeous galettes seemed to fit the bill perfectly.

As usual, I've added a little bit of a personal twist to the recipe.  Flaky puff pastry is smeared with sour cream, which was homemade.  Also, remembering how well the hit of lime worked with sweet potatoes in this recipe, I couldn't resist adding some freshly grated lime zest.  I also subbed in some blue cheese instead of goat's cheese, and replaced pumpkin seeds with walnuts.

The end result is a sensation - full-on flavour, and fantastic contrasting textures.  Crisp, flaky, buttery pastry, smothered in tangy sour cream, given a bit of extra zip with a hit of lime;  softness and sweetness of the potatoes meets creamy, salty blue cheese, and crunchy walnuts;  all topped off with a bit of heat from chilli and garlic and a touch of freshness in the parsley.  Now, who wouldn't find that surprising?

Sweet Potato Galettes Recipe
Adapted from a recipe by Yotam Ottolenghi & Sami Tamimi
Makes 4
Vegetarian
Click here for a printable copy of this recipe

2x medium sweet potatoes
250g puff pastry (I used store bought)
1x free-range egg, lightly beaten
sour cream
grated zest of 1x lime
blue cheese, crumbled
walnuts, coarsely chopped
1x red chilli, finely chopped (remove seeds if desired)
1 tablespoon olive oil
1x clove garlic, finely chopped
handful freshly chopped flat-leaf parsley
flaky sea salt & freshly ground black pepper

Preheat oven to 200 degrees C (400 degrees F).

Bake potatoes in their jackets until they soften, but are still firm in the centre - about 35 minutes.

Meanwhile, roll pastry out on a lightly floured surface to about 2mm (1/16 inch) thick.  Cut into four rectangles, approximately 7cm x 14 cm (3 in x 6 in), and prick them all over with a fork.  Place the pastry rectangles on a parchment-lined baking sheet, and rest in the fridge for about half an hour.

Once sweet potatoes are cool enough to handle, remove skins and cut into 3mm (1/8 in) thick slices.

Remove pastry from the fridge, and brush lightly with the beaten egg.  Place a spoonful of sour cream on each piece of pastry, and spread leaving a small border on all edges.  Sprinkle a little grated lime zest over each one.  Arrange sweet potato slices over the top, keeping the border clear.  Season with flaky sea salt and freshly ground black pepper.  Sprinkle a little blue cheese, walnuts and chilli over the top of each one.

Sweet Potato Galettes 1

Bake in the oven until the pastry is golden and cooked through - about 20 to 25 minutes.

Meanwhile, mix together olive oil, parsley and garlic, and brush pastries with the mixture as soon as they come out of the oven.

Sweet Potato Galettes 4

Serve warm or at room temperature.

Two of these per person, accompanied by a simple salad, make a delicious light meal, or serve one per person as an appetiser.  And if you're lucky enough to be enjoying some real sunshine and summer weather where you live, these would make sensational picnic food.

If you would like to get to know Yotam Ottolenghi a little better, then do go and visit my friends at I Heart Cooking Clubs and see what they've all cooked up ...

IHCC Ottolenghi Leek Badge resized

... or check out Ottolenghi: The Cookbook and Ottolenghi's other great titles available from Amazon USA, Amazon UK or Fishpond NZ.

          Ottolenghi: The Cookbook

I will also be sharing this post at See Ya In the Gumbo hosted by the delightful Michelle at Ms. enPlace.

See Ya in The Gumbo Badge


Sunday, August 12, 2012

Tangy Peanut-Avocado Salsa

Tangy Avocado Salsa 2

So, if you've been reading here the last couple of weeks you'll know that I, and my friends at I Heart Cooking Clubs, have been getting to know Rick Bayless.  Despite my initial reticence, after a couple of dishes, I've warmed to him slightly, so with our theme this week being "Feel the Heat!" I was wondering just how warm things were going to get.  We were challenged to break out the chillies and dial up the heat.

Quite a challenge indeed, as I do have chilli issues - not that I have a problem with chillies, it's just that getting anything that packs a bit of a punch here is not so easy.  I wasn't sure what I was going to make, but I was pretty sure it wasn't going to be a big pot full of chilli.  Funny thing, but I'm pretty sure that if someone made chilli for me I would love it and scoff down every single mouthful, probably even go back for more, but it's not something I've ever felt inspired to make myself - and still don't - but never say never, maybe that will change before we're done with Rick.

Anyway, trawling through his website for some inspiration, I came across his recipe for a Tangy Peanut-Avocado Salsa and, incredibly, I actually had all the necessary ingredients on hand.  Well ... actually ... not exactly.  The recipe did call for a couple of serrano chillies, which are not available here, so I used one of the long skinny ones I showed you in this post last week (seeds and all), and the little round one from the same post, which turned out to be quite hot, without the seeds.

Now, looking at the photos, you probably don't need me to tell you that in the looks department this is probably the least appealing thing I've ever posted.  Still this "salsa" which is really more like a sauce or dip, certainly makes up for its unfortunate looks in taste, and packs quite a punch.  Just how much punch will of course depend entirely on the chillies you use.

I had a friend for dinner last night and served this salsa with a simple piece of pan roasted salmon, and a fresh green salad with fennel and avocado.  The salsa was perfect to cut through the richness of the salmon, and at the same time the fats in the salmon seemed to balance out the heat of the salsa.

This is a great quick accompaniment to make to go with almost anything, and chances are you'll almost always have all the ingredients on hand, ready to quickly liven up a piece of fish or even (as I discovered tonight) roasted vegetables.

Tangy Avocado Salsa 1

Tangy Peanut-Avocado Salsa Recipe
Adapted (hardly at all) from this recipe by Rick Bayless
Vegetarian
Click here for a printable copy of this recipe

2 tablespoons roasted, unsalted peanuts
2 chillies, stemmed (deseeding, optional), roughly chopped
large handful fresh coriander (cilantro), roughly chopped
1/2 cup water
1 tablespoon fresh lemon juice
1 tablespoon fresh lime juice
1 ripe avocado
flaky sea salt

 Put the peanuts, chillies, coriander, water, and lemon and lime juices into your blender, and blitz until smooth.

Remove the pit and skin from the avocado, and discard.  Roughly chop the flesh and add to the blender  Pulse until well blended.

Add salt to taste, and add extra water if necessary.

Tangy Avocado Salsa 3

If you would like to get to know Rick a little better, then do go and visit my friends at I Heart Cooking Clubs and see what they've all cooked up ...

Rick Bayless @IHCC button rounded

Friday, August 3, 2012

Chilli Lime Mussels & Broad Bean Salad with Green Olive Dressing

Chilli Lime Mussels with Green Olive & Broad Bean Salad 1

You could be forgiven for thinking that sounds like a rather unusual combination of ingredients.  Indeed I though the same thing myself when I first came across the recipe which inspired this post.

After my debut foray last week into trying out the recipes of Rick Bayless with the I Heart Cooking Clubs group, I was eager to give him another try and see if we could get a little better acquainted.

Our theme this week is "Green, Green, Green Is Everything I'm Wearing", and whilst most of my fellow bloggers in the group might have access right now to lots of lovely, exotic green things like tomatillos, jalapenos and cactus paddles, such is not the case here.

What to make?  I spent a few hours trawling through Rick's website looking for something suitable, but almost every recipe I looked at required some ingredient I couldn't access.  Now ordinarily that might not be such a big deal - after all, I can surely come up with a few substitutes - but, as it turned out, the thing that usually needed to be subbed out was the green thing.  And seriously, you can't front up to the green themed party without the green thing, now can you.

And then, just as I was about to give up all hope, I went to the section on Rick's Season 8 recipes and his recipe for Green Olive Dressed Salad with Mussels & Fava Beans simply jumped out at me.  After all, green olives I can do (I have jars full of them in my pantry);  salad is one of my preferred meal options any time of year;  broad beans (that's fava beans to many of you) - out of season here right now, but I have frozen ones on hand and they will do perfectly well;  and as for mussels - not only are these plentiful and inexpensive here, but we have New Zealand green-lipped mussels - now, take that for green!

Chilli Lime Mussels 1

The original recipe called for simply steaming the mussels, then chilling them, removing them from their shells, and serving them on the broad bean salad.  But I decided to go in a slightly different direction.  For starters, I'm not that fussed on cold mussels, and what's more I have been wanting to share my recipe for Chilli-Lime Mussels with you for ages.  So I decided to take Rick's green olive dressed broad bean salad (to which I also added some avocado) and to serve that as an accompaniment to the mussels.  I knew the two would work well together, and the chilli lime seasonings added to the mussels echo those in the salad.

I halved the quantities for the salad dressing, since I was only cooking for one, and still ended up with way more dressing than I needed.  Not that I'm sad about that - the dressing is fabulous and it will be finding it's way onto just about every meal for the next week!!  I also, as I did with last week's recipe, included some lemon juice in the dressing, rather than just the lime juice that was called for, because the limes here are expensive and just don't render that much juice.

Green Olive & Broad Bean Salad 1

A word about chillies.  The original recipe calls for poblano chillies, and no doubt where many of you live you may be able to buy chillies by variety.  Here in New Zealand, however, we don't get a great deal of choice - the chillies we usually see are generally long and skinny, they come in red or green, and occasionally orange, and are usually not very hot.

Chillies 1

On occasion we do seem to see other varieties of chillies, but they are not usually named, and available advice about them is generally very limited.  Case in point:  When I picked up my chillies for this dish at the supermarket yesterday, there were some I hadn't seen before in the chilli basket.  They were smallish, roundish and actually quite hard and fleshy.  They didn't have the kind of hollow, empty feel that a chilli usually has.

Chillies 2

Wanting a bit more information, I found some hapless staff member who was replenishing the banana area and asked him if they were chillies.  He confirmed that they were.  "What are they like?" I asked.  "Are they hot? Mild? Medium?"  He smiled sheepishly and said he didn't know.  "Well, is there someone here who does know?" I enquired.  The reply ... beat this ... "Nope.  Nobody knows.  Perhaps you can buy one and try it, then you can tell us."  I'm not kidding, that is exactly what he said.  A timely reminder, if one were ever needed, that if you really want to know what you're eating and where your food comes from, then the supermarket is probably not the place to find it.  So, if you can get poblano chillies then go for it - I used these long, skinny, red ones as that was what was available.  If you can identify them, I'd love to know what they are, and even more so, I'd love to know what that little, round one is.

Green Olive & Broad Bean Salad 3

Broad Bean Salad with Green Olive Dressing Recipe
Vegetarian
Serves 1 for a light meal or 2-3 as a side dish
Click here for a printable copy of this recipe

For the dressing:
1x chilli (poblano if you can get it)
2x cloves garlic, unpeeled
1/4 cup lime juice, freshly squeezed
1/4 cup lemon juice, freshly squeezed
1/2 cup extra virgin olive oil
1/2 cup pitted green olives, coarsely chopped
flaky sea salt

For the salad:
1x cup broad (fava) beans, frozen (by all means use fresh if you can get them)
1x avocado, flesh cut into chunks
2x large handfuls of salad greens
(I used a mixture of baby cos and spinach)

Begin by making the dressing.  Roast the chilli, either directly over a flame or under a hot grill, until blackened all over.  Remove from heat and drop into a plastic bag.  Close bag and set aside until the chilli is cool enough to handle.

Meanwhile, put the garlic cloves into a small, dry skillet set over medium heat, and roast until the cloves have softened, and blackened in a few places.  Remove and set aside to cool.

Put the lime juice, lemon juice and olive oil into a blender.  Add half of the green olives, setting aside the rest for garnishing the salad later.

Remove chilli from plastic bag and rub off the blackened skin.  Cut off the stem and cut the chilli in half lengthwise.  Scrape out the seeds and membrane.  Roughly chop one half of the chilli and add it to the ingredients in the blender.  Set the other half aside for garnishing the salad.

Slip the skins off the garlic cloves.  Add to the blender along with a generous pinch of sea salt, and blend everything until smooth.

For the salad, bring a small pot of water to the boil, salt the water and then add the broad beans to the pot.  Bring water back to the boil, allow to boil for 1 minute, then drain and immediately plunge beans into a bowl of ice water.  Once they are cool enough to handle, slip the thick greyish skins off the beans and discard.  Set the beans aside in a small bowl.

Put the salad leaves into another bowl and toss lightly with the dressing, then transfer to a serving bowl or platter.  Scatter the broad beans and chunks of avocado over the top.  Finely slice the remaining chilli and sprinkle over the salad, along with the remaining green olives.  Finish with another drizzle of the dressing and serve immediately.

Green Olive & Broad Bean Salad 2

Chilli-Lime Mussels Recipe
Makes one very generous serving or
Serves 2 as an appetiser
Click here for a printable copy of this recipe

18x green-lipped mussels, cleaned and de-bearded
2 tablespoons olive oil
2x cloves garlic, roughly chopped
2 tablespoons chilli jam
1x kaffir lime leaf or grated zest of 1x lime
1/2 cup white wine
fresh coriander leaves

First make sure that all your mussels are still "alive".  Before cooking, all of your mussels should be tightly shut.  If there are any that are open, give them a sharp tap on the side of the sink (or bowl) - if they're healthy they should close up.  If they stay open, discard them immediately.  Similarly, once cooked, if there are any mussels that remain closed, they too should be discarded.

Heat olive oil in a large pan (I use a large skillet which has a lid) over medium-high heat.  Add garlic, and as soon as it becomes fragrant add the chilli jam, lime leaf or zest, and white wine.  As soon as the wine begins to boil, add the mussels and cover.  Cook until the mussels have opened, shaking the pan from time to time - this will only take about 5 minutes.

As soon as the mussels have opened, remove to a serving bowl, pour over a few spoonfuls of the broth, and garnish with fresh coriander leaves.

Chilli Lime Mussels 2

If you would like to get to know Rick a little better, then do go and visit my friends at I Heart Cooking Clubs and see what they've all cooked up ...

Rick Bayless @IHCC button rounded

I'm also sharing this post this week with a couple of lovely friends ... Deb at Kahakai Kitchen, hosting Souper (Soup, Salad & Sammie) Sundays and Michelle at Ms. enPlace, hosting See Ya In the Gumbo.


Saturday, July 28, 2012

Nieve de Limon (Lemon-Lime Sorbet)

Lemon-Lime Sorbet 4

If you've been visiting here for a while, then you probably know that one of the places I like to play is at I Heart Cooking Clubs.  Twice a year a new chef is chosen, with whom we spend the next six months cooking according to a different weekly theme.  During that time we really do "get to know" the chosen chef pretty well, and amongst those who participate we get to know each other pretty well too.

The current chef the group is spending time with is Rick Bayless.  Rick is well known I'm sure to most of you in America, but here in New Zealand, not so much - unless you happen to be a Food TV addict, in which case you will no doubt have seen him at some stage.  I have to admit he's not my favourite Food TV personality.  I think this has much to do with the fact that he is a very "high energy" personality (if you didn't know better, you could be forgiven for thinking he's on speed - not that I wish to denigrate here) and, as his show usually seems to be on pretty late in the evening, if I watch it I seem to end up going off to bed in a highly agitated state - you know, like getting the kids over excited right before bedtime - not good!!  So I admit to frequently turning the tele off when Rick comes on.  Add to that the fact that he cooks Mexican food - not that I have anything against Mexican food - and uses a whole lot of ingredients that, not only have I never heard of, but which are largely inaccessible here in New Zealand.

So I confess to a distinct lack of enthusiasm when the group chose Rick Bayless as our featured chef.  I don't have any of his books in my collection.  I couldn't find any of his books at my local library either.  And what's more, the bright, freshness of many of his dishes seem to be very "summery" food - and again we're back to many ingredients which are inaccessible or unsuitable in the depths of the New Zealand winter.

All of which is a whole lot of excuses for not joining in with the group for the last four months.  And I could come up with more, but they are all just that - excuses.  Howewer, I've come to realise that participating in groups like this is important to me.  It is about building communities, and on reflection that means joining in and playing your part, even when it doesn't suit.  It is also about learning and broadening culinary horizons, and keeping an open mind - that's why we're spending six months with our chosen chef and not just one week.  Ok, so I may not be able to get all the ingredients called for in a particular recipe - but I can look for alternatives, and explore why these may or may not work, and in the same way that I can learn from what my fellow group members create, maybe they too can learn something from my challenges.

So all of that was a very long-winded way (is anyone out there still actually reading?) of saying, I've been missing my IHCC buddies, and there may only be a couple of months left to spend with Rick, but I'm giving him a try.

The theme this week is Nieves:  Icy Cold Treats to Cool Off With!  About this point some of you may be thinking, "this woman is a complete lunatic".  Not only have I not been playing for four months, but in the middle of winter I've chosen to jump back in the very week the group is getting into "icy cold treats".  Hell, I could just go and lick the frost off the bonnet of my car every morning if I want something icy cold.  As it happens though, and I've mentioned this here before, no matter whether it's summer or winter my favourite treat is always ice cream or sorbet, so this seemed like the perfect challenge for Rick and I to get acquainted.

Lemon-Lime Sorbet Collage 2

Without any of Rick's books to turn to, I checked out the recipes on his website.  There's plenty there to choose from and given that citrus fruit is plentiful and inexpensive here right now his Fresh Lime Ice with Berries seemed perfect - although in my case it is "sans berries" since, unlike the citrus fruit, berries are not available here right now unless they are either frozen or have travelled half way round the world to get here.  I also added some lemon juice into the mix as, even though seasonal, limes are still quite pricey here, and I don't know what limes are like in your part of the world, but here they are rather like bullets and not particular juicy.

Lemon-Lime Sorbet 1

My resulting lemon-lime sorbet, had the perfect balance of sweetness to citrusy tanginess and I will definitely be making this again.  If I were to make any changes, I would like to try this with a dash or two of bitters added - lemon, lime and bitters is one of my favourite drinks, and in sorbet form that would make me pretty happy.

Lemon-Lime Sorbet 3
Props courtesy of Stevens Homewares, Nelson (details below)

Nieve de Limon Recipe
(Lemon-Lime Sorbet)
Adapted from this recipe by Rick Bayless
Makes about 750 ml
Click here for a printable copy of this recipe

fresh limes and lemons
(I used 4 limes and 1-1/2 lemons)
1 cup sugar
1/3 cup corn syrup
(corn syrup helps prevent your sorbet turning hard and icy in the freezer)
1-1/4 cups water

Grate the zest of 2 limes into a medium bowl.  Juice lemons and limes until you have 3/4 cup of juice.  Add to the bowl with the zest.

Put the sugar, corn syrup and water into a small pot, and heat gently just until the sugar is dissolved.  Remove from the heat and add to juice and zest.

Cover and refrigerate several hours - overnight is best.

Next day remove from fridge and churn in an ice cream maker, according to manufacturer's instructions.

Freeze for a few hours to firm up before serving.

Rick suggests serving this with fresh berries (strawberries, blackberries, raspberries), and if they are seasonal for you right now I'm sure that would be a great addition.  A sprig or two of mint or basil would also be a nice touch, again if you have them in season right now.

Lemon-Lime Sorbet 2

So after my first experience with Rick, what do I think?  Well, if this sorbet is anything to go by, it seems that we could get along.  At least I'm convinced enough to see what we can make together next week - keep watching this space.

If you would like to get to know Rick a little better, then do go and visit my friends at I Heart Cooking Clubs and see what they've all cooked up ...

Rick Bayless @IHCC button rounded


Props courtesy of Stevens Homewares Ltd 
"chef'n" ice cream scoop

I'm also sharing this post at See Ya In the Gumbo hosted by my lovely friend, Michelle, at Ms. enPlace, at Foodie Friday hosted by Designs By Gollum, at Gallery of Favourites hosted by the lovely April, of The 21st Century Housewife.  This will also be a submission to Sweet New Zealand, inspired by Alessandra Zecchini and hosted this month by Kristina at Plum Kitchen.


    Sweet New Zealand Badge A