Showing posts with label New Zealand. Show all posts

Saturday, April 26, 2014

Mushroom, Basil & Lemon Salad

Mushroom, Basil & Lemon Salad  2.jpg

Who doesn't love a picnic?  Ok, so maybe just as there are a few Scrooges out there who don't love Christmas, I'm sure there are also a few ne'er sayers when it comes to picnicing, but for the most part a good picnic seems to be universally popular.  Whether you're six or sixty, whether you'd rather hike for several hours to some remote destination or simply throw a rug on the living room floor, there's something about the informality of a picnic which transports most of us to that "happy place".  Of course, like all good things, timing is everything.  Unless you're planning your feast on a rug in front of a blazing fire, winter time when the wind is howling and the snow is six inches deep is probably not ideal.  Likewise, I personally think that summer is not great for a picnic either - it can generally be too hot, all the ideal spots are usually completely overcrowded, and here in New Zealand at least you will spend the whole time fighting with the ants who want to eat your food and the sandflies who want to have a feast on you.  Spring and autumn though always seem to me like the perfect time to pack up the basket and head outdoors for a little alfresco dining.
Tulip Tree 2

In my part of the world, right now is absolutely perfect picnic time.  The weather is glorious.  It's still plenty warm enough to be outside in something sleeveless, but without the harsh intensity of summer's heat.  There's scarcely a breath of wind, and the light has that beautiful golden quality that is unique to autumn.  Doesn't hurt also that here in New Zealand we can experience breathtaking scenery at just about every turn - sounds braggy I know, but it's actually true.  I only have to look out my front windows for a vista which sweeps from the sea to The Grampians.  Everything is so lushly green, after last week's heavy rain, punctuated by a blaze of gold and russet as leaves turn and trees begin to shed their autumn cloaks.  If ever there was a siren call to the great outdoors, this is it, and so it couldn't be better timing that this week our I Heart Cooking Clubs' theme is "What's in your picnic basket?".

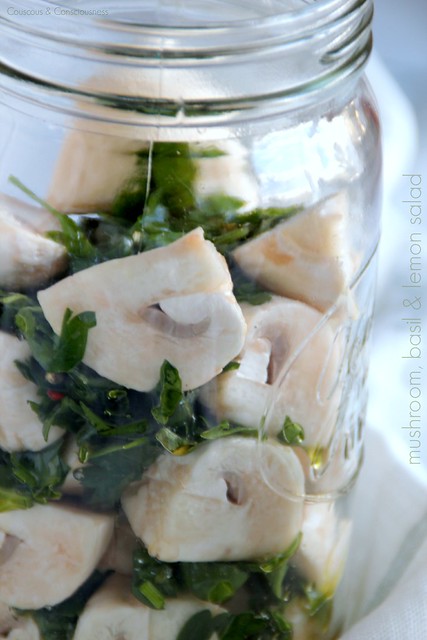
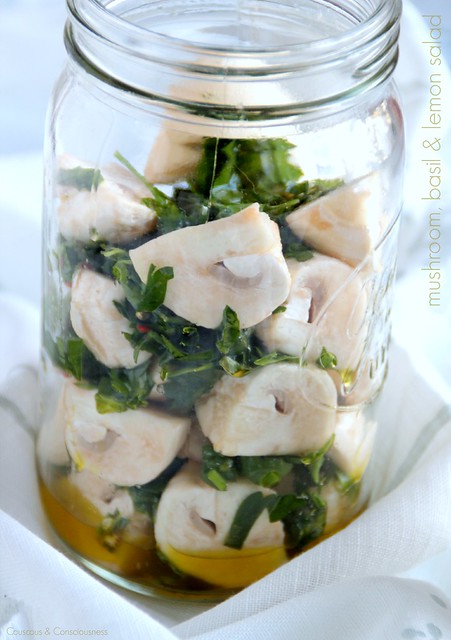
We continue to cook with Nigel Slater, and I found that he had loads of great dishes which were either suitable for, or easily adaptable to, picnic fare.  I happened to have a pile of mushrooms on hand, so when I stumbled upon his recipe for "Mushrooms with Basil and Lemon" in a Marie Claire cookbook written by Nigel I knew I'd found just the thing.  I love a raw mushroom salad - it's the kind of thing that doesn't need to be refrigerated, and only gets better the longer it sits around, which makes it positively ideal for taking to a picnic.  Layer it up in a big Agee jar, as I have done, and you have something which transports well and looks like you've done something really special.  If you want to be even more fancy schmancy, you could actually put this into several smaller jars for individual servings - just remember though that, whilst that might look cool, all that extra glass weighs something and, unless you have a party of Sherpas available to help out, you are probably going to be the one who has to carry it!
Mushroom, Basil & Lemon Salad 3.jpg

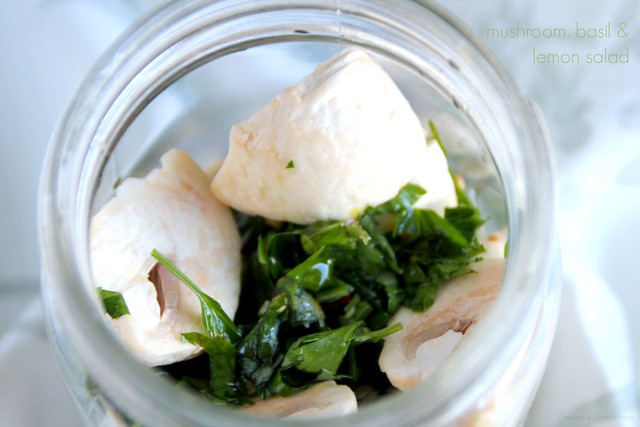
This salad gets plenty of flavour from loads of basil, parsley, and lemon, a nice bit of extra texture from crunchy coriander seeds, and a good kick of heat from some chilli.  I used a small, hot chilli with the seeds left in, but if you prefer just a whisper of heat choose a milder chilli and remove the seeds - it's totally up to you.  This would be a great salad alongside some cold chicken or smoked salmon, or something as simple as a crusty baguette to mop up all the salad juices.  It would also be great to take along to a barbeque - it won't mind sitting around, and would be delicious with grilled meats, vegetables or fish.
Mushroom, Basil & Lemon Salad 4.jpg

Mushroom, Basil & Lemon Salad Recipe
Adapted from recipe by Nigel Slater
from Marie Claire Cookbook
Serves 2-4 depending on what else you have to go with it
Click here for a printable copy of this recipe

250g (9 oz) mushrooms
1x lemon
2 tablespoons red wine vinegar
large handful of basil leaves
large handful of flat leaf parsley
1 teaspoon coriander seeds
1 red chilli, finely chopped
flaky sea salt & freshly ground black pepper
1/2 cup extra virgin olive oil

Grate the zest of the lemon into a small bowl and set aside.

Wipe the mushrooms clean with a barely damp paper towel (do not wash them) and cut into quarters, or wedges if they are large.  Place mushrooms in a medium sized bowl, add the red wine vinegar and juice of the lemon.  Mix gently together and leave aside for about an hour to marinate.

Roughly chop the herbs and add to the bowl containing the lemon zest, adding also the coriander seeds, chilli, salt, pepper and olive oil.  Mix together well.

Spoon alternating layers of mushrooms and herb mixture into a clean preserving jar, pour over any vinegar or oil remaining in your bowls, seal the jar and head for the great outdoors.

If you would like to get to know Nigel Slater a little better, and to see what everyone else has in their picnic basket this week, then do go and visit my friends at I Heart Cooking Clubs and check out the links ...


... or check out Marie Claire Cookbook by Nigel Slater and Nigel's many other great titles available from Amazon USA, Amazon UK, or Fishpond NZ.

I'll also be sharing this post this week at See Ya In the Gumbo hosted by the delightful Michelle at Ms. enPlace, at Souper (Soup, Salad & Sammies) Sundays hosted by my lovely friend Deb at Kahakai Kitchen, at Weekend Cooking hosted by Beth Fish Reads, at Foodie Fridays hosted by Designs by Gollum, and at Cook Your Books hosted by the lovely Joyce at Kitchen Flavours.

See Ya in The Gumbo Badge    Souper Sundays Badge    Weekend Cooking Badge    Foodie Friday Badge    Cook Your Books Badge

Lastly, I'm also sharing this post at a new to me event - Cooking with Herbs hosted by the very lovely Karen at Lavender and Lovage.  Thanks, Karen, for the invitation to participate.  Check out the links below to see all the other lovely "herby" dishes.

Cooking with Herbs Lavender and Lovage


Saturday, June 22, 2013

Celeriac, Lentil & Hazelnut Salad

Celeriac, Lentil & Hazelnut Salad 2

Yes, it's that week again.  It's Potluck week at I Heart Cooking Clubs, and that means that we get to choose any recipe we like from any one of the eight IHCC chefs.  That's a pretty impressive line-up which includes our current chef of course, Yotam Ottolenghi, who enjoys the venerable company of Nigella Lawson, Mark Bittman, Giada de Laurentiis, Jamie Oliver, Tessa Kiros, Rick Bayless and Madhur Jaffrey.


With so much wonderful food to choose from, Potluck week is the time I usually like to try my hand at something a bit special, but at the fag end of a tiring week, and feeling a bit under the weather, something simple, comforting and tasty was called for.

This Celeriac, Lentil & Hazelnut Salad, from Yotam Ottolenghi's book Plenty, was perfect.  It was suitably light when I wasn't feeling like anything too heavy.  Lentils always speak to me of comfort and nourishment.  And celeriac ... well, celeriac is one of my favourite winter vegetables, and is pricey enough in these parts to make me feel like I'm having something quite luxurious.  However, for all that it seems expensive, celeriac does go a long way.  I paid $6 for one medium sized celeriac - I used half of it in this salad, which lasted me two days;  I used quarter of it in a pot of soup which is bubbling away as I write, and which will deliver at least 6-8 servings;  and I still have quarter of it left to use in a Celeriac Remoulade later in the week.

I did, as I always seem to do, tinker with the recipe a little.  I used the brown lentils that I had on hand, instead of the Puy lentils Ottolenghi uses in the original recipe.   For a bit of extra colour and flavour, I also added in some of the roasted red peppers I preserved during the summer, and some of those quick pickled lemons I shared with you a couple of weeks ago (which I now can't help adding to just about everything I make).  I also used flat leaf parsley instead of mint, which I think would have been wonderful, but which is seldom available in the middle of the New Zealand winter.

Since I was going to be eating on my own, I halved the original recipe.  That made two large, main meal servings, which I accompanied one night with grilled sausages and then on the second night with pan-roasted salmon.  Delicious with both, and I think it tasted even better the second day.  This dish can easily be made well in advance, but do make sure to dress the lentils as soon as you take them off the heat and drain them so that they really soak up the flavour.

Celeriac, Lentil & Hazelnut Salad 1

Celeriac, Lentil & Hazelnut Salad Recipe
Adapted from a recipe by Yotam Ottolenghi
from Plenty
Vegetarian
Makes 2 generous servings
Click here for a printable copy of this recipe

1/2 cup green or brown lentils
1-1/2 cups water
generous bunch thyme sprigs
1/2 small celeriac, peeled and cut into 1cm (1/3 inch) batons
generous handful hazelnuts
2-3 tablespoons extra virgin olive oil
2 tablespoons red wine vinegar
1x roasted red pepper cut into strips
quick pickled lemons, roughly chopped (to taste)
flaky sea salt & freshly ground black pepper
generous handful flat-leaf parsley, roughly chopped

Put lentils, water and thyme into a smallish pot and bring to a boil.  Reduce the heat and simmer until the lentils are tender but not mushy - about 15 minutes.

Add the celeriac to another pot of boiling salted water, and cook until just tender - about 8 minutes.

Meanwhile, in a shallow pan over medium heat, toast the hazelnuts until golden.  As soon as they are toasted tip the hazelnuts out into a clean tea towel, and rub vigorously to remove the skins.

As soon as the lentils are cooked, drain, and put into a serving bowl.  Immediately, add the olive oil, red wine vinegar, and a liberal sprinkling of sea salt and freshly ground black pepper.

Drain the celeriac and add to the lentils, along with the roasted red peppers, quick pickled lemons, half the hazelnuts and half the parsley.  Toss well, taste and adjust seasonings to your liking.  Sprinkle the rest of the hazelnuts and parley over the top to serve, and finish with an extra drizzle of extra virgin olive oil.

This is delicious served warm or at room temperature.

If you would like to get to know Yotam Ottolenghi a little better, then do go and visit my friends at I Heart Cooking Clubs and see what they've all cooked up ...

IHCC Ottolenghi Leek Badge resized

... or check out Plenty and Ottolenghi's other great titles available from Amazon USA, Amazon UK or Fishpond NZ.

          Plenty: Vibrant Recipes from London's Ottolenghi


I'm also sharing this post this week at See Ya In the Gumbo hosted by the lovely, and often hilarious, Michelle at Ms. enPlace, at Souper (Soup, Salad & Sammies) Sundays hosted by my good friend Deb at Kahakai Kitchen, and at Cook Your Books, hosted by the lovely Joyce at Kitchen Flavours.


See Ya in The Gumbo Badge            Souper Sundays Badge            Cook Your Books Badge

Sunday, October 14, 2012

Spicy Vegetable "Samosas"

Spicy Vegetable Samosas 3

Our theme at I Heart Cooking Clubs this week, where we are cooking with the fabulous Madhur Jaffrey for the next six months, is "Spice Bazaar".  So many herbs and spices conjure up such wonderful memories for me.  I told you last week about my grandmother's spice cupboard - in a time when you typically would not have found much other than a bit of ground cinnamon and ground ginger in the cupboards of your typical Kiwi housewife, this was a pretty unique feature.  How I used to love the aromas of cumin, cardamom, turmeric and garam masala, smells which still transport me back to my childhood, though as a kid I never for a moment realised that wasn't the norm.  Not content with just her packets of ground spices, my grandmother also kept a small kitchen garden at the back door.  This wee garden always boasted several chilli plants, the ubiquitous clumps of parsley & mint, and lots of coriander plants.  Of course she would use this fresh, but she would also deliberately allow some of the plants to go to seed so that she would have a constant supply of coriander seeds.  Whilst such things might be common in many New Zealand gardens today, that was certainly not the case back then.

The other day I needed a bit of portable food to take to work for my dinner break.  With a bit of filo pastry in the fridge that needed to be used up, I thought some Spicy Vegetable Samosas would fit the bill perfectly.  Now do note that I am taking a bit of creative license here with the term samosa.  A true samosa normally uses quite a unique pastry which, after filling and folding, is then deep fried.  I'm still determined to give that a try, but on this occasion the filo was to hand, which made for a great substitute as well as saving on a bit of time.

The filling was delicious and "homely", and although I don't recall my grandmother ever making samosas, some similar kind of "savoury" - a flaky puff pastry case with a filling such as this - would have been far more likely to grace a plate for a gathering than the typical sausage roll.  Personally, I found these to be only very mildly spiced on the heat scale.  That said, the other mouth I feed declared them to be way too hot, so depending on your tastes you may want to cut back a bit on either the chilli or the cayenne pepper.

Spicy Vegetable Samosas Recipe
Adapted from a recipe by Madhur Jaffrey from
Makes 12
Vegetarian

12 sheets filo pastry
sunflower oil

4x medium sized potatoes (about 800g - 1-1/2 to 1-3/4 lb)
4 tablespoons sunflower oil
1/2 medium sized leek, thinly sliced
175g (6 oz) frozen peas, thawed
5cm (2 inch) piece fresh ginger, grated
1 small green chilli, deseeded & finely chopped
3 tablespoons finely chopped fresh coriander
3 tablespoons water
1 teaspoon salt
1 teaspoon ground coriander
1 teaspoon garam masala
1 teaspoon ground cumin
1/4 teaspoon cayenne pepper
juice of 1x lemon

Cut potatoes in half and boil in their skins until fork tender.  Drain and set aside to cool completely.  Once potatoes have cooled completely, remove skins and cut into small dice.  You want the cubes of potato to be roughly the size of the peas.

Heat the 4 tablespoons of oil in a large pan over medium heat.  Add the leeks and fry until softened, and just barely beginning to turn golden.  Add  peas, ginger, chilli, fresh coriander and water.  Stir for a few minutes until everything is well combined and peas are warm and tender.

Add potatoes, salt, ground coriander, garam masala, cumin, cayenne and lemon juice to the pan.  Stir to combine, and cook over gentle heat for a few minutes, stirring from time to time.  Taste and add a little more salt or lemon juice if necessary.

Remove from heat and allow to cool.

Pea & Potato Filling for Samosas

Lay sheets of filo pastry out on a clean tea towel on your kitchen bench.  You will be working with one sheet at a time and, as sheets can dry out and become brittle very quickly, you should keep the remaining sheets of filo covered with a damp tea towel while you work.

Place a single filo sheet on another clean tea towel in front of you, and begin to fill and fold your pastries, following the directions in the following photos:

Folding Samosas 1
Lay sheet of filo on tea towel with long edge towards you and brush lightly with with oil

Folding Samosas 2
Fold in one third from one of the short ends, and then brush the folded-in section with a little more oil

Folding Samosas 3
Fold in the remaining third and again brush with a little oil

Folding Samosas 4
Place filling in a roughly "triangular" shape on the bottom left corner of the filo

Folding Samosas 5
Fold the bottom right corner of the filo over the filling

Folding Samosas Collage
Now keep folding, end over end, until you get to the top.
Then fold the end over and brush with a little more oil to seal.

Once all the pastries have been folded, place them on a baking sheet, seam side down, brushing the top lightly with a little more oil.  Put into a warm oven, preheated to 175 degrees C (350 degrees F), and bake until golden brown and crispy - about 35 minutes.

Remove from oven.  Can be served hot straight from the oven, or these are just as good warm or at room temperature.

Spicy Vegetable Samosas 1

If you would like to get to know Madhur a little better, then do go and visit my friends at I Heart Cooking Clubs and see what they've all cooked up ...

IHCC

... or check out Madhur Jaffrey's Indian Cooking and many of Madhur's other great titles available from Amazon USA, Amazon UK or Fishpond NZ.

          Madhur Jaffrey's Indian Cookery

I am sharing this post this week with my friends Michelle at Ms. enPlace hosting See Ya In the Gumbo, and with April at The 21st Century Housewife hosting Gallery of Favourites.


Saturday, July 28, 2012

Nieve de Limon (Lemon-Lime Sorbet)

Lemon-Lime Sorbet 4

If you've been visiting here for a while, then you probably know that one of the places I like to play is at I Heart Cooking Clubs.  Twice a year a new chef is chosen, with whom we spend the next six months cooking according to a different weekly theme.  During that time we really do "get to know" the chosen chef pretty well, and amongst those who participate we get to know each other pretty well too.

The current chef the group is spending time with is Rick Bayless.  Rick is well known I'm sure to most of you in America, but here in New Zealand, not so much - unless you happen to be a Food TV addict, in which case you will no doubt have seen him at some stage.  I have to admit he's not my favourite Food TV personality.  I think this has much to do with the fact that he is a very "high energy" personality (if you didn't know better, you could be forgiven for thinking he's on speed - not that I wish to denigrate here) and, as his show usually seems to be on pretty late in the evening, if I watch it I seem to end up going off to bed in a highly agitated state - you know, like getting the kids over excited right before bedtime - not good!!  So I admit to frequently turning the tele off when Rick comes on.  Add to that the fact that he cooks Mexican food - not that I have anything against Mexican food - and uses a whole lot of ingredients that, not only have I never heard of, but which are largely inaccessible here in New Zealand.

So I confess to a distinct lack of enthusiasm when the group chose Rick Bayless as our featured chef.  I don't have any of his books in my collection.  I couldn't find any of his books at my local library either.  And what's more, the bright, freshness of many of his dishes seem to be very "summery" food - and again we're back to many ingredients which are inaccessible or unsuitable in the depths of the New Zealand winter.

All of which is a whole lot of excuses for not joining in with the group for the last four months.  And I could come up with more, but they are all just that - excuses.  Howewer, I've come to realise that participating in groups like this is important to me.  It is about building communities, and on reflection that means joining in and playing your part, even when it doesn't suit.  It is also about learning and broadening culinary horizons, and keeping an open mind - that's why we're spending six months with our chosen chef and not just one week.  Ok, so I may not be able to get all the ingredients called for in a particular recipe - but I can look for alternatives, and explore why these may or may not work, and in the same way that I can learn from what my fellow group members create, maybe they too can learn something from my challenges.

So all of that was a very long-winded way (is anyone out there still actually reading?) of saying, I've been missing my IHCC buddies, and there may only be a couple of months left to spend with Rick, but I'm giving him a try.

The theme this week is Nieves:  Icy Cold Treats to Cool Off With!  About this point some of you may be thinking, "this woman is a complete lunatic".  Not only have I not been playing for four months, but in the middle of winter I've chosen to jump back in the very week the group is getting into "icy cold treats".  Hell, I could just go and lick the frost off the bonnet of my car every morning if I want something icy cold.  As it happens though, and I've mentioned this here before, no matter whether it's summer or winter my favourite treat is always ice cream or sorbet, so this seemed like the perfect challenge for Rick and I to get acquainted.

Lemon-Lime Sorbet Collage 2

Without any of Rick's books to turn to, I checked out the recipes on his website.  There's plenty there to choose from and given that citrus fruit is plentiful and inexpensive here right now his Fresh Lime Ice with Berries seemed perfect - although in my case it is "sans berries" since, unlike the citrus fruit, berries are not available here right now unless they are either frozen or have travelled half way round the world to get here.  I also added some lemon juice into the mix as, even though seasonal, limes are still quite pricey here, and I don't know what limes are like in your part of the world, but here they are rather like bullets and not particular juicy.

Lemon-Lime Sorbet 1

My resulting lemon-lime sorbet, had the perfect balance of sweetness to citrusy tanginess and I will definitely be making this again.  If I were to make any changes, I would like to try this with a dash or two of bitters added - lemon, lime and bitters is one of my favourite drinks, and in sorbet form that would make me pretty happy.

Lemon-Lime Sorbet 3
Props courtesy of Stevens Homewares, Nelson (details below)

Nieve de Limon Recipe
(Lemon-Lime Sorbet)
Adapted from this recipe by Rick Bayless
Makes about 750 ml
Click here for a printable copy of this recipe

fresh limes and lemons
(I used 4 limes and 1-1/2 lemons)
1 cup sugar
1/3 cup corn syrup
(corn syrup helps prevent your sorbet turning hard and icy in the freezer)
1-1/4 cups water

Grate the zest of 2 limes into a medium bowl.  Juice lemons and limes until you have 3/4 cup of juice.  Add to the bowl with the zest.

Put the sugar, corn syrup and water into a small pot, and heat gently just until the sugar is dissolved.  Remove from the heat and add to juice and zest.

Cover and refrigerate several hours - overnight is best.

Next day remove from fridge and churn in an ice cream maker, according to manufacturer's instructions.

Freeze for a few hours to firm up before serving.

Rick suggests serving this with fresh berries (strawberries, blackberries, raspberries), and if they are seasonal for you right now I'm sure that would be a great addition.  A sprig or two of mint or basil would also be a nice touch, again if you have them in season right now.

Lemon-Lime Sorbet 2

So after my first experience with Rick, what do I think?  Well, if this sorbet is anything to go by, it seems that we could get along.  At least I'm convinced enough to see what we can make together next week - keep watching this space.

If you would like to get to know Rick a little better, then do go and visit my friends at I Heart Cooking Clubs and see what they've all cooked up ...

Rick Bayless @IHCC button rounded


Props courtesy of Stevens Homewares Ltd 
"chef'n" ice cream scoop

I'm also sharing this post at See Ya In the Gumbo hosted by my lovely friend, Michelle, at Ms. enPlace, at Foodie Friday hosted by Designs By Gollum, at Gallery of Favourites hosted by the lovely April, of The 21st Century Housewife.  This will also be a submission to Sweet New Zealand, inspired by Alessandra Zecchini and hosted this month by Kristina at Plum Kitchen.


    Sweet New Zealand Badge A

Sunday, March 4, 2012

Little Blood Orange Cakes


Little Blood Orange Cakes 3

I have rules when it comes to buying fruit.  Vegetables too, if it comes to that.  As much as possible I like to buy produce that is grown locally, and therefore in season, for a number of reasons.  Firstly, fruit and vegetables which have been harvested as close as possible to ripeness and which have traveled the shortest possible distance to get to your table tastes better.  It's a no-brainer really.  I mean, let's face it, you know that you feel like c**p after spending 14 hours on a long-haul flight to the other side of the world, so why for a moment would you think that something as delicate as a strawberry flown all the way from Chile in the middle of our winter is going to cope with long-haul air travel any better than you do?  Secondly, avoiding out of season produce imported from the other side of the world is one way of making a small difference to my carbon footprint.  Admittedly, however, I am not fanatical about this.  I do buy imported specialty goods from time to time - cheeses, olives and olive oils, for example - but I do try not to overdo it on the imports.  And, lastly, I like to give as much support as I possibly can to local producers.

So you won't find me buying peaches, strawberries or tomatoes in the middle of winter.  And you won't find me buying lemons in January.  In short, if something grows here in New Zealand I won't buy an out of season import.  I do, however, make an exception of buying imported fruit on rare occasions when it is fruit which doesn't grow here - pineapple, bananas, papaya, mango, for example - and even though I know that here, far from where they have grown, they are not truly at their best, there is nothing quite like indulging in some tropical fruit for the occasional special treat.

With that in mind, I was faced with a bit of a dilemna this week.  At I Heart Cooking Clubs, where we are cooking with Tessa Kiros, our theme for the week was "Fight Scurvy - Eat More Citrus" - a theme I normally would have been super-excited about, except that it's so definitely not citrus season here in New Zealand right now.  I definitely wasn't about to rush out and buy up bags of lemons or oranges imported from the US.  So, just as I was wondering if I might be able to adapt something to perhaps use some of my homemade marmalade, I came across bags of blood oranges on special at the supermarket.  Now blood oranges are one of my favourite fruits, and since we don't grow them here (as far as I know) I don't feel too bad about buying imported ones.

As I've done so often over the last few months, I turned to Tessa's book, Falling Cloudberries: A World of Family Recipes, which I think by now has actually become the most used cookbook in my collection.

Falling Cloudberries: A World of Family Recipes

From there it was a breeze to turn Tessa's Little Lemon Cakes into Little Blood Orange Cakes.

Little Blood Orange Cakes 2

These little cakes are utterly, utterly delicious.  They are light, beautifully moist, and the delicate, slightly "perfumed" flavour of the blood orange makes them seem ever so slightly exotic.  These are pretty much perfect any time of day, but I think would be especially good for dessert on those occasions when you are looking for something that is not too rich or heavy.  A dollop of creme fraiche or Greek-style yoghurt would be a good addition on the side.

Tessa suggests making these in individual 3/4 cup ramekins, or a single 20cm (8 inch) cake tin.  I definitely wanted individual cakes here, but my ramekins weren't quite big enough - note to self, get some bigger ramekins.  As it turned out, Texas sized muffin tins worked perfectly.

Little Blood Orange Cakes 1

Little Blood Orange Cakes
Adapted from recipe by Tessa Kiros
Makes 4
Click here for a printable copy of this recipe

100g (3-1/2 oz) butter, room-temperature
100g (3-1/2 oz) caster sugar
1 large, free-range egg, separated
1 teaspoon vanilla extract
100g all purpose flour
1 teaspoon baking powder
1 blood orange, grated zest and juice
60ml (1/4 cup) milk

For icing:
1-1/2 tablespoons blood orange juice
50g (1-3/4 oz) icing sugar

Preheat oven to 180 degrees C (350 degrees F).

Lightly grease and flour the base and sides of four 3/4 cup ramekins, or Texas muffin tins.

Cream the butter and sugar, until light and fluffy.  Add the egg yolk and vanilla, and beat well.

Add the sifted flour and baking powder, together with the grated zest of the blood orange.  Fold in with a metal spoon, just until combined.

Add the milk and blood orange juice, and stir well until fully incorporated.

Using clean beaters, beat the egg white in a small bowl until white and fluffy and holds soft peaks.  Add one large spoonful of the egg white to the cake mixture, and mix well to loosen the cake batter.  Add the rest of the egg white, and fold in gently using a large metal spoon.

Divide mixture evenly between ramekins or muffin moulds.  Put into the preheated oven and bake for about 30 minutes - until the cakes are golden, and a skewer inserted into the centre comes out clean.

Remove from oven and place ramekins or tin on a wire rack to cool completely.  Run a knife around the sides of the cakes to loosen and remove from their moulds.

Make the icing by whisking the icing sugar and blood orange juice together until smooth, adding more of either to achieve the consistency you want.  (I kept mine fairly runny as I wanted more of a glaze than a thick icing.)

Put the cooled cakes onto a plate, make a few holes in the top of each cake with a skewer, and dribble the icing over the top.  I topped mine off with a garnish of the Seville Orange Spoon Sweets I made a few months ago.

If you would like to get to know Tessa a little better, then do go and visit my friends at I Heart Cooking Clubs and see what they've all cooked up ...

IHCC Tessa Kiros Button

... or check out Falling Cloudberries and many of Tessa's other great titles available from Amazon or Fishpond NZ.


I hope you'll give these wonderful little cakes a try - I'm sharing them this week at Cookbook Sundays, where my friends are delving into their cookbook collections and sharing some of their recipes.  Do stop by to see what they're cooking - you might even feel inspired to link up a recipe from one of your own cookbooks.

CookbookSundays

I am also sharing this post with Sweet New Zealand, a monthly blog event created by the very lovely Alessandra Zecchini, and which this month is hosted by the equally lovely and incredibly talented Emma at My Darling Lemon Thyme. This is an opportunity for all Kiwi bloggers (whether you are living in New Zealand or overseas), as well as for non-Kiwi bloggers living in New Zealand, to connect and share some of those sweet treats from your kitchen.  So, head on over to Emma's and share something sweet.
Sweet New Zealand Badge