Showing posts with label pine nuts. Show all posts

Sunday, June 22, 2014

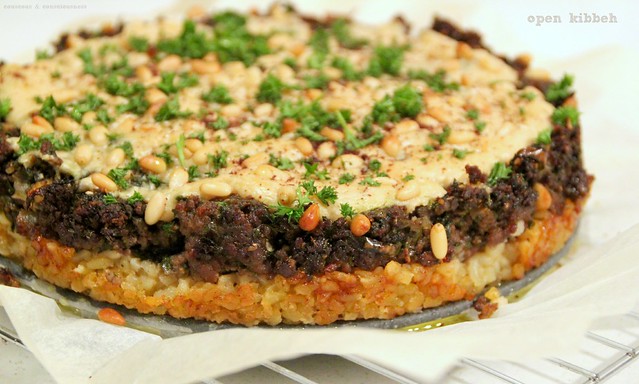
Open Kibbeh

Open Kibbeh 2

This month at Tasting Jerusalem*, we're exploring tahini - a paste made from grinding sesame seeds, which is a key ingredient in many Middle Eastern dishes, most well-known probably being hummus.

In the past, I've made a few dishes using tahini from my favourite cookbook, Yotam Ottolenghi's "Jerusalem" ...

... Braised Eggs with Lamb, Tahini & Sumac (one of my all-time favourite Ottolenghi dishes),
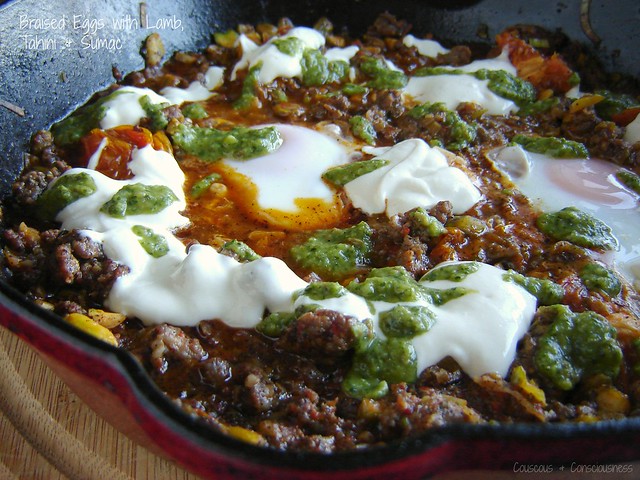
Braised Eggs with Lamb, Tahini & Sumac 1

... Fried Cauliflower with Tahini & Pomegranate,
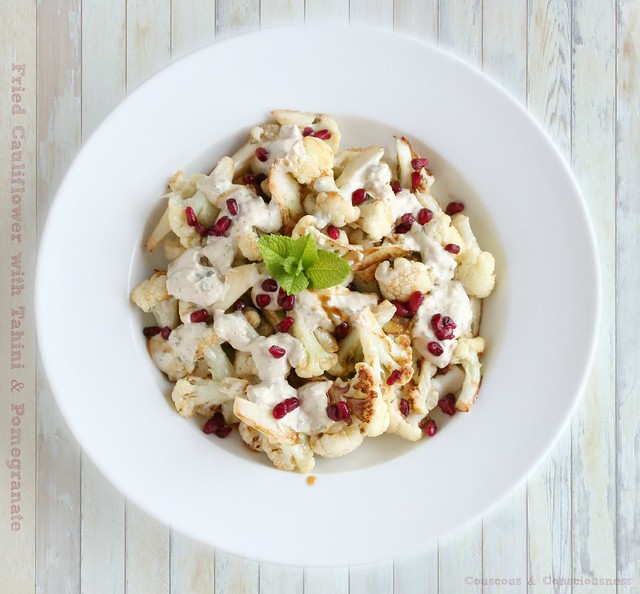
Fried Cauliflower with Tahini & Pomegranate 2

... Butternut Squash & Tahini Spread,
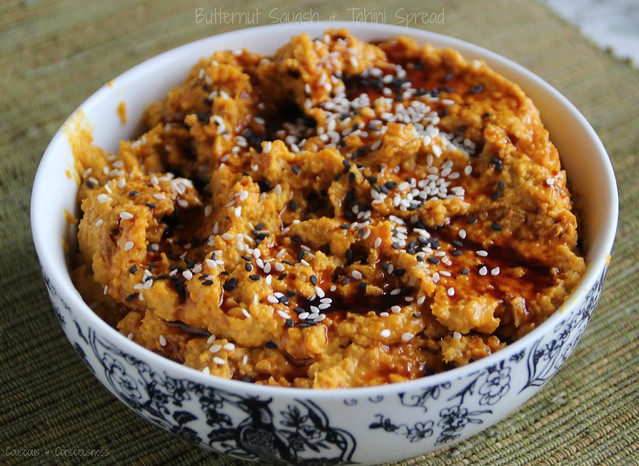
Butternut Squash & Tahini Spread 2

... and the insanely, insanely, insanely good Hummus Kawarma with Lemon Sauce.
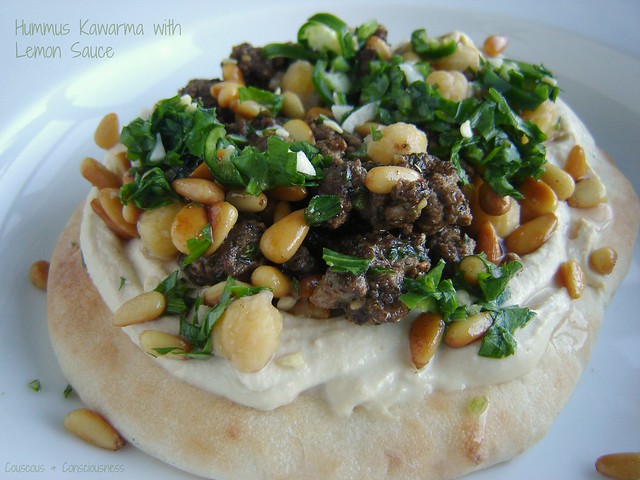
Hummus Kawarma with Lemon Sauce 1

But I was yet to try the Open Kibbeh.  I'd had this one bookmarked for ages, and with this week being Pot Luck week at I Heart Cooking Clubs, it seemed like the ideal opportunity to give this dish a try.  Kibbeh is a Middle Eastern dish, most commonly prepared (as I understand it) as a kind of bulghur wheat croquette, stuffed with minced lamb, and served with a tahini sauce.

In this less conventional version, the kibbeh is prepared more like a kind of savoury "cake".  A base of bulghur wheat, topped with fragrant, spicy lamb, all topped off with a tahini sauce.

Once again, Ottolenghi did not disappoint me.  This was a wonderfully flavourful dish - great for a wintery evening, and would be excellent for a weekend lunch dish as well.  When I was a kid, my grandmother often made an Indian dish of Potato Cutlets - patties made of mashed potato, filled with savoury mince, and then fried until crispy and golden.  The flavours and textures of Ottolenghi's Open Kibbeh filled me with nostalgia, reminding me a great deal of those potato cutlets of my childhood.

I made only very minimal changes to the recipe - I used banana shallots instead of onions, replaced the spices called for in this recipe with some of the baharat spice mixture I made a while back, and cut down the oil a little.

The final dish is best served warm or at room temperature, rather than straight out of the oven - it's also likely to fall to bits if you try to serve it too hot - and in typical Ottolenghi fashion is a triumph of taste and texture.  You can be sure that I will be making this again - I hope you will try it too.
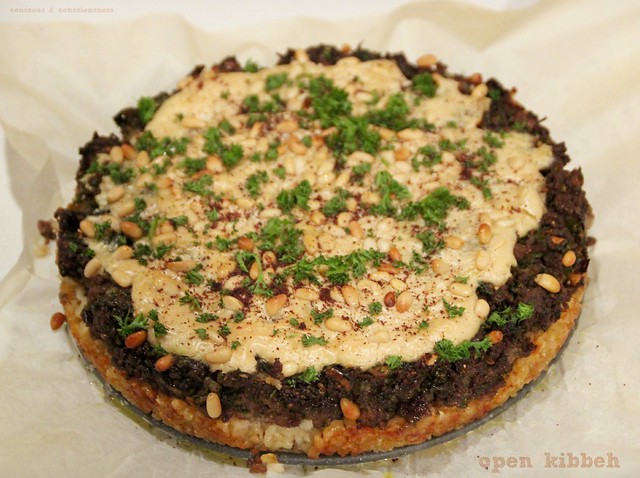
Open Kibbeh 1.jpg

Open Kibbeh Recipe
Adapted from recipe by Yotam Ottolenghi & Sami Tamimi
from Jerusalem, A Cookbook
Serves 4 as a light meal with salad
Click here for a printable copy of this recipe

125g (4oz) bulghur wheat
olive oil
1x large banana shallot, finely chopped
2x cloves garlic, crushed
1x green chilli, finely chopped (remove seeds if you don't want the heat)
350g (12 oz) minced lamb
3 teaspoons baharat spice mixture
large handful fresh coriander, roughly chopped
large handful fresh parsley, roughly chopped
flaky sea salt & freshly ground black pepper
generous handful of pine nuts
2 tablespoons self raising flour
1 tablespoon of olive oil
2-3 tablespoons tahini paste
juice of half a lemon
warm water
flaky sea salt

To finish:
sumac
fresh parsley, roughly chopped
extra virgin olive oil

Preheat oven to 190 degrees C (375 degrees F).  Lightly grease a 20cm springform or loose-bottomed cake tin, and line the base with non-stick baking paper.

Put bulghur wheat in a small bowl, cover with boiling water, and set aside for 30 minutes.

Meanwhile,  heat a little olive oil (about 1 tablespoon) in a large frying pan set over medium heat.  Add chopped shallots, garlic, and chilli to the pan, and saute until softened.  Add the lamb, and continue to saute until the lamb is lightly browned - about 5 minutes.

Stir in the baharat spice, coriander, parsley, about two-thirds of the pine nuts, and a generous pinch each of flaky sea salt and freshly ground black pepper.  Cook for a couple more minutes.  Remove from heat, taste and adjust seasoning as necessary.

Strain any remaining liquid off the bulghur.  Add the flour, 1 tablespoon of olive oil, and a pinch each of salt and black pepper.  Work with your hands till you have a mixture that is starting to hold together.  Tip the wheat into the prepared cake tin, and press firmly over the base of the tin - I found it easiest to work with slightly wet hands.  Spread the wheat out into an even layer which is quite firmly compacted.  Spread the lamb mixture evenly over the top of the wheat, and again press down quite firmly.

Bake in preheated oven until the lamb is hot and well browned - about 20 minutes.

Meanwhile prepare the tahini sauce.  Mix tahini paste with the lemon juice and a pinch of flaky sea salt.  Then add enough warm water (a little at a time), until you reach a sauce which is thick yet pourable.

Remove the kibbeh from the oven.  Pour tahini sauce evenly over the top, sprinkle with the remaining pine nuts, and return to the oven until the tahini is set and lightly browned and the pine nuts are golden.

Remove from the oven and leave to cool to room temperature before removing from the tin.  To serve, sprinkle over fresh parsley and sumac, and finish with a drizzle of extra virgin olive oil.

If you would like to get to know Yotam Ottolenghi a little better or any one of our other IHCC chefs, then do go and visit my friends at I Heart Cooking Clubs and see what they've all cooked up for Pot Luck week ...

IHCC Ottolenghi Leek Badge resized

... or check out Jerusalem and Ottolenghi's other great titles available from Amazon USA, Amazon UK or Fishpond NZ.

* Have a look also at what my "Tasting Jerusalem" friends have been doing - you'll find plenty of other great uses for the tahini, along with other interesting ingredients as well. (“Tasting Jerusalem is a virtual cooking community exploring the vibrant flavors and cuisine of the Middle East through the lens of “Jerusalem: A Cookbook” by Ottolenghi and Tamimi published by Ten Speed Press. You can follow along and cook with us by subscribing to omgyummy.com, following the hashtag #TastingJrslm on Twitter and Instagram, liking our Facebook page or joining our Google+ Community and finally checking out all of our groups’ dishes on Pinterest.”)

I'll also be sharing this post at See Ya In the Gumbo hosted by the lovely, and very amusing, Michelle at Ms. enPlace, at Weekend Cooking hosted by Beth Fish Reads, and at Foodie Friday hosted by Designs by Gollam.


See Ya in The Gumbo Badge      Weekend Cooking Badge    


Monday, July 1, 2013

Hummus Kawarma (Lamb) with Lemon Sauce

Hummus Kawarma with Lemon Sauce 2

There is much that I could say to preface this post.  But I'm going to keep it simple.  As I mentioned yesterday, today my blog turns four.  No-one could be more surprised about that than me - I'm not particularly good at sticking to things.  In fact, this blog and my yoga practice are the only things I've ever stuck at for any length of time in living memory.  There is much I could probably say about the "journey" this blog has taken, but most of all I just want to say thank you to all of you for continuing to read my posts and leave your kind and generous comments.  The friendship and thoughtfulness I've discovered in complete strangers humbles me deeply, and there really are no words to express my gratitude.  'Nuff said.

Now back to food.  Our June Community Recipe at I Heart Cooking Clubs was Ottolenghi's hummus, and I did plan to bring you this last week to coincide with our "Got A Pulse" theme, but life got in the way and it just didn't happen.  Not in a bad way mind you.  A highlight of my week was a visit for the last four days of my oldest and dearest friend.  Friends for the last 35 years, but not having had the opportunity to spend time together like this since we flatted together in our twenties, I can tell you we had a wonderful weekend ... good food and good wine (both of which were infinitely superior to what was consumed back "in the day"), shopping, movies, and talking till the wee small hours, picking up where we left off as though it was yesterday.  So I'm sure you'll forgive having had to wait a few extra days for this post.

Needless to say, this is another gem from Yotam Ottolenghi.  Warm hummus (yes, warm ... who'd have thought), topped with spicy lamb, a piquant, garlicky lemon sauce, and (the icing on the cake) buttered pine nuts.

I've got to say that this is not a "throw it together in five minutes" kind of dish.  There are quite a few steps involved.  But most elements of the dish can be prepared in advance, and if you're suitably prepped, the final dish actually can come together in just a few minutes.

I took a couple of shortcuts.  The original recipe called for a number of different spices for marinating the lamb.  I took the easy option, using some of my favourite Sami's Kitchen spice blends:  Shawarma spice blend (a combination of pepper, pimento, mustard, cumin, ginger, cardamom, coriander, nutmeg, cinnamon and cloves), and Za'atar (a blend of thyme, sesame, sumac, salt, coriander and cumin), and I must say (though I'm not paid to do so) that these represent no shortcut in flavour.  I know that these spice blends are readily available in New Zealand and Australia (not sure about elsewhere), but I do highly recommend them if you can get your hands on them.

And a word about the hummus.  Ottolenghi's hummus is a little different from what I've made before.  In fact, I kind of have my "go to" hummus recipe which I pretty much make now with my eyes closed, so I almost wasn't going to bother - I was thinking I'd just make my usual hummus and putting the toppings on it.  But then my friend and IHCC co-host Kim at Stirring the Pot posted this dish and hooked me in when she described the "cloudlike and velvety" qualities of the hummus.  After I shared Kim's post on my Facebook page, my friend Martine made it and said it was the smoothest, best hummus she'd ever tasted.  And when the lovely Joanne at Eats Well With Others described it as "the hummus to end all hummus", it was a no-brainer ... I had to try it.  So, all I can say is - don't just take my word for it.  When I tell you this hummus is wonderful, I've got back-up!

Of course the hummus on its own is heavenly - still warm and velvety with more tahini than I would have imagined - but top that with the spicy lamb, lemon sauce, and buttered pine nuts, and you have, as Ottolenghi says, "one of the most sensational things you can put in your mouth".  Nothing else needed but a few warm pita breads and a simple salad.  Eat with your hands!!

Hummus Kawarma with Lemon Sauce 1

Hummus Kawarma (Lamb) with Lemon Sauce Recipe
Adapted from recipe by Yotam Ottolenghi & Sami Tamimi
Serves 4
Click here for a printable copy of this recipe

Basic Hummus Recipe
1 cup dried chickpeas
1 teaspoon baking soda
1 cup tahini
4 tablespoons lemon juice
4 cloves garlic, roughly chopped
100ml (or so) (1/4 cup) chilled water
generous pinch of salt

Wash chickpeas well and place in a large bowl.  Cover with at least twice their volume of cold water, and leave to soak overnight.

Next day, drain the chickpeas and place in a medium-sized saucepan along with the baking soda.  Set the pan over high heat and cook, stirring constantly, for about 3 minutes.  Add 6 cups of fresh water and bring to the boil.

Continue to cook until the chickpeas are soft enough to crush between your fingers, but not completely mushy.  This could take anywhere from 20 minutes to an hour, depending somewhat on your chickpeas and also how long they soaked for in the first instance.  Mine took just a little over 20 minutes.

Drain the chickpeas, and reserve a handful or so for garnishing the finished dish.  Put the rest of the warm chickpeas into the food processor and blitz until you reach a stiff paste.  Then add the tahini, lemon juice, garlic and salt.  Blitz it up again, and then with the motor still running, slowly drizzle in the iced water, and keep processing for about 5 minutes until completely smooth.

Transfer to a bowl, cover with cling film and leave to rest for about half an hour before serving.

For the lamb:
300g boneless lamb shoulder
2-1/2 teaspoons Shawarma Spice Blend
1 teaspoon za'atar or dried oregano
1 tablespoon red wine vinegar
1 teaspoon dried mint
generous handful flat-leaf parsley, finely chopped
generous pinch flaky sea salt
olive oil

For the lemon sauce:
generous handful flat-leaf parsley, finely chopped
1 green chilli, finely chopped
juice of 1 lemon
2 tablespoons red wine vinegar
2 cloves garlic, minced
pinch flaky sea salt

To serve:
flat-leaf parsley, finely chopped
large handful pine nuts, fried in a little butter

Chop lamb very finely.  This is easiest done in the food processor, pulsing just until finely chopped but not quite minced.

Remove lamb to a bowl and add the shawarma spices, za'atar, vinegar, mint, parsley and salt.  Mix well to make sure all of the meat is covered with the seasoning.  Cover the bowl and leave to marinate for at least 30 minutes and up to 24 hours.

Prepare the lemon sauce, just before cooking the lamb, by simply putting all the ingredients into a small bowl, and mixing well.

Set a large skillet over medium heat and add 1-2 tablespoons of olive oil.  Once the oil is hot, add the lamb in a couple of batches, stirring as you cook.  It will only take a couple of minutes - take care not to overcook.

Serve in shallow bowls, spreading a generous portion of hummus in each bowl.  Make a hollow in the centre of the hummus, and serve the warm lamb into the hollow.  Scatter with the reserved chickpeas, and drizzle with the lemon sauce.  Sprinkle over extra parsley and the buttered pine nuts to garnish.

If you would like to get to know Yotam Ottolenghi a little better, then do go and visit my friends at I Heart Cooking Clubs and see what they've all cooked up ...

IHCC Ottolenghi Leek Badge resized

... or check out Jerusalem and Ottolenghi's other great titles available from Amazon USA, Amazon UK or Fishpond NZ.

          Jerusalem 

I'm also sharing this post this week at See Ya In the Gumbo hosted by the lovely, and very amusing, Michelle at Ms. enPlace.


See Ya in The Gumbo Badge


Saturday, May 25, 2013

Pasta with Sardines

Pasta with Sardines 4

This week is Pot Luck week at I Heart Cooking Clubs, and this means that we get carte blanche to choose any recipe we like either from our current chef, who as I'm sure you know by now, happens to be the incredibly inspiring Yotam Ottolenghi, or any one of the seven other chefs we have previously featured at IHCC.

I actually had an Ottolenghi dish picked out weeks ago that I was going to make for this week's challenge, but somehow that didn't come to pass and I decided that today was the day to get this post out of draft.  This dish is ever so slightly adapted from a Mark Bitman recipe, and is one of my favourite pasta dishes.  Mark Bitman was actually the featured chef when I first joined the IHCC community, and I loved cooking his dishes.  This recipe was one that I made way back then, with all good intentions for publishing it as my "Farewell to Bitman" post.  Somehow, that didn't happen, and although I've made this dish several times since, the post has continued to languish in draft.  Time for that to change.

This is one of those great "pantry raid" dishes, perfect for using up a few of those store cupboard ingredients - pasta, raisins (original recipe uses currants, but I prefer raisins), pine nuts and tinned sardines.  On the subject of sardines, I actually prefer to use fresh, and I have included a video from YouTube here which shows just how easy they are to clean - I promise that it is totally worth the little bit of effort if you are able to get them fresh.  However, the original recipe calls for tinned sardines, and they will work perfectly well if you either can't lay your hands on fresh ones or can't be bothered to clean them.


Other changes I like to make to this dish, are replacing onion with fennel - I think the "aniseed" flavour is a great complement to the fish and the raisins, and I also like to add in some chopped preserved lemon for its intensely lemony-salty hit.

This dish is incredibly quick to make - once you've prepared the fish (which is itself the work of moments), the rest of the dish pretty much comes together in the amount of time it takes to boil pasta, making it perfect for a quick, mid-week dinner.

Add to this the fact that, from both an ethical point of view and a healthy one, sardines are a great choice, and you have a win:win dish.  Hope you'll try it.

Pasta with Sardines 5

Pasta with Sardines Recipe
Adapted from a recipe by Mark Bitman from
Makes 2 generous servings
Click here for a printable copy of this recipe

6x fresh sardines
1/4 cup flour
flaky sea salt & freshly ground black pepper
olive oil

250g pasta ( I used De Cecco casareccia)
salt

handful of raisins, soaked in warm water while you prepare the sardines
handful of pine nuts, lightly toasted
olive oil
1x fennel bulb, thinly sliced
1/2 a preserved lemon (discard the flesh, and slice the skin thinly)
grated zest of 1x lemon
large handful fresh parsley leaves, coarsely chopped
freshly ground black pepper

Put a large pot of water over high heat and bring to the boil.

Meanwhile, prepare the sardines as per the video above.  Wash thoroughly and use a paper towel to pat completely dry.

Pasta with Sardines 1

Spread flour, seasoned with flaky sea salt and freshly ground black pepper, on a plate.  Dredge the sardines in the flour, shaking off any excess, and set aside.

Pasta with Sardines 2

Heat a tablespoon or so of olive oil in a shallow frying pan over medium heat.  As soon as the oil is hot, add the sardines to the pan, and continue to cook until the fish is golden brown and almost cooked through.  Remove from pan to a plate lined with a paper towel to absorb any surplus oil.  Break into slightly bigger than bite-sized pieces.

Now liberally salt the boiling water, and add the pasta to the water.  Cook according to the packet instructions until al dente.

Meanwhile, heat another tablespoon or two of olive oil in a large skillet over medium heat.  When hot, add the sliced fennel and saute until the fennel has softened - about 6 to 8 minutes.  Add the drained raisins, most of the pine nuts, preserved lemon skin, sardines, and a generous grind of black pepper.  (Because the preserved lemon is salty, you may find that you don't need any additional salt.)  Stirring gently, combine everything well, and cook until everything is heated through and fish is cooked through.

Pasta with Sardines 3

Drain the pasta, reserving a cup of the cooking water.  Add the pasta to the pan containing the fish, and add most of the chopped parsely.  Toss carefully to combine and add a little of the reserved pasta water if necessary.  Taste and adjust seasoning to your liking

Transfer to a warm serving bowl, and sprinkle over the remaining pine nuts and parsley, and the grated lemon zest.

Delicious served immediately or at room temperature. 

If you would like to get to know Mark Bitman a little better, then do go and visit my friends at I Heart Cooking Clubs and see what they've all cooked up ...


or check out some of these great Mark Bitman cookbooks:

How to Cook Everything, Completely Revised 10th Anniversary Edition: 2,000 Simple Recipes for Great Food   How to Cook Everything Vegetarian: Simple Meatless Recipes for Great Food   Mark Bittman's Kitchen Express: 404 inspired seasonal dishes you can make in 20 minutes or less

Available from Amazon, Book Depository UK, and Fishpond NZ

I'm also sharing this post this week at See Ya In the Gumbo, hosted by the very lovely Michelle at Ms. enPlace.

See Ya in The Gumbo Badge


Wednesday, February 16, 2011

Roasted Pear Salad with Lardons, Gorgonzola & Pine Nuts - Charcutepalooza # 1

Roasted Pear Salad with Lardons, Gorgonzola & Pine Nuts 1

A couple of days ago I told you that I had joined up with the blogging group Charcutepalooza to participate in a year of charcuterie challenges.  The group was founded by Mrs Wheelbarrow and The Yummy Mummy, who are acting as co-hosts and mentors.  We will be working from Michael Ruhlman's book "Charcuterie: The Craft of Salting, Smoking & Curing", and indeed Michael Ruhlman has also been offering support to the group as we learn, share and explore this age old craft. 

As I mentioned the other day, because we are still in the midst of a New Zealand summer, I have so far been unable to participate in the first challenge of making duck prosciutto, but I can't wait to give this a go when the weather turns cooler.

I was, however, very excited when the second challenge of curing our own bacon was announced.  In actual fact we had a choice of making bacon or pancetta but, since the same challenges present themselves for hanging pancetta as hanging duck breasts, bacon it was to be.

Now The Ruhls of the group preclude me from giving you the recipe for curing the bacon (go and buy the book), or have a good look around on the website for guidance.  What I can tell you though is that curing your own bacon is one of the easiest and yet most satisfying things you will ever do in your own kitchen.  Not only that, the end results are so absolutely outstanding you won't ever want to buy bacon again (well you probably will, but it won't be the same). 

Make no mistake, people, this is life changing stuff - once you are finished you will marvel at your own cleverness.  Not only that, the amount of credit others will give you for your cleverness is actually out of all proportion to the amount of effort it took to get this much kudos.  No matter, just suck it up.  But more importantly, I believe that in these times of blatant over-commercialism and convenience, when we can pick up a packet of just about anything from the supermarket, we lose so much consideration and respect for where our food really comes from.  Not only that, the increasing availability of so much product (I'm not even going to call it food) that can literally travel directly from the supermarket shelf to your plate (maybe a pass through the microwave if its lucky) has caused us also to lose a great deal of consideration and respect for our own health and well-being (physically, emotionally, spiritually) and that of our families.  What causes obesity? - convenience and not caring.  Okay, I know that is an over-simplification, and I can hear some of you screaming at me through the ether as I write, but you get where I'm coming from, don't you? I truly believe that every step we take in getting closer to the source of our food is a step in the right direction in so many ways.  When we begin to think about the land that produces our food, we will more likely take better care of it;  when we start to think about the animals that give up their lives to feed us, we will more likely take better care of them too;  and when we really start to think about the food we are preparing and feeding to our families, we will almost certainly take better care of them too.  Enough said, because you all know I could really go on here!  End of sermon - go make bacon.

As I just said the process is incredibly simple.  A mixture of salt (see note below**), pepper, herbs, spices and sugar are mixed together to make a paste ....

Home-Cured Bacon  4

... then massaged into a piece of free-range pork belly ...

Home-Cured Bacon 3

... and then left to cure for several days, before a final roasting ...

Home Cured Bacon

... after which your bacon will be ready to cook as normal.

I can tell you that, in order to give a uniquely New Zealand flavour to my bacon, I replaced some of the ingredients in my cure with manuka honey and kawakawa (New Zealand bush basil).  I also added a few drops of liquid hickory smoke, for a touch of smokey flavour. We have a commercial brand of bacon here in New Zealand called Kiwi bacon - an abiding childhood memory of growing up in Auckland was driving past the Kiwi bacon factory which used to have an enormous kiwi bird on the roof that went round and round in circles - I like to think what I've done here is a new "spin" on kiwi bacon.

You might get a good laugh out of this TV commercial that used to air here for Kiwi bacon.


(**Note:  I was unable to get any pink curing salt, so just left it out and used only Maldon sea salt.  As predicted, when the bacon first starts to cook it turns a kind of brownish-grey colour (I know that doesn't sound very appealing) rather than retaining the "pinkness" that we normally associate with bacon, but by the time it has browned and crisped completely, it looks and tastes sensational.  All the flavours of the herbs and garlic definitely come through, resulting in a taste unlike any other bacon I have ever tasted.)

I enjoyed my bacon, in this simple but delicious salad ...

Roasted Pear Salad with Lardons, Gorgonzola & Pine Nuts 2

Roasted Pear Salad with Lardons, Gorgonzola & Pine Nuts Recipe

For each person:
bacon, from free-range pork, cut into lardons - as much as you like
1x small pear for each person, quartered and cored
assorted salad leaves
generous handful of Gorgonzola or other blue cheese
generous handful of pine nuts or walnuts, toasted
extra virgin olive oil
white balsamic vinegar

Cook lardons in hot pan, until golden and crispy and some of its fat has rendered out.  Remove lardons from pan and set on a paper towel to drain, leaving as much of the fat behind in the pan as possible.

Add the quartered pears to the pan, adding a little bit of olive oil if there is not enough fat left from the bacon.

Arrange salad leaves on a plate or platter.  Sprinkle over crumbled Gorgonzola.  As soon as the pears are ready remove them from the pan and arrange over the leaves, pour over any juices from the pan, sprinkle over the lardons and toasted nuts.

Drizzle over a generous amount of extra virgin olive oil and a sprinkling of white balsamic vinegar.

Roasted Pear Salad with Lardons, Gorgonzola & Pine Nuts 3

I enjoyed this with some crusty bread and a glass of chardonnay.

This post is linked to Charcutepalooza