Showing posts with label david lebovitz. Show all posts

Sunday, December 25, 2011

Rolled Almond Meringue with Christmas Mince Ice Cream & Cookbook Sundays # 3

Rolled Almond Meringue with Christmas Mince Ice Cream 1

Happy Christmas everyone - I hope you are all enjoying a lovely day with your families, and enjoying good food on your tables.  This year is a quiet Christmas for me, my partner being away in Australia for work, and finances being such that travelling to spend time with family or friends was just not an option this year.

Nevertheless, I am having a lovely relaxing day, and will certainly be enjoying my share of festive fare.  Dinner tonight will be a salad of crispy-skin, five-spice duck, with watercress, mango, sweet potato & crispy noodles, with a tamarind and sesame dressing.  Dessert will be this rolled almond meringue filled with a fruit mince ice cream.  The great thing about a dessert such as this is that I can cut off a slice (or three), and keep the rest frozen for another occasion.

This is an adaptation of a recipe from Jan Bilton's Fresh & Fancy Fare, a book I've had for about 25 years and haven't used nearly enough, so I thought this would be a great submission for this week's Cookbook Sundays.  The original recipe calls for a filling of whipped cream mixed with shredded coconut and oranges, but since I wanted to create something less perishable the ice cream filling instead of cream seemed the way to go.  And besides, who really needs an excuse to make ice cream?!

As luck would have it, I just happened to have half a jar of Christmas fruit mince left over from last year.  It was however looking a bit dried out and sad, but I remembered that it had been particularly good, so I felt sure that if I gave it a bit of love I could resurrect it and use it as the base for my ice cream.  I added a heaped tablespoon of my home-made Seville orange marmalade, 50g of chopped chocolate (I used Whittakers Dark Ghana), and a hefty slosh of my Damson gin.  Not only did that breathe new life into my old Christmas mince, but I think I successfully improved it.  Any good quality Christmas mince that you happen to have on hand will suffice here.

For my ice cream custard, I used David Lebovitz's base for his Brown Bread Ice Cream - well, him being the God of all things ice cream in my opinion, where else would I turn?

There is brown sugar and sour cream in the ice cream base which gives it a lovely caramel base flavour, with a hint of tartness, all of which married beautifully with the spices, bitter orange, chocolate and almond flavours coming through from the Christmas mince - utterly divine.  You can be sure there will be more than one batch of this whipped up over the summer - actually beautiful flavours for a winter ice cream too, which is not to be sniffed at since ice cream is (hands down) my favourite dessert all year round.

The meringue is beautifully chewy and marshmallowy (is that a real word? - you know what I mean), and the hint of almond adds yet another layer of flavour to those coming through from the ice cream.

Rolled Almond Meringue with Christmas Mince Ice Cream 2


Rolled Almond Meringue with Christmas Mince Ice Cream
Adaptations from recipe by Jan Bilton
Serves 6-8
Click here for a printable copy of this recipe

For the ice cream:
1 cup whole milk
1-1/2 cups cream
1/3 cup granulated sugar
1/3 cup light brown sugar
pinch of salt
225g (8 oz) sour cream
5 large egg yolks
1/2 teaspoon vanilla extract
2/3 cup good quality Christmas fruit mince

For the meringue:
5 egg whites
1 cup caster sugar (mine was vanilla infused)
1/2 teaspoon almond extract
1 teaspoon white vinegar
2 teaspoons cornflour

Begin by making the ice cream, and I suggest that you start this at least 24 hours before making the meringue.

First of all make an ice bath by putting ice cubes and a bit of water into a medium bowl.  Then put the sour cream and 1 cup of the cream into another medium sized bowl.  Stand this bowl in the ice bath and set everything aside.

Put the egg yolks into yet another bowl, whisk slightly to break up the yolks, and then set this aside also.

Put the milk, the remaining 1/2 cup of cream, the sugars and the salt into a medium-sized saucepan, and heat over a gentle heat.  Stir constantly until the sugar has dissolved completely and the mixture is warm.  Test by sticking your little finger into the mixture and when it is too hot to hold your finger there it is ready.

Remove from the heat, and gradually pour some of the milk mixture onto the egg yolks.  Whisk constantly as you pour - this is important or you will end up with scrambled eggs.  Once about half of the milk mixture is incorporated into the eggs, scrape the whole lot back into the saucepan, again whisking constantly.

Set the pan back over low heat, and stir constantly until the custard thickens enough to coat the back of a spatula.

Remove from the heat, and strain the mixture over the top of the cream and sour cream mixture resting in its ice bath.  Whisk constantly until the mixture is smooth and has cooled completely.  Stir in the vanilla.

Cover with cling film, pressing it right down onto the surface of the custard.  Refrigerate for several hours at least - ideally overnight.

Next day, churn in your ice cream maker according to the manufacturer's directions.  Remove the churned ice cream to a cold bowl, stir through the Christmas mince, then freeze until firm.

Now make the meringue.  Begin by preheating your oven to 180 degrees C (350 degrees F).  Lightly butter a Swiss-roll tin and line it with parchment paper.  Set aside.

In a scrupulously clean bowl, beat the egg whites until stiff.  Add the sugar, a little bit at a time, and continue beating until all the sugar is dissolve and the mixture is stiff and glossy.

Fold the almond extract, vinegar and cornflour gently into the meringue.

Spread the mixture into the prepared tin, and bake in the preheated oven for 15 minutes.

Meanwhile, spread another sheet of baking paper out onto your kitchen bench and dust it liberally with icing sugar.

Remove the cooked meringue from the oven, and turn it out onto the icing sugar dusted baking paper.  Allow to cool completely.

Spread ice cream over the centre of the meringue (soften your ice cream first if necessary), roll up from the long edge.  Wrap in parchment paper and freeze until you are ready to serve.

Enjoy and have a happy Christmas - for those of us here in New Zealand it's nearly over, but I know that for many of you it is only just beginning.

Cookbook Sundays Badge 

Earlier I mentioned Cookbook Sundays.  What is that all about, you are perhaps wondering.  Well, if you're anything like me you have dozens of cookbooks gathering dust on your bookshelves, some of which have never even been cooked from.  Sure I spent hours browsing through them when I first bought them, marking all the recipes I was going to make with little post-it notes, and yet still those books languish in the bookcase and never make it to the kitchen.  There are others from which I have made but one recipe which was such a resounding success that I've made it over and over again, and yet somehow I've never made anything else from that book.  Sound a bit familiar?!

Take comfort - you are not alone, and now Cookbook Sundays is your opportunity to change that.  Every Sunday I'm going to share with you a recipe that I haven't made before from one of my ever expanding collection of cookbooks.  And, because I know that if you have read this far then you are guilty of this too, I'm inviting you to join in with me.  Each week my Cookbook Sundays post will have a linky for you to share something you've cooked from one of your cookbooks.

The rules for joining in are simple:
  1. Your post must state the author and the title of the book your recipe has come from.
  2. Your post must mention Cookbook Sundays and link back to this post.  Including the Cookbook Sundays badge is optional, but always appreciated.
  3. You may submit as many entries as you like, and you may use the same cookbook as many times as you like.  Old posts are also welcome.
  4. Lastly,  remember that what goes around, comes around - one of the reasons you are participating in this is because you want people to read your posts, so do the right thing and go and visit a few of the other participants. 
Now, go and dust off those cookbooks and get cooking!  Use the linky tool at the end of this post to submit your entry/entries - simply scroll down to where it says "You are next ... Click here to enter", and then follow the instructions.  The linky will be open for one week.

Lastly, if you would like to use the Cookbook Sundays badge in your post, simply copy the code in the box beside the badge below and paste it into your post.  Feel free to also use it in your sidebar if you wish.

CookbookSundays

Sweet New Zealand Badge 

I am also sharing this post with Sweet New Zealand, a monthly blog event created by the very lovely Alessandra Zecchini, and which this month is hosted by the equally lovely and incredibly talented Bron Marshall. This is an opportunity for all Kiwi bloggers (whether you are living in New Zealand or overseas), as well as for non-Kiwi bloggers living in New Zealand, to connect and share some of those sweet treats from your kitchen.  So, head on over to Bron's and share something sweet.

I'm also sharing this at Bake with Bizzy.

Wednesday, September 8, 2010

Pink Guava, White Chocolate & Macadamia Nut Ice Cream Recipe

Christchurch Earthquake 2, edited

At 4.30 on Saturday morning life as we know it here in Christchurch changed forever.  We were woken with the bed shaking violently and a loud rumbling sound - yes, we were in the grips of an earthquake.  Now here in New Zealand we live on the fault line and earthquakes are nothing new to us.  But it didn't take long for us to realise that this was something way bigger than we had experienced before and, once we could hear glass breaking and stuff crashing down all around our apartment, we knew it was time to get into a doorway - quick!  It turned out to be a 7.1 magnitude quake, and although it was all over in 15 seconds (apparently), those seconds were terrifying and seemed like minutes.  Equally terrifying have been the constant after shocks - over 100 of them now since the big one, and many of them in excess of 5 on the richter scale.

For all that, on a personal level, we have survived with nothing more than a bit of broken crockery and a few broken bottles which fell off the kitchen shelves - a shattered bottle of orange blossom water and a jar of teriyaki sauce that lost its lid and sprayed all over the kitchen walls - the combination of the two together left an interesting aroma in the kitchen!  So we have been incredibly lucky.
Christchurch Earthquake 3, edited

Many others have not been so lucky - there are many people who have had to be evacuated from their homes, and many who still have no power or running water.  Many of the old character and heritage buildings in the city, which give our city its particular charm, have been severely damaged and will almost certainly have to be demolished.  Our central business district, where many of these older buildings are located, is largely unsafe and has been completely closed off for the last four days.  Many of our smaller businesses (despite the immediate setting up of financial assistance by our government) will simply not survive.  Redevelopment and rebuilding of the city will doubtless take several years, and the character of our city will be very different, which is rather sad to contemplate. 

Christchurch Earthquake 1, edited

Miraculously, however, the human toll has been minimal.  Not one life has been lost, and despite quite a few minor injuries, there have been only two serious injuries.  I believe we are amazingly blessed to live in a city with a small population (we have only 330,000 people here), so we don't have buildings which are over-crowded;  we have relatively good building and construction standards in New Zealand;  and essential services have been able to swing into action with relative ease.  But the greatest miracle of all must surely be that the quake happened at a time of day when our city buildings and streets are largely deserted - even just a couple of hours earlier the results would have been catastrophic.

There's no doubt that an event like this, even when you come out of it largely unscathed, leaves you feeling shaken up and vulnerable.  It has clearly reminded me of the value of living from moment to moment - I definitely feel very uneasy, and every after shock scares the hell out of me, but all my yesterdays and tomorrows have never felt less relevant.  Despite my nervousness, right now, I am alive, I am safe, I am healthy - what more could I possibly ask for?!  I am grateful to have a yoga practice which sustains me at a time when I need it most, and I am also immensely grateful for all the emails and comments I have received from so many of you out there in "blog land" - that so many people from all over the world, who I've never even met, have taken the time to spare a thought for me and the other people of Christchurch is deeply humbling and I thank you all.  I will reply to you all, but please don't be offended if I haven't gotten to you yet.

And since I'm so grateful to you all, I thought I should share a recipe with you - would be rude not to, wouldn't it?!  To be honest, I haven't been cooking much the last few days, but I sure as heck have been "comfort eating".  Now when it comes to comfort food, favourites come in the form of chocolate, brownies and ice cream, and making a batch of ice cream seemed like just the thing to satisfy, as well as providing a good distraction.

I made this adapting my favourite vanilla ice cream recipe by David Lebovitz as my base - I left out the vanilla bean, although I did include the vanilla extract, and I added an extra egg yolk.  To this I added a couple of tins of pink guavas (pureed) and some chunks of macadamia nut white chocolate.  The result is a beautifully delicate flavour (I think next time I would cut the vanilla back a bit, as it does dominate the guava a little); a gorgeous, pale, pinky-peachy colour;  and, a smooth, creamy and luscious texture interspersed with hits of crunch from the white chocolate and macadamia nuts.  I will definitely make this again - perfect for a celebration meal, or when you just need a bit of comfort and indulgence.

Pink Guava, White Chocolate & Macadamia Nut Ice Cream 6, cropped & edited

Pink Guava, White Chocolate & Macadamia Nut Ice Cream Recipe
Makes about 1.5 litres
Click here for a printable copy of this recipe

250ml (1 cup) full-fat milk (preferably organic)
pinch of salt
150g (3/4 cup) sugar
500ml (2 cups) heavy cream
6 large egg yolks (preferably free range)
1 teaspoon pure vanilla extract (maybe reduce to 3/4 teaspoon)
2x 410g tins guava halves
1 tablespoon cassis (optional)
125g macadamia nut white chocolate, cut into small chunks

Pink Guava, White Chocolate & Macadamia Nut Ice Cream 5, cropped & edited

Drain guava halves of all their syrup. Using a food processor or stick blender, process the guavas until you have a smooth puree, then strain to remove the seeds (you could probably do this in a food mill if you prefer). Add the cassis, stir well, then cover and refrigerate for several hours, ideally overnight.

Pink Guava, White Chocolate & Macadamia Nut Ice Cream 3, edited

Next, strain the cream into a 2 litre bowl, and then stand that bowl in an ice bath.

Lightly whisk the egg yolks in a separate bowl and set aside.

Combine milk, salt and sugar in a small saucepan and gently heat. Then slowly pour about half of the warmed milk into the egg yolks, stirring constantly to ensure the eggs don't curdle.

Return the warmed egg yolks and milk to the saucepan.  Then cook over a low heat, stirring constantly, until the custard is thick enough to coat the back of a spoon or spatula.

Strain the custard into the cream, which is standing over its water bath, and keep stirring until the custard is completely cool.  Stir in the vanilla extract.

Cover with cling film, pressing it right down onto the surface of the custard, and then refrigerate for several hours, ideally overnight.

Pink Guava, White Chocolate & Macadamia Nut Ice Cream 2, edited

Mix the custard and the guava puree together, and then churn in your ice cream maker according to the manufacturer's instructions.

Pink Guava, White Chocolate & Macadamia Nut Ice Cream 1, edited

Remove churned ice cream to a cold bowl.  Stir through the chopped up chocolate.

Serve immediately, or freeze in a suitable container until ice cream has firmed to your desired consistency.

For ice cream inspiration and perfection, I recommend:

The Perfect Scoop: Ice Creams, Sorbets, Granitas, and Sweet Accompaniments


I'm submitting this post to the Two for Tuesdays blog hop.

Saturday, August 21, 2010

Raspberry Gelato Recipe - Cooking Italy 9


Raspberry Gelato 1, cropped & edited

It's still the "fag end" of winter here, and we are still being subjected to fairly regular polar blasts coming straight off the Antarctic;  the mountains are still covered in snow and, despite the emergence of daffodils and some early blossom, warm, sunny spring weather still seems a little way off.  But for all that, no matter how cold it is outside, the dessert of choice for me is still usually something frozen - give me a bowl of sorbet or ice cream over an apple pie any day!  I infinitely prefer, no matter what the weather, a cold dessert to a hot one.  There is, however, one notable exception - my all-time-most-favourite dessert (the one I would ask for if I was on death row, heaven forfend) - and that is my Dad's steamed pudding.  There is just something about a dish which is made with a father's love that tastes better than anything else on earth.  (Note to self:  see if I can get Dad to show me how to make it and share the recipe, so that I can share it with you.)

But I have digressed.  Such is my passion for frozen desserts that I always have several tubs, in varying flavours, in the freezer at any one time.  What's more, that passion seems to have grown immeasurably since I discovered how ridiculously easy it is to make your own.  Not only is making your own sorbets and ice creams incredibly easy, you also know exactly what is in them - no artificial ingredients (thickeners, stabilisers, emulsifiers, things you can't pronounce - ick!) - just beautiful, fresh, natural ingredients (fresh, seasonal fruit, free-range eggs, cream, milk, maybe some vanilla).  Little wonder that home-made ice creams and sorbets taste soooooo good!

So that I can enjoy my frozen desserts all year round, I freeze fruit during the summer for turning into sorbets and ice creams during the winter.  I poach or roast fruits like apricots, peaches and nectarines, then bag them up in whatever quantity I need for a batch of ice cream, taking care to note on the bag what sugar went into the preparation of the fruit.  Berries I simply freeze, free-flow, and then bag.  I do all this, rather than making big batches of the ice cream or sorbet when the fruit is in season, because frozen desserts don't really keep so well much beyond about 3 months - it's not really that they "go off" so much, but they tend to get icy and the texture changes.  So I find it is better to freeze the fruit, and make batches of dessert as I need them.

Given my love for frozen desserts, I was very excited that one of our assignments this month for the Cooking Italy group was gelato - any flavour we liked, using this recipe from PickYourOwn.org.  Immediately, my imagination started to run wild - I had some roasted peaches in the freezer, and some amaretti biscuits leftover from some Sweet Potato Ravioli I had made a couple of weeks ago (post for that coming soon - promise), so Roasted Peach and Amaretti Gelato sounded pretty darn good to me.  Sadly the roasted peaches, turned out to be poached peaches, and since they were already in a vanilla-infused sugar syrup I decided to turn them into a sorbet instead, rather than risk upsetting the sugar-balance of the gelato (sugar doesn't freeze, so playing around with the quantity of sugar will affect how soft or firm your ice cream becomes).  So instead I opted to use up a bag of frozen raspberries from the freezer for a Raspberry Gelato.  I do still have roasted apricots and roasted nectarines in the freezer so they will get their turn next!

Now, before I go on, a word about ice cream makers.  I know that I have told you this before, but if you don't already own an ice cream maker, go and get one - contrary to what you may think, you don't have to spend a fortune.  You can get one for as little as about $40 (which will do a perfectly good job), and then the frozen confections which will come out of your kitchen will be limited only by your imagination.  I keep the bowl of my ice cream maker in the freezer at all times, so that I am always good to go when the urge takes me.

So what, you might ask, is the difference between gelato and ice cream - the best explanation I have found is this one given by David Lebovitz - but the simplest facts that I have been able to discern from a variety of sources is that gelato generally has less air and less fat than a traditional ice cream, resulting in a product which is more dense in texture and in which the flavour is not masked by the taste and texture of fat coating the palate.

This gelato is as simple as making an egg custard, pureeing some fresh fruit, and then letting the machine do the work - churn away.  The result is lusciously fruity, and with a greater ratio of milk to cream is not overly rich.  Incidentally this recipe uses 8 egg yolks, and in case you were wondering what to do with 8 egg whites (they can be frozen), I can recommend either Nigella's Prodigious Pavlova or Giada's Egg White Frittata with Lox and Arugula, both of which just happen to call for, yes you guessed it, 8 egg whites.  Talk about serendipitous!

Raspberry Gelato Recipe
Adapted from recipe on
Makes approx. 1.5 litres
Click here for a printable copy of this recipe

2 cups milk
1 cup sugar
1/4 cup skim milk powder
8 large free-range egg yolks
1 cup cream
1 teaspoon vanilla extract
3 cups raspberries
(if using frozen, thaw first)

Begin by setting up an ice bath - place a 2-quart (2l) bowl in a larger bowl partially filled with ice and water.  Set a strainer over the top of the smaller bowl and pour the cream into the bowl.

Separate the egg yolks into a medium bowl.  The whites can be discarded or set aside for another purpose.  Whisk the yolks until thickened.

Next heat the milk, sugar and powdered milk together in a large saucepan, bringing it to a gentle simmer and stirring to ensure the sugar is completely dissolved.

Remove from heat and gradually pour some of the milk into the yolks, whisking constantly as you pour.  Then pour the warmed egg yolk and milk mixture back into the saucepan containing the remainder of the milk.

Cook over low heat, stirring constantly and scraping the bottom of the pan with a heat-resistant spatula, until the custard thickens enough to coat the spatula.

Strain the custard into the bowl of cream, and stir over the ice bath until the custard is completely cool.  Add the vanilla extract.  Pour the custard into a jug (that will make pouring into the ice cream maker easier later on).  Cover with cling film, pressing the cling film right down onto the surface of the custard so that the whole surface is covered.  Refrigerate to chill thoroughly - at least about 8 hours, but preferably overnight.

Raspberry Gelato 6, edited

Now you're ready to make ice cream.  Puree the raspberries for a couple of minutes in the food processor or blender, and strain if you prefer to remove the seeds.  Remove custard from the fridge.

Raspberry Gelato 7, cropped & edited

Set your ice cream machine churning and pour in the custard followed by the raspberry puree.  (You could mix the custard and fruit together before pouring into your machine, but I found that my churn did a good job of mixing them for me.)  Churn according to manufacturer's instructions, then serve straight from the churn, or freeze for a couple of hours if you prefer a firmer texture.

Raspberry Gelato 5, cropped & edited

Visit my Cooking Italy page  to learn more about the group, find links to other participants in the group, and links to all the recipes I have so far contributed.

Interested in making more frozen desserts?  Then, I recommend The Perfect Scoop by David Lebovitz - you will also find loads of great recipes and information on his website.

The Perfect Scoop: Ice Creams, Sorbets, Granitas, and Sweet Accompaniments

Monday, February 8, 2010

Making the most of summer's bounty


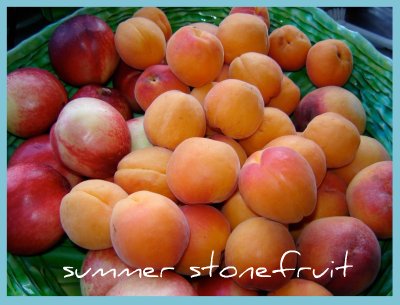
Well it's that time of year when my love affair with asparagus has given way to summer fruit. Really nothing says summer to me more than an abundance of apricots, peaches, nectarines, raspberries and strawberries, and this year (perhaps because the summer weather has actually been pretty crappy!) the fruit seems to be especially good. Interesting parallel - worst summer I can remember for about 15 years, best summer fruit I can remember for about as long.

So, needless to say, I have of course been indulging in plenty of unadulterated fresh fruit - big bowls of it every morning, but I've also been cooking with them and trying to set some aside to enjoy a bit of summer in the middle of winter.

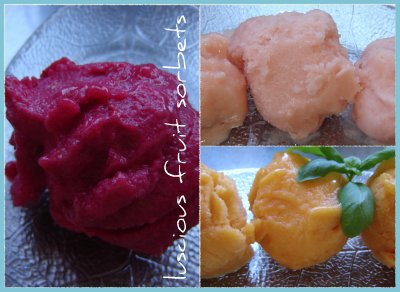
I've made lots of sorbet ...

... raspberry, white fleshed nectarine, and apricot. My apricot sorbet is made using this recipe from Stone Soup. For my nectarine sorbet I used David Lebovitz's recipe - David is after all close to Godliness, in my opinion, in matters of frozen desserts! That's my nectarine sorbet in the top right corner of the picture above, which as you can see is quite a lot paler than that in the picture on the recipe link. I suspect that is because the nectarines I had were white fleshed ones, and that yellow fleshed ones would deliver a deeper pink sorbet, though I still think my pale pink version is very pretty. My raspberry sorbet is made using the following recipe adapted from the "River Cafe Italian Kitchen" cookbook. This has really intense flavour, and the colour is just drop-dead gorgeous.

Raspberry Sorbet Recipe
Makes about 1.5 litres
vegan, gluten free


800g fresh raspberries
1 whole Meyer lemon, preferrably organic, plus
juice of 1/2 lemon
350g caster sugar

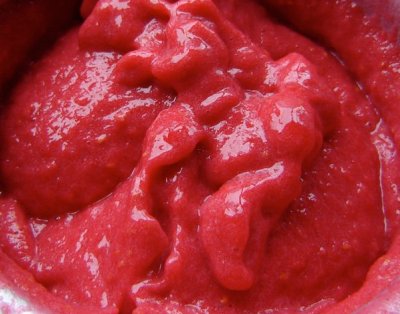
Wash the lemon thoroughly, and if you are not using an organic lemon give it a good scrub to remove any wax that might be on the skin. Then cut the lemon (skin and all) into smallish pieces, discarding any pips, and put into a food processor. Put the caster sugar into the processor with the lemon, and blitz until you have a thick puree with little bits of lemon peel still visible. Add the raspberries and blitz again until everything is combined. Add the lemon juice, and taste. At this point you may add a little more sugar if the raspberries are too tart, or you may want to add a little more lemon juice - the lemon flavour should be noticeable but not overpowering.

Chill the puree for several hours (I like to leave it in the fridge overnight). Then pour the puree into an ice-cream maker and churn according to your machine's directions.

First note: You may want to strain the puree before churning to remove the pips. Personally I don't - I think it is inherent in the nature of raspberries to have pips, and I like the slightly more rustic nature and texture of an unstrained sorbet.

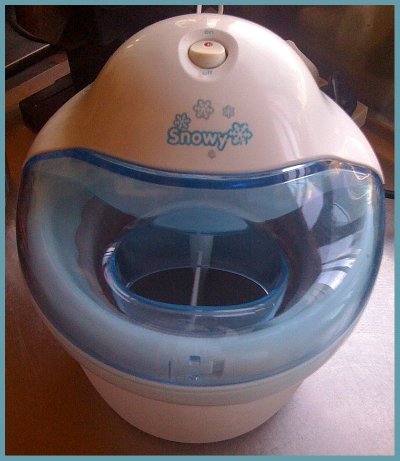
Second note: If you don't have an ice-cream maker - go and get one today before summer is over. I promise you won't regret it. Contrary to what you may think, this does not have to cost you a lot of money. Whilst it is true that I covet a "serious ice-cream machine", with a built-in refrigeration unit, that might set me back $1,000-$2,000, Mr Snowy here does the job just fine and he only cost about $40. I think normal retail for this is about $80, but I picked this up in one of those 50% off electrical goods sales that Briscoes have just about every second weekend. Or there are literally dozens of similar machines available on TradeMe at almost any time.


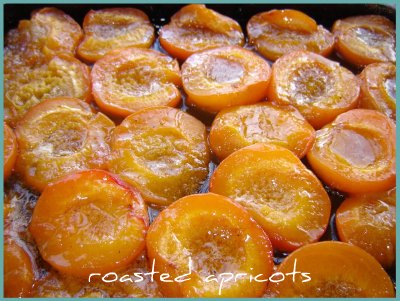
Of course the sorbet you make now is not going to keep all winter - after a while it starts to go all icy and the texture changes. But I'm very excited to have come across this recipe for Roasted Apricot Sorbet on Couldn't Be Parve. I haven't actually made this recipe yet (though I did pass the link on to a friend who has made it and declared it to be "absolutely divine"), but I have roasted several batches of apricots (6kg in all) and put them in the freezer to make into sorbet during the winter. Let me tell you that when I had a wee taste of the first batch I almost went weak at the knees - they taste soooooo good!! I know that these are going to make the most heavenly sorbet, but they would be divine as they are on good vanilla ice-cream, or dolloped on top of crumpets instead of jam, or used to fill a tart ... or just eat them straight out of the pan when no-one's watching.


I have plans to also roast some nectarines and some peaches this week, as I see no reason why I shouldn't be able to treat them exactly the same way. Will keep you posted on progress.


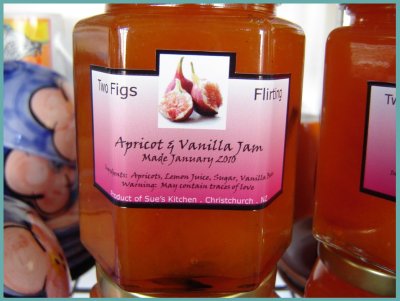
I made this jam, exactly according to the recipe and I will definitely make this again. There is absolutely nothing that I would change about this - it is probably the best apricot jam I think I've tasted for years. It is not too sweet and the set is just perfect - I think it's the lemon juice that helps on both these fronts. I ended up with about a dozen jars, and don't you just love my special labels I produced ....


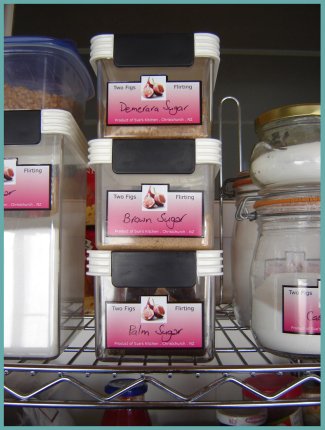
I'm so excited I have been labelling everything in my pantry!! These are relatively inexpensive, and available in any quantity - even very small quantities (just half a dozen, or even just 1 or 2) if you want them. If you're interested in some labels of your own for your pantry ingredients or preserves send me your query via the "Contact Me" box on the sidebar of this blog. I know that's a little bit Martha, but then for someone who is obsessive about folding (my folding of fitted sheets is legendary), this should come as no surprise.


I hope this has inspired you to do something with all that beautiful summer fruit that's out there right now. Please leave me a comment and let me know what you've been doing with summer's bounty.

Friday, August 7, 2009

Winter Vegetable Nonya Curry Recipe


It is no secret, amongst those who know me, that my culinary style is predominantly influenced by the flavours of the Mediterranean. However, Asian flavours also play a big role in my culinary repertoire - Indian and Thai food being particular favourites.

In fact I like nothing better, on a leisurely Sunday, than having the time to prepare an Indian feast from scratch - having the time to roast and grind spices, grate fresh coconut to make coconut milk, a trip out to the Asian supermarket to pick up any ingredients I may not have, making my own curry pastes, pickles, chutnies and home-made flatbreads, and maybe even a batch of ice cream to finish off with.

I love the way that being involved in every step of preparing such a meal somehow makes me feel closer to generations of women who still spend much of their daily lives preparing food for their families in just this way. Spiritually speaking, I get that we are all connected, but something about cooking in this way really reinforces that connection for me. First sniff of cumin and I am immediately transported to a humble Indian village, where women squat around simple fires and cooking pots to cook for their loved ones. To me, there is a physicality to the grinding of spices, grating coconut, roasting of nuts, slicing & dicing vegetables, rubbing and marinating meats that completely absorbs me. I find that I am able to be very "present" throughout the process - this to me is really cooking from the heart. Furthermore, there is no doubt in my mind that even the simplest of food which is prepared with love, tastes of love.

I think our mothers and grandmothers understood this. We all know that no-one else's apple pie, for example, tastes quite like Mum's. Now, in reality, there is probably nothing particularly special about Mum's apple pie. But she makes that pie with love for her family and friends. I am convinced that on some level that is transmitted to us - it comes through in the taste, maybe we witness the way she chops the apples with a small smile on her face, or sings softly to herself as she prepares the pastry. And so, I believe, Mum's apple pie satisfies us on an emotional level in a way that no other apple pie can.

Today, however, most modern women are juggling careers as well as home lives, and simply don't have the time to spend several hours a day channeling the domestic goddess. I am no exception. Modern women often need to fall back on a bit of "convenience feeding" and, as a result, many children today are raised on a diet of pre-packaged microwave meals and take-outs. I actually have a theory that overeating in an effort to try and satisfy the emotional appetite has much to do with today's obesity problems - I don't think it is only about the high fat, sugar and sodium levels of many convenience foods.

It doesn't, however, have to be this way. With a well-stocked pantry, and a little bit of planning and forethought, great tasting food can come out of your own kitchen in a matter of minutes. Weekends are a great time to pre-prepare meals which can be frozen - soups, curries, and casseroles all freeze and reheat really well. A crockpot is also a really useful gadget to have in the kitchen - it takes barely moments to put a few ingredients into the slow cooker in the morning, and come home to a hot and satisfying meal at the end of the day.

I teach yoga classes most evenings, not usually finishing work until 8pm. Because I also need to get up pretty early in the morning to teach classes again and do my own practice, I need to get to bed fairly early as well. That means that I need to be able to turn out a meal fairly quickly after my work day is over. So I have to be fairly well organised - I can often find time to do a little bit of preparation in between classes (maybe chop vegetables, or other ingredients, get any pans or utensils out that I plan to use, etc). A real key to this for me is keeping my pantry well stocked with things like tins of tomatoes, jars of artichoke hearts, sun dried tomatoes & olives (things that can be thrown together in a flash with a bit of pasta and a grating of parmesan). Tinned beans and chickpeas are also a great stand-by - generally I like to cook my own and keep a few bags of them in the freezer, but a tin on the pantry shelf is great for an emergency. And jars or sachets of various curry pastes are fantastic for a meal in minutes - yes, it is great to spend the time making your own, and that is certainly my ideal - but it is just not always realistic.

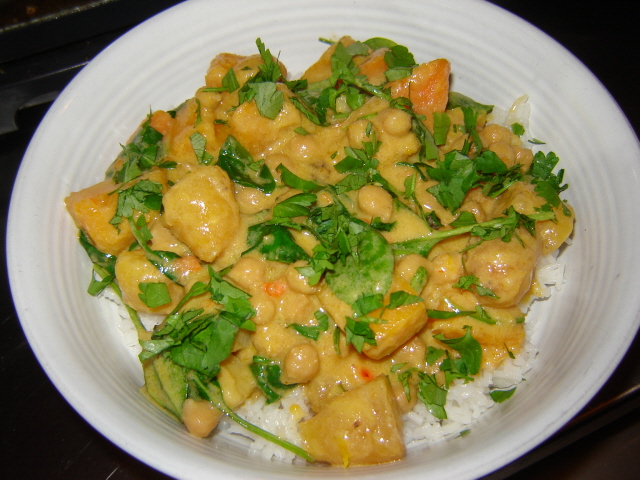
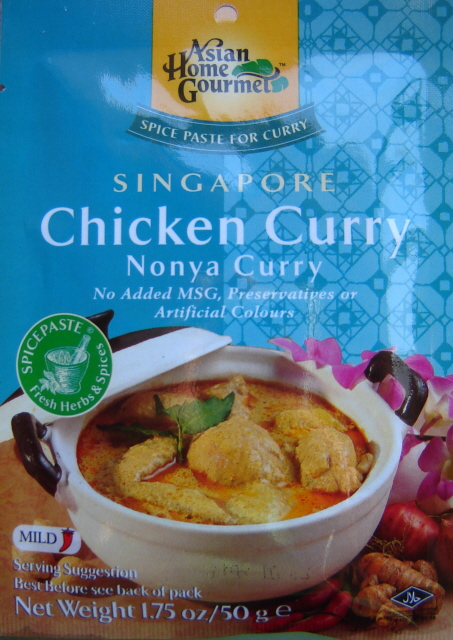
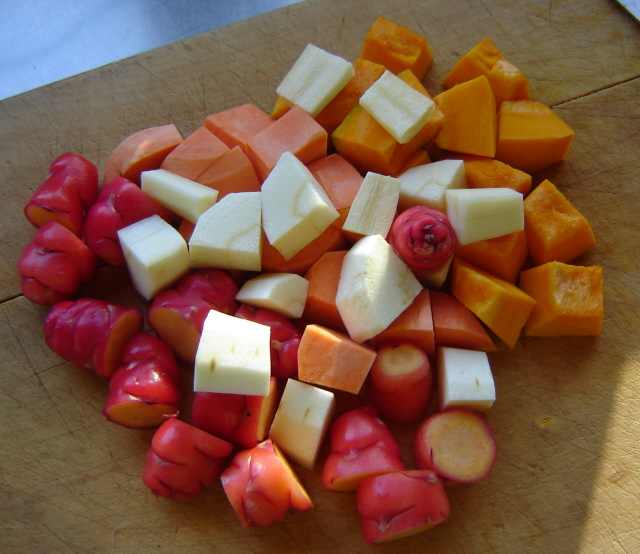
This recipe then, is one I make a lot - I can make this curry in the time it takes to cook the rice - that is less time than it would take to order and pick up a takeaway. I always have a sachet of this Nonya curry paste (amongst others) in the cupboard, as well as a can of coconut milk, and adding plenty of fresh vegetables I don't feel I am compromising anything in the way of flavour or nutritional value. Give it a bit more zing with some fresh chilli, lemon juice and herbs. Serve with some rice or roti on the side, and this really makes a great meal. I frequently make this just with pumpkin and chickpeas, but a quick look in the vege bin the other day revealed that I also had half a kumara (sweet potato), half a parsnip, and a few yams that needed to be used up, so in they went too. I have to admit I wasn't quite sure how well the parsnip would work in this, but it was actually great. Feel free to experiment with any combination of vegetables, and leave me a comment if you come up with some additions that work well for you.

Winter Vegetable Nonya Curry Recipe

Click here for a printable copy of this recipe

Vegetarian
Serves 3-4

400-500g chopped firm vegetables
(pumpkin, sweet potato, yams, parsnip)
1 red chilli
1-1/2 cups cooked chickpeas
1 sachet Asian Home Gourmet Nonya Curry paste
(refer Source Guide)

425ml can coconut cream
1 tablespoon vegetable oil
2 handfuls of fresh baby spinach
1 lime, grated zest & juice
bunch fresh coriander


Chop assortment of vegetables into bite size pieces, about 1.5-scm. Remove seeds and membrane from the chilli, and finely slice.

Heat oil in saucepan over medium heat. Once hot, stir curry paste into the heated oil, reduce heat to low-medium, and cook paste, stirring constantly for 1 minute.

Add chopped vegetables and sliced chilli to the pan, stir thoroughly until all vegetables are coated with the paste, and cook for a further 3 minutes, stirring from time to time.

Add the can of coconut cream to the pan, reduce heat to low and simmer until vegetables are just tender - about 10 minutes.

Once vegetables are tender, add chickpeas to the pan and continue to cook just long enough to warm the chickpeas through.

Remove pan from the heat, add the spinach and stir until the spinach is just wilted. Stir in the grated zest and juice of the lime.

Serve immediately over steamed rice, and top with chopped fresh coriander.


Frozen Lemon Yoghurt


To finish? I happened to have some of this Frozen Lemon Yoghurt in the freezer that I made according to this recipe from David Lebovitz. This is gloriously tangy and refreshing, ridiculously easy to make, and was the perfect ending to a meal such as this.

All in all, this was a great meal in a hurry, with absolutely no guilt attached.