Saturday, February 27, 2010

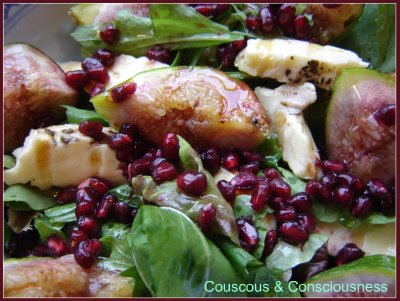
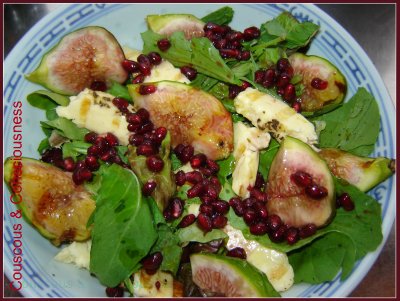
Grilled Fig, Haloumi & Pomegranate Salad


Over Christmas I was lucky enough to add a few great new cookbooks to my collection.  One, "Ottolenghi, The Cookbook", was a Christmas present to myself picked up on a trip to Auckland from Cook the Books. The other two, Donna Hay's latest book "Seasons" and "Falling Cloudberries" by Tessa Kiros were acquired with some book vouchers I got for Christmas from my very generous and adoring Dad.

These are some wonderful books, and over the next few weeks I plan to share with you some of the things I've been making from these books.  Today, I want to take you inside the Donna Hay book.


This book is the best of her quarterly, seasonal magazines that I am sure many of you love - everything is presented with her inimitable style and flair.  I love her ability to transform just a few simple ingredients (so many of her recipes seem to have just half a dozen ingredients), without complicating them in any way, into something wonderful.  The book features such gems as: Spring - "paper-bag snapper with preserved lemon" and "milk chocolate and coffee layer cake";  Summer - "yellow cherry tomato tarte tatin" and "white peach and fig granita";  Autumn - "pumpkin, spinach and goat's cheese pie" and "sticky orange and vanilla upside-down cake";  and Winter - "olive-crusted veal with feta mash" and "pear and espresso panna cotta.  This book really makes me look forward to the changing seasons.  There is plenty in this book for both vegetarians and meat eaters alike, and for anyone who likes simple, fantastic tasting food without the fuss.

Today's recipe - grilled fig, haloumi and pomegranate salad - is from the summer section of the book.  It is the very first page I opened the book at when I found it in the book store, and I was immediately hooked. As you might expect, this salad took just a few minutes to put together, but it seemed like something utterly special and luxurious.  This has much to do, no doubt, with the fact that here in New Zealand fresh figs are actually a bit of a luxury and are available for such a short time.  This would certainly be a fabulous dish to serve up to someone you want to impress or spoil for a special occasion or, as I did, have something really special when you have to dine alone.


In the original recipe, Donna suggests frying the haloumi in some olive oil;  however, I chose to grill it and was happy with the results.  Since I had the grill out, I thought that grilling the figs might be nice, although the original recipe didn't call for doing anything to them other than cutting them in half.  I did hedge my bets though - as I wasn't sure whether I would prefer grilled or plain figs I only grilled half of them.  As it turned out, I loved the way that grilling them seemed to really intensify the sweetness and juiciness of the figs, so next time I would grill them all.

Grilled Fig, Haloumi & Pomegranate Salad Recipe
Click here for printable copy
Adapted from "Seasons" by Donna Hay
Vegetarian
Serves 2

1/2 cup mint leaves
large handful rocket (arugula) leaves
4 green figs, halved
200g haloumi, sliced thinly
1/2 pomegranate, seeds and juice removed
1 tablespoon red wine vinegar
2 tablespoons extra virgin olive oil

Heat a ridged grill pan until hot.  Cook the haloumi on both sides until nice char marks are starting to appear, and the cheese is just starting to soften.  Cook the figs, cut-side down, until lightly charred and juices are beginning to run.  Remove from the grill.

Allow to cool slightly, then cut or tear the haloumi into smaller pieces.  Cut the fig halves in half again (so now your figs are in quarters).

Remove the seeds from the  pomegranate (I like the "spanking" method - incredibly satisfying), and retain any juice that comes out with them.

Arrange the figs, haloumi, mint and rocket leaves in a bowl or platter.  Sprinkle the pomegrante seeds over the top and drizzle over the juice.

Lightly combine the red wine vinegar and extra virgin olive oil, and drizzle over the salad.  Toss gently to combine.

I'm also submitting this post to Cookbook Sundays, hosted by the lovely Brenda at Brenda's Canadian Kitchen.  She's worth a visit any day of the week, but why not head over there right now and see who else has dusted off their cookbooks - you'll almost certainly find some great recipes, and maybe you'll discover a new book you'd like to add to your collection.

cookbook sundays

Monday, February 15, 2010

Tomato Bruschetta Recipe - Cooking Italy


There are few things that I like better than curling up on the sofa with a good book, and when it comes to time out to do just that my preferred reading material would usually be a good cookbook rather than a gripping novel. As you might imagine then, I have quite a good collection of cookbooks; although, I still have an equally extensive "wishlist" of culinary tomes that I would like to add to the shelves.

Now you've heard me mention before my love for Italian food, and as you might expect I draw constantly on a number of Italian cookbooks for my inspiration. In that vein, one cook and author who inspires me, and whose books have been on my wishlist for quite some time, is Marcella Hazan. Imagine my excitement then, when on a recent visit to Spinach Tiger (one of the food blogs I visit regularly), I stumbled across the Cooking Italy group - a group of like-minded food lovers and bloggers who are learning to cook regional Italian food together by cooking their way through Marcella's book The Essentials of Classic Italian Cookery.


Each month Angela (aka Spinach Tiger, and the group founder and co-ordinator) posts a selection of dishes from the book, which the group will then cook, discuss and post their results. Of course, because most of the group are in the northern hemisphere, I will at times be seasonally out of step with everyone else. (Right now, for example, while I'm up to my armpits in peaches and tomatoes, most of the group are up to their knees in snow!!) Which means that sometimes I'll simply choose something from the list that they made 6 months ago - get the picture.

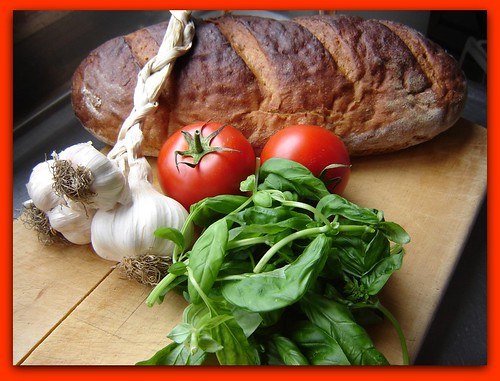
And so I come to my first dish, and coincidentally the very first dish the group prepared as well - Tomato Bruschetta (pronounced brusketta by the way). Seasonally, of course, this is the perfect time for this dish. But it also strikes me as very fitting that this should be the first dish that I make, as it absolutely epitomises for me what Italian food is all about - that the best food arises from cooking with exceptional, seasonal, locally produced ingredients, simply prepared - food which highlights the quality of the ingredients rather than showcasing the talents of the chef.  In that vein, this is a relatively simple dish to put together, but there is no place to hide here - you need to use the very best ingredients that you can get your hands on. Here in the New Zealand summer (such as it is) all of the ingredients required are at their best right now, and I got everything I needed at the Christchurch Farmers Market on Saturday - everything locally grown or produced, with the exception of the garlic which had travelled a few hours down the road from Marlborough.

This would be a good appetiser, but I enjoyed it for a light lunch so much that I have had it nearly every day since (nice change from the hummus and pumpkin seed crackers that I usually have).

So about those ingredients - choose a good, crusty sourdough or artisinal loaf - something that is going to retain good body, texture and chew once it has been grilled - this is not the time for the Tip Top white sliced! Tomatoes should be perfectly ripe, preferably organic, - don't even think about making this with those pale, insipid, tasteless hot house tomatoes in the winter. Roma tomatoes are recommended for this, because they have more flesh and less seeds than other varieties, but the ones I had were just fine. Garlic - fresh only - no garlic paste out of the jar! Basil - obviously fresh, not dried - although I would suggest that if you don't have fresh basil to hand, a bit of pesto "dobbed" on top or some rocket (arugula) would be great alternatives. Lastly - olive oil - the very best extra virgin olive oil that your budget will allow.

Tomato Bruschetta Recipe
adapted from Marcella Hazan's "The Essentials of Classic Italian Cooking"
Click here for printable copy of recipe


These are the quantities I used for a lunch for one, and you can just use that as a per person guide if you are serving several people

1 garlic clove
2 thick slices good, crusty bread
1 large fresh, ripe tomato (or 2 if they're small)
3-4 basil leaves , torn into small pieces
extra virgin olive oil
flaky sea salt
black pepper, freshly ground

Cut tomatoes in half, remove seeds and cut into small dice.

Grill or toast the bread until crisp and golden. (Although this was not suggested in the recipe, I drizzled the bread with a little olive oil first and was pleased with the result.)

Cut the garlic clove in half, and then rub the cut side over the toasted bread. You will be surprised at how much flavour this imparts without having to mix minced or chopped garlic into the tomatoes.

Top the now garlic-infused toast with the diced tomatoes, torn basil leaves, and drizzle with olive oil.

Season with the salt and pepper, and serve immediately.

Summer on a plate - enjoy!!

Monday, February 8, 2010

Making the most of summer's bounty


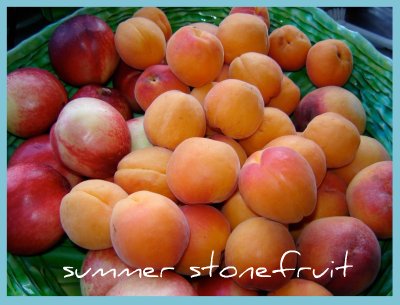
Well it's that time of year when my love affair with asparagus has given way to summer fruit. Really nothing says summer to me more than an abundance of apricots, peaches, nectarines, raspberries and strawberries, and this year (perhaps because the summer weather has actually been pretty crappy!) the fruit seems to be especially good. Interesting parallel - worst summer I can remember for about 15 years, best summer fruit I can remember for about as long.

So, needless to say, I have of course been indulging in plenty of unadulterated fresh fruit - big bowls of it every morning, but I've also been cooking with them and trying to set some aside to enjoy a bit of summer in the middle of winter.

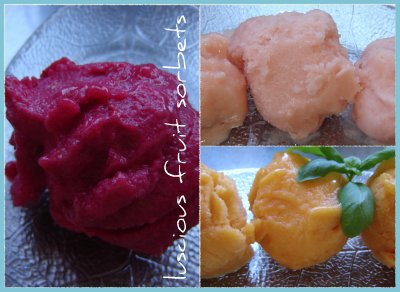
I've made lots of sorbet ...

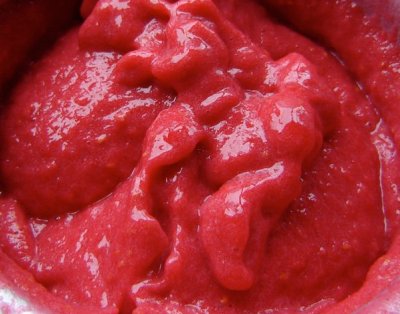
... raspberry, white fleshed nectarine, and apricot. My apricot sorbet is made using this recipe from Stone Soup. For my nectarine sorbet I used David Lebovitz's recipe - David is after all close to Godliness, in my opinion, in matters of frozen desserts! That's my nectarine sorbet in the top right corner of the picture above, which as you can see is quite a lot paler than that in the picture on the recipe link. I suspect that is because the nectarines I had were white fleshed ones, and that yellow fleshed ones would deliver a deeper pink sorbet, though I still think my pale pink version is very pretty. My raspberry sorbet is made using the following recipe adapted from the "River Cafe Italian Kitchen" cookbook. This has really intense flavour, and the colour is just drop-dead gorgeous.

Raspberry Sorbet Recipe
Makes about 1.5 litres
vegan, gluten free


800g fresh raspberries
1 whole Meyer lemon, preferrably organic, plus
juice of 1/2 lemon
350g caster sugar

Wash the lemon thoroughly, and if you are not using an organic lemon give it a good scrub to remove any wax that might be on the skin. Then cut the lemon (skin and all) into smallish pieces, discarding any pips, and put into a food processor. Put the caster sugar into the processor with the lemon, and blitz until you have a thick puree with little bits of lemon peel still visible. Add the raspberries and blitz again until everything is combined. Add the lemon juice, and taste. At this point you may add a little more sugar if the raspberries are too tart, or you may want to add a little more lemon juice - the lemon flavour should be noticeable but not overpowering.

Chill the puree for several hours (I like to leave it in the fridge overnight). Then pour the puree into an ice-cream maker and churn according to your machine's directions.

First note: You may want to strain the puree before churning to remove the pips. Personally I don't - I think it is inherent in the nature of raspberries to have pips, and I like the slightly more rustic nature and texture of an unstrained sorbet.

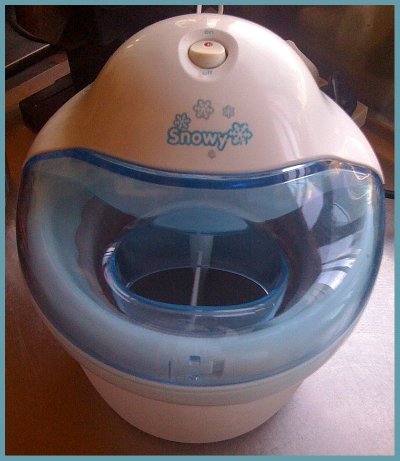
Second note: If you don't have an ice-cream maker - go and get one today before summer is over. I promise you won't regret it. Contrary to what you may think, this does not have to cost you a lot of money. Whilst it is true that I covet a "serious ice-cream machine", with a built-in refrigeration unit, that might set me back $1,000-$2,000, Mr Snowy here does the job just fine and he only cost about $40. I think normal retail for this is about $80, but I picked this up in one of those 50% off electrical goods sales that Briscoes have just about every second weekend. Or there are literally dozens of similar machines available on TradeMe at almost any time.


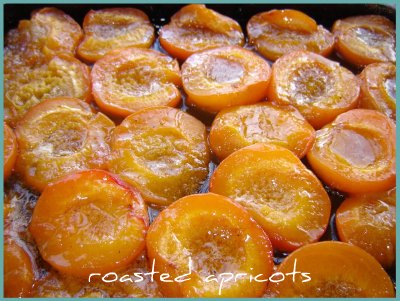
Of course the sorbet you make now is not going to keep all winter - after a while it starts to go all icy and the texture changes. But I'm very excited to have come across this recipe for Roasted Apricot Sorbet on Couldn't Be Parve. I haven't actually made this recipe yet (though I did pass the link on to a friend who has made it and declared it to be "absolutely divine"), but I have roasted several batches of apricots (6kg in all) and put them in the freezer to make into sorbet during the winter. Let me tell you that when I had a wee taste of the first batch I almost went weak at the knees - they taste soooooo good!! I know that these are going to make the most heavenly sorbet, but they would be divine as they are on good vanilla ice-cream, or dolloped on top of crumpets instead of jam, or used to fill a tart ... or just eat them straight out of the pan when no-one's watching.


I have plans to also roast some nectarines and some peaches this week, as I see no reason why I shouldn't be able to treat them exactly the same way. Will keep you posted on progress.


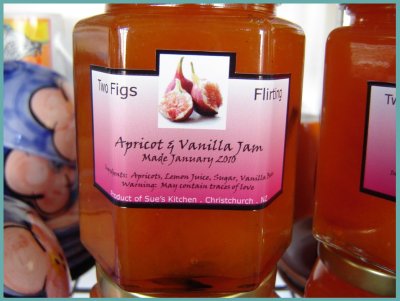
I made this jam, exactly according to the recipe and I will definitely make this again. There is absolutely nothing that I would change about this - it is probably the best apricot jam I think I've tasted for years. It is not too sweet and the set is just perfect - I think it's the lemon juice that helps on both these fronts. I ended up with about a dozen jars, and don't you just love my special labels I produced ....


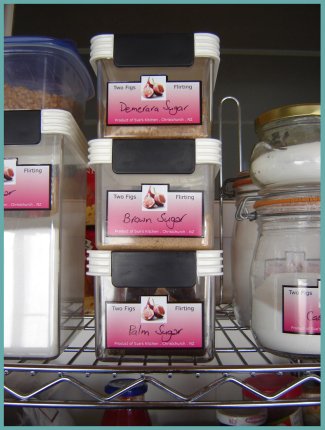
I'm so excited I have been labelling everything in my pantry!! These are relatively inexpensive, and available in any quantity - even very small quantities (just half a dozen, or even just 1 or 2) if you want them. If you're interested in some labels of your own for your pantry ingredients or preserves send me your query via the "Contact Me" box on the sidebar of this blog. I know that's a little bit Martha, but then for someone who is obsessive about folding (my folding of fitted sheets is legendary), this should come as no surprise.


I hope this has inspired you to do something with all that beautiful summer fruit that's out there right now. Please leave me a comment and let me know what you've been doing with summer's bounty.

Friday, February 5, 2010

Chocolate Panettone French Toast Sandwiches


Today is, believe it or not (and really how could you not), World Nutella Day! Three years ago Michelle at Bleeding Espresso and Sara at Ms. Adventures in Italy decided to give the celebration of Nutella its own special holiday, and World Nutella Day was born. To a Nutella lover, it seems incredibly fitting to me have a special day on which to totally indulge in this pleasure.


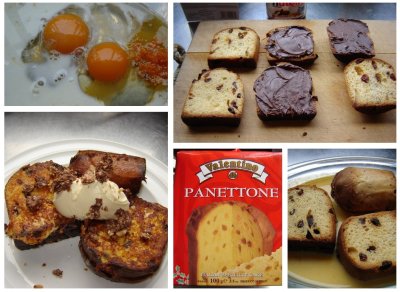
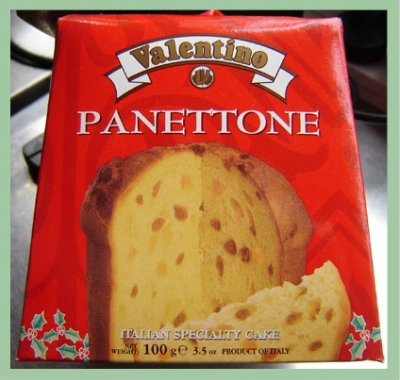
So, of course, a celebration brunch was called for! As I just happened to have a panettone (a gorgeous Italian fruit cake, which is frequently served at Xmas - refer Source Guide) sitting in the pantry, some Nutella french toast sandwiches seemed like a good idea.


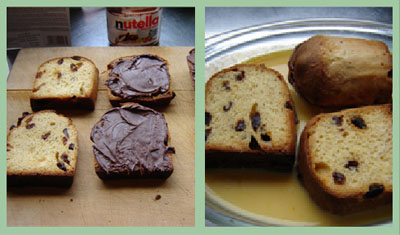
First of all you need to make a nice eggy bath for your sandwiches, using free-range eggs, grated orange zest, orange juice, milk, and a dash of maple syrup or honey.


Next cut the panettone into thick slices, and spread half of the slices thickly (this is not the time for a "thin smear") with Nutella. Sandwich together and then give your sandwiches a nice soak in the egg mixture while you melt a bit of butter in a pan.


Once the pan is hot, add the sandwiches and brown on both sides. Serve immediately with a dollop of mascarpone cheese, and finish off with a sprinkling of crushed "Ferrero Rocher" chocolates on top.


Chocolate Panettone French Toast Sandwiches Recipe

6 thick slices of panettone, or other stale bread
2 free-range eggs
grated rind & juice of half an orange
1/4 cup milk
1-1/2 teaspoons maple syrup
lashings of Nutella
1-1/2 tablespoons butter
mascarpone
2 or 3 Ferrero Rocher chocolates, crushed

Put eggs, orange juice and zest, maple syrup and milk in a wide, shallow dish, and whisk lightly to combine. Set aside.

Spread Nutella on three of the panettone/bread slices. Spread as thickly as you can without breaking the bread. Place the other three bread slices on top to make sandwiches.

Drop butter into a frying pan, and set over medium-high heat. Meanwhile, put sandwiches into the egg bath, coating both sides separately. Once the pan is hot and the butter is melted, add the sandwiches to the pan, and cook until browned on both sides.

Remove to a serving plate. Place a dollop of mascarpone cheese on top and sprinkle with the crushed chocolates.

Enjoy!

Do you have a favourite way to enjoy Nutella? - I'd love to hear about it.

Saturday, January 23, 2010

Pappardelle with Chicken, Broccoli & Pesto Sauce


This is one of those great pasta dishes, that with a little bit of before-hand preparation (some of which can even be done the day before) comes together in just a few minutes at the end. This works really well for me with teaching in the evenings, as I can have everything prepped well in advance and then completion takes only as long as it takes to boil water and cook pasta - about 15 minutes max! It's also another one of those "everything in one bowl" dinners that I love.

Let's begin with the pesto. I have to be honest and say that for years I have always bought ready-made pesto and never bothered to make my own. That was until recently when I tried a store bought pesto that I hadn't used before - horror of horrors, it was so awful, it actually rendered the dinner I made inedible - it tasted incredibly sweet! Yes, sweet. "But how could this be?" I thought - there's no sugar in pesto. Imagine my horror when I then went and looked at the contents label on the pottle, and sure enough there was sugar in it. Determining, not to ever make that mistake again, I began to examine the contents labels of other pestos and that is when I discovered that many of them contain a whole lot of stuff (including often sugar) that in my opinion has no place being in pesto. I don't really know why I've never looked at that before, as I normally look at ingredients labels quite carefully on most things, but somehow pesto had slipped under my radar. Since then I have been making my own, and have been astounded to discover just how much better it tastes. What's more pesto can be frozen, so you can enjoy home-made pesto long after basil season has finished. I have been using this recipe by Lidia Bastianich and to begin with I was just using the "bung everything in the food processor" method - not that there's anything wrong with that. However, more recently I have begun using the mortar and pestle and doing it by hand and the results are just outstanding - the texture is far superior and every ingredient seems to retain its individual characteristics. Additional advantages of this method are, firstly, much less cleaning up, and secondly, the triceps get a good work-out - say goodbye to those "flappy" upper arms!


So this can easily be made the day before, or even several days before for that matter. If you have made it in advance, I recommend that you take it out of the fridge an hour or two before you want to use it to return to room temperature. Also if you are making it in advance, I suggest that you don't put all of the oil that is asked for into the pesto while you are mixing it up - just reserve a teaspoon or two. Then put your finished pesto into a small dish or bowl, and try to level out the top as much as possible. Then pour the reserved oil in a thin layer over the top, completely covering it - this helps to stop the pesto from turning brown on exposure to the air, and that oil can just be mixed into the pesto before you use it.

Now for the chicken. You could use chicken thighs or breasts for this, cut into pieces, tossed in a little bit of olive oil, lemon juice, salt, pepper, and fresh rosemary, and then sauteed. Personally, I always use free-range, organic chicken, but have found that buying individual pieces seems to be hellishly expensive. Solution - I buy a whole chicken, roast it, use half for this recipe, then use the other half for something else (often a chicken and seafood paella) the next night. I often also use this same method and make this Chicken Carbonara recipe by Giada de Laurentiis - certainly not a very traditional "carbonara" recipe, but a great dish nonetheless.


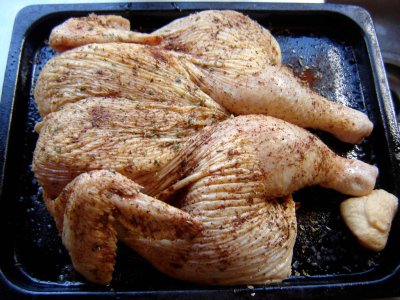
I like to butterfly my chicken and remove the backbone. (The backbone then goes into a large snaplock bag in the freezer - ditto any leftover chicken from a roast chicken dinner - and once the bag is full the whole lot gets made into chicken stock.) The chicken is then laid out flat, drizzled with a little olive oil and seasoned on the inside. Then flipped over, drizzled again with a little olive oil, and more salt and pepper. Then I might further season one half of the chicken with perhaps lemon juice and rosemary (for this recipe) and the other half with perhaps paprika and oregano for the paella, or some other seasoning that would be appropriate for its intended end purpose. So this is the beauty of butterflying - it is really easy to treat each half of the chicken separately. The chicken then gets roasted at 180 degrees for about 45 minutes to an hour depending on the size of the bird.

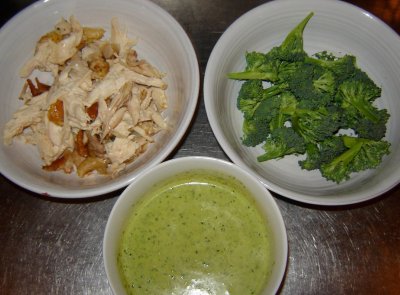
Once roasted and cooled enough to handle, I remove all the flesh from the chicken, putting each half into a separate container and into the fridge. This can be done several hours before you need it or even the day before. Once all the flesh has been removed from the carcass, and the carcass is completely cold, it then joins the backbone in the freezer bag for stock.

Not much to the broccoli really - this just gets cut into florets, and of course this could also be done well in advance. Actually, I often use broad beans (fresh or frozen) instead of broccoli in this recipe, and they too can be blanched and shelled well ahead of time.

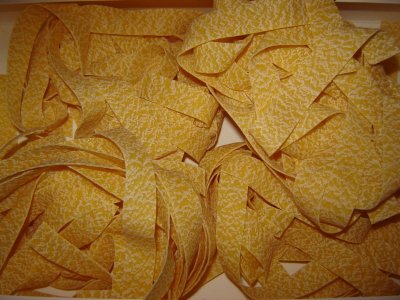
My preferred pasta for this recipe is this gorgeous egg pappardelle that I get from the Mediterranean Food Warehouse but you could use any pasta that you like.


Pappardelle with Chicken, Broccoli & Pesto Sauce Recipe
Click here for a printable copy of this recipe


For pesto:
approximately 2 cups of basil leaves
pinch of salt
2 cloves of garlic
3 tablespoons pine nuts, lightly toasted
2 tablespoons pecorino cheese, grated finely
2 tablespoons parmesan, grated finely
3-4 tablespoons olive oil
(Note: if you don't have pecorino cheese, substitute with extra parmesan)


Put a few of the basil leaves in a mortar with the salt and begin to crush. Continue adding leaves, a few at a time. Once all the leaves have been added, add the garlic to the mortar, and continue to pound with the pestle until a paste forms.

Add the pine nuts, and crush them into the paste. Then add the cheese, work that in a little, and then add the olive oil one tablespoon at a time. Keep working until you have a creamy paste.

This will make about 1 cup of pesto.

For the pasta:
1 cup of pesto
100-125ml cream
2 cups of cooked chicken, shredded
2 cups of broccoli florets
250g pappardelle (or other pasta)
1-2 tablespoons olive oil
generous handful pine nuts, lightly toasted
freshly grated parmesan to serve

Mix pesto with cream, until you have a pourable, sauce-like consistency. Set aside.

Drop pasta into boiling salted water. About 4 minutes before the pasta has finished cooking, add the broccoli to the pan and allow it to cook with the pasta.

Once the pasta is cooked, set a colander over the serving bowl that you intend to use, and begin to drain the pasta into the colander - take care not to "overflow" the bowl - once the bowl is full, move the colander to the sink and continue to drain. This does two things - firstly, you now have a really nice hot bowl in which to serve your finished dish, and secondly, you have some reserved pasta water if you need it to "loosen" the sauce. Drizzle a little olive oil over the pasta, and shake gently to distribute.

Return the empty pasta pot to the heat, along with about 1 tablespoon olive oil. Add the chicken to the pan and heat through - about 1 minute. Then return the pasta and broccoli to the pan. Pour over the pesto and cream, and toss everything gently together over the heat, until the sauce is warmed through and coats everything well. Add some of that reserved pasta water if you need to. Taste and add some salt and pepper if necessary.

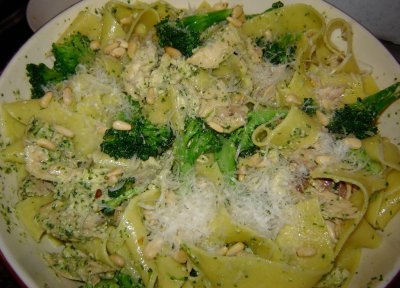
Drain water out of the warmed bowl. Add pasta to the bowl, sprinkle toasted pine nuts and grated parmesan over the top. Serve with extra parmesan.

This makes 3 very generous portions, or could easily feed 4 with some bread and salad on the side.

Buon Appetito!

Tuesday, January 12, 2010

Chargrilled Calamari, Asparagus & Rice Noodle Salad Recipe


Once summer comes I whole-heartedly embrace "salad season". By this I mean a substantial salad which on its own constitutes a meal - such is my idea of the perfect summer meal!

Such a salad should, in my opinion, contain firstly some protein - this could come in the form of:

  • Cheese - grilled haloumi, feta, blue cheese, brie, soft goats-milk cheeses, bocconcini or mozzarella are all great in salads
  • Poultry - try chicken, duck or quail
  • Fish and seafood - salmon, smoked white fish, prawns, lobster, crab, squid, mussels are all wonderful additions to any salad
  • Meat - personally I don't use much meat in my salads other than perhaps some chorizo sausage or some crispy prosciutto or pancetta, but you could certainly experiment with the inclusion of some rare lamb or beef
  • Nuts and seeds - I like cashews, pecans, walnuts, pine nuts, hazelnuts, almonds, pistachios, peanuts, sunflower seeds, pumpkin seeds and sesame seeds
  • Pulses - try chickpeas, lentils, cannellini beans, lima beans, borlotti beans
  • And yes, if you must, tofu - I have to say it definitely wouldn't find its way into any salad of mine, but it would certainly be a good inclusion for those whose gastronomic ethos doesn't extend to the consumption of various other forms of protein and, apparently, some people even like it.

Secondly, I like a grain of some sort - noodles, pasta, rice, quinoa, couscous, croutons are a few suggestions. It is useful to know, if your diet doesn't include any animal products, that pulses combined with grains form a complete protein.

Thirdly, a great meal in a salad should have great texture and colour - consider the inclusion of some fruit (fresh or dried) and fresh herbs (mint, coriander, flat-leaf parsley, basil, tarragon are all wonderful in salads).

And lastly, your salad should have a great dressing which pulls the whole meal together - it's the dressing which really balances out all the ingredients you have chosen for your salad and creates beautiful layers of flavour.

Above all, don't be afraid to experiment and come up with your own wonderful creations. Like all experimenting in the kitchen, not everything will be a success, but along the way you will learn a great deal about flavours and textures that work well together, and you will without doubt get many pleasant surprises.

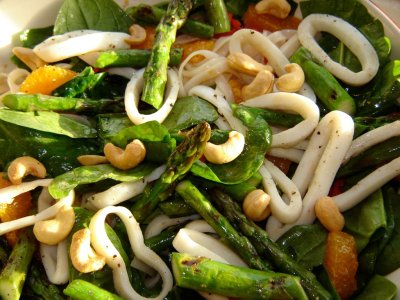
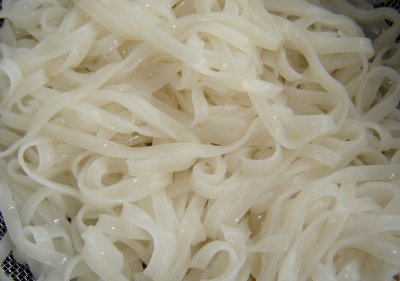
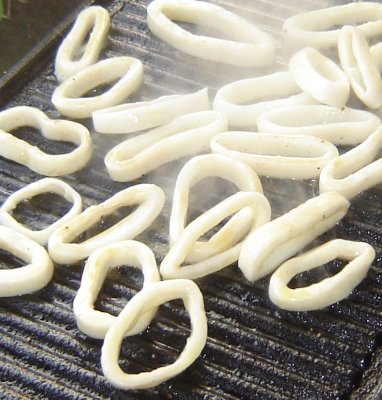
This particular salad was an exceptionally happy marriage of several things in my fridge and pantry that needed to be used up: a bag of calamari rings in the freezer, remains of a packet of Thai rice sticks in the pantry, a red chilli, half a bag of spinach, a bunch of asparagus, a handful of cashew nuts, an orange (in actual fact, if I'd been "planning" this salad I would have used a pink grapefruit, but an orange is what I had), and the remains of the Wagamama dressing from my last post. I didn't have any on hand at the time, but some fresh herbs would have made this perfect - coriander, mint, Thai basil or Vietnamese mint would have been ideal.

A word of caution: although this salad was a wonderful assemblage of some leftovers that I happened to have on hand, you do still need to think a little carefully about what you're putting into your salad - it shouldn't just become a "dumping ground" for everything you need to use up. That said, give this salad a try and go ahead and create some great salads of your own, and if you come up with a favourite of your own I would love to hear about it - leave me a comment or contact me by email - I really love to hear what's happening in your kitchen.

Chargrilled Calamari, Asparagus & Rice Noodle Salad Recipe
Click here for printable copy of this recipe
Gluten free
Makes 2 generous servings


300g calamari rings
100g Thai rice sticks (or other rice noodles)
1x red chilli, de-seeded and sliced
6-8 asparagus stalks
1x pink grapefruit (or orange)
handful of cashew nuts (roasted, unsalted)
2x generous handfuls of baby spinach
olive oil
salt and pepper
fresh coriander or mint, approx 2T
Wagamama dressing from last post

Cook noodles in boiling water until soft, around 6-8 minutes. Drain and rinse well in cold water. Place in a bowl or spread on a serving platter.


Snap woody ends off asparagus stalks, toss with a little olive oil and a sprinkling of sea salt, then cook on a hot grill pan until lightly charred and just tender (but still with some bite). Alternatively, feel free to simply steam your asparagus if you prefer. Cut spears into 2-3 pieces.


Similarly, toss calamari rings with a little olive oil, salt and pepper, and cook on a hot grill pan - this will take barely a couple of minutes.


Strew spinach leaves over the noodles.

Remove all skin and pith from the grapefruit. Then remove the segments of flesh from in between the membranes - do this holding the fruit over the spinach so that as you go the juice goes into the salad. Once all the fruit has been removed, squeeze the membrane over the salad to extract any remaining juice.

Distribute asparagus and grilled calamari evenly over the top of the noodles, spinach and grapefruit. Pour the dressing over everything, then sprinkle cashew nuts, chilli and chopped herbs over the top.

Sunday, December 6, 2009

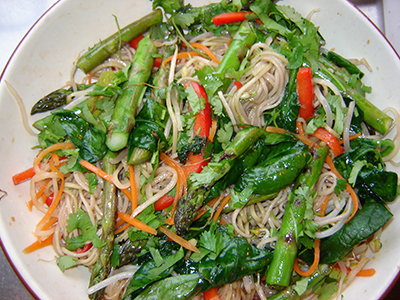
Asparagus & Green-Tea Soba Noodle Salad


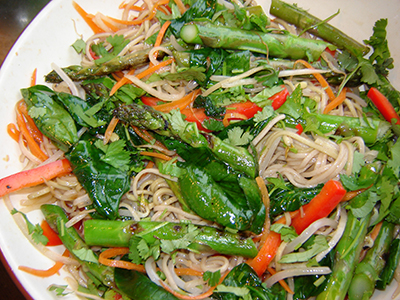
By now I think you all know about my love for fresh asparagus - I just never seem to tire of it. My beloved however doesn't share my passion for this spring treasure (he's more of a broccoli guy), so while he's been away this week I have been totally indulging my every asparagus whim. I've been cooking up dishes in which the asparagus is "the hero" - taking centre stage rather than being "the bit on the side" that I usually have. This asparagus and noodle salad, adapted from The Wagamama Cookbook, is one of my old favourites. It's also very adaptable - I have made this using broccolini instead of asparagus on occasions, and I imagine it would also be fantastic with the addition of prawns if you wanted something special and not entirely vegetarian.

This is the perfect summer salad - light, healthy, crunchy and tangy - enjoy.

Asparagus & Green-Tea Soba Noodle Salad Recipe
Click here for printable copy of this recipe

Vegetarian, gluten-free*
Makes 2 generous servings
(adapted from a recipe in The Wagamama Cookbook)

Salad ingredients:
Piece of daikon (Japanese radish) about 4" long, peeled
1 small carrot, peeled
90g green-tea soba noodles*
90g plain soba/buckwheat noodles*
1/2 red pepper
1 red chilli
1 bunch asparagus
2 handfuls of mung bean sprouts
1 tablespoon vegetable oil
handful of baby spinach
salt
small bunch coriander, chopped

Dressing ingredients:
1 medium shallot, finely chopped
1" piece fresh ginger, peeled & grated
1 clove garlic, finely chopped
1 1/2 tablespoons rice vinegar
1 tablespoon water
3 tablespoons tamari
1 tablespoon tomato ketchup
100ml vegetable oil

First make the dressing - simply combine all the ingredients in a screw top jar, give it a good shake and set aside. This will keep for at least a week in the refrigerator.

Begin the salad by shredding the daikon and carrot into long, fine strands - I use one of those wide blade peelers that has a shredder on the opposite side (you can see it in the picture). If you don't have a suitable shredder or tool for doing this, cut into the longest, finest juliennes that you can manage. Then put the daikon and carrot strands into a bowl of cold water and ice, and refrigerate for at least an hour until crisp.

Meanwhile, cook the noodles in boiling water - they will only take 2-3 minutes - drain and refresh under cold running water. Set aside.

Remove the seeds from the red pepper, and cut into thinnish strips. Remove the seeds and membrane from the chilli, and slice.

Drain the now crisp daikon and carrot. Mix with the noodles, red pepper and chilli, and 2-3 tablespoons of the dressing. Season with salt and set aside on serving platter or bowl.

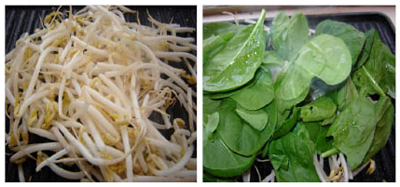
Heat a griddle pan until smoking. Toss the asparagus spears with a little of the oil and salt, and cook on the griddle for a few minutes until lightly charred. Remove from heat and cut spears in half. Similarly now toss the bean sprouts in a little oil and salt and add to the griddle. Give them a couple of minutes, turning them occasionally, then add the spinach. Almost immediately after adding the spinach turn off the heat. The spinach will begin to wilt in the residual heat, and once it has just wilted remove.

Add the asparagus, bean sprouts and spinach to the rest of the salad. Toss lightly to combine, and sprinkle chopped coriander over the top.


Notes

* I say gluten-free here because soba noodles are traditionally made from buckwheat flour which, as I understand it, is gluten-free. However, the packets of soba noodles I had both contained wheat flour as well as buckwheat flour, so check ingredients carefully if this is important to you. You could substitute with any wheat-free noodles.

* If you can't find green-tea soba noodles (though these are pretty much available in most supermarkets and Asian specialty stores now), you can cook plain noodles in boiling green tea.