Friday, February 5, 2010

Chocolate Panettone French Toast Sandwiches


Today is, believe it or not (and really how could you not), World Nutella Day! Three years ago Michelle at Bleeding Espresso and Sara at Ms. Adventures in Italy decided to give the celebration of Nutella its own special holiday, and World Nutella Day was born. To a Nutella lover, it seems incredibly fitting to me have a special day on which to totally indulge in this pleasure.


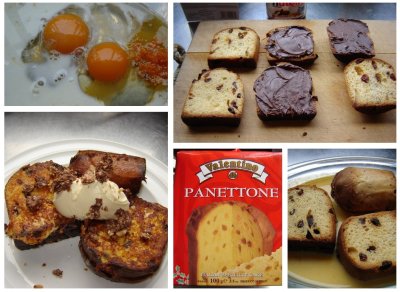
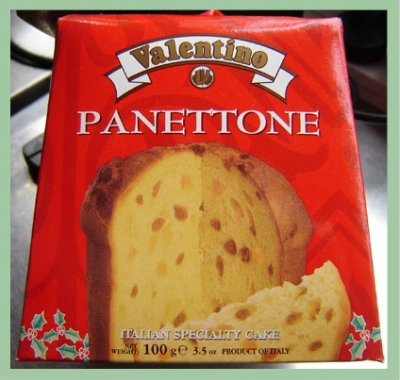
So, of course, a celebration brunch was called for! As I just happened to have a panettone (a gorgeous Italian fruit cake, which is frequently served at Xmas - refer Source Guide) sitting in the pantry, some Nutella french toast sandwiches seemed like a good idea.


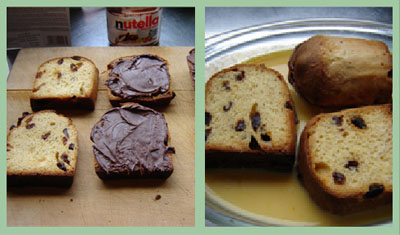
First of all you need to make a nice eggy bath for your sandwiches, using free-range eggs, grated orange zest, orange juice, milk, and a dash of maple syrup or honey.


Next cut the panettone into thick slices, and spread half of the slices thickly (this is not the time for a "thin smear") with Nutella. Sandwich together and then give your sandwiches a nice soak in the egg mixture while you melt a bit of butter in a pan.


Once the pan is hot, add the sandwiches and brown on both sides. Serve immediately with a dollop of mascarpone cheese, and finish off with a sprinkling of crushed "Ferrero Rocher" chocolates on top.


Chocolate Panettone French Toast Sandwiches Recipe

6 thick slices of panettone, or other stale bread
2 free-range eggs
grated rind & juice of half an orange
1/4 cup milk
1-1/2 teaspoons maple syrup
lashings of Nutella
1-1/2 tablespoons butter
mascarpone
2 or 3 Ferrero Rocher chocolates, crushed

Put eggs, orange juice and zest, maple syrup and milk in a wide, shallow dish, and whisk lightly to combine. Set aside.

Spread Nutella on three of the panettone/bread slices. Spread as thickly as you can without breaking the bread. Place the other three bread slices on top to make sandwiches.

Drop butter into a frying pan, and set over medium-high heat. Meanwhile, put sandwiches into the egg bath, coating both sides separately. Once the pan is hot and the butter is melted, add the sandwiches to the pan, and cook until browned on both sides.

Remove to a serving plate. Place a dollop of mascarpone cheese on top and sprinkle with the crushed chocolates.

Enjoy!

Do you have a favourite way to enjoy Nutella? - I'd love to hear about it.

Saturday, January 23, 2010

Pappardelle with Chicken, Broccoli & Pesto Sauce


This is one of those great pasta dishes, that with a little bit of before-hand preparation (some of which can even be done the day before) comes together in just a few minutes at the end. This works really well for me with teaching in the evenings, as I can have everything prepped well in advance and then completion takes only as long as it takes to boil water and cook pasta - about 15 minutes max! It's also another one of those "everything in one bowl" dinners that I love.

Let's begin with the pesto. I have to be honest and say that for years I have always bought ready-made pesto and never bothered to make my own. That was until recently when I tried a store bought pesto that I hadn't used before - horror of horrors, it was so awful, it actually rendered the dinner I made inedible - it tasted incredibly sweet! Yes, sweet. "But how could this be?" I thought - there's no sugar in pesto. Imagine my horror when I then went and looked at the contents label on the pottle, and sure enough there was sugar in it. Determining, not to ever make that mistake again, I began to examine the contents labels of other pestos and that is when I discovered that many of them contain a whole lot of stuff (including often sugar) that in my opinion has no place being in pesto. I don't really know why I've never looked at that before, as I normally look at ingredients labels quite carefully on most things, but somehow pesto had slipped under my radar. Since then I have been making my own, and have been astounded to discover just how much better it tastes. What's more pesto can be frozen, so you can enjoy home-made pesto long after basil season has finished. I have been using this recipe by Lidia Bastianich and to begin with I was just using the "bung everything in the food processor" method - not that there's anything wrong with that. However, more recently I have begun using the mortar and pestle and doing it by hand and the results are just outstanding - the texture is far superior and every ingredient seems to retain its individual characteristics. Additional advantages of this method are, firstly, much less cleaning up, and secondly, the triceps get a good work-out - say goodbye to those "flappy" upper arms!


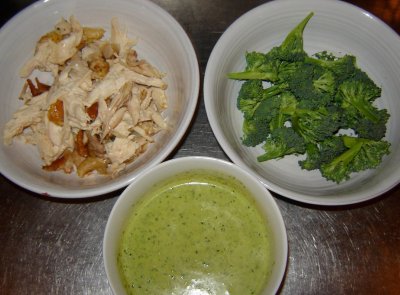
So this can easily be made the day before, or even several days before for that matter. If you have made it in advance, I recommend that you take it out of the fridge an hour or two before you want to use it to return to room temperature. Also if you are making it in advance, I suggest that you don't put all of the oil that is asked for into the pesto while you are mixing it up - just reserve a teaspoon or two. Then put your finished pesto into a small dish or bowl, and try to level out the top as much as possible. Then pour the reserved oil in a thin layer over the top, completely covering it - this helps to stop the pesto from turning brown on exposure to the air, and that oil can just be mixed into the pesto before you use it.

Now for the chicken. You could use chicken thighs or breasts for this, cut into pieces, tossed in a little bit of olive oil, lemon juice, salt, pepper, and fresh rosemary, and then sauteed. Personally, I always use free-range, organic chicken, but have found that buying individual pieces seems to be hellishly expensive. Solution - I buy a whole chicken, roast it, use half for this recipe, then use the other half for something else (often a chicken and seafood paella) the next night. I often also use this same method and make this Chicken Carbonara recipe by Giada de Laurentiis - certainly not a very traditional "carbonara" recipe, but a great dish nonetheless.


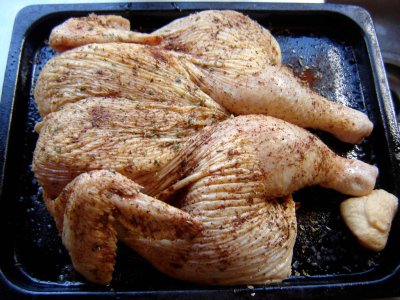
I like to butterfly my chicken and remove the backbone. (The backbone then goes into a large snaplock bag in the freezer - ditto any leftover chicken from a roast chicken dinner - and once the bag is full the whole lot gets made into chicken stock.) The chicken is then laid out flat, drizzled with a little olive oil and seasoned on the inside. Then flipped over, drizzled again with a little olive oil, and more salt and pepper. Then I might further season one half of the chicken with perhaps lemon juice and rosemary (for this recipe) and the other half with perhaps paprika and oregano for the paella, or some other seasoning that would be appropriate for its intended end purpose. So this is the beauty of butterflying - it is really easy to treat each half of the chicken separately. The chicken then gets roasted at 180 degrees for about 45 minutes to an hour depending on the size of the bird.

Once roasted and cooled enough to handle, I remove all the flesh from the chicken, putting each half into a separate container and into the fridge. This can be done several hours before you need it or even the day before. Once all the flesh has been removed from the carcass, and the carcass is completely cold, it then joins the backbone in the freezer bag for stock.

Not much to the broccoli really - this just gets cut into florets, and of course this could also be done well in advance. Actually, I often use broad beans (fresh or frozen) instead of broccoli in this recipe, and they too can be blanched and shelled well ahead of time.

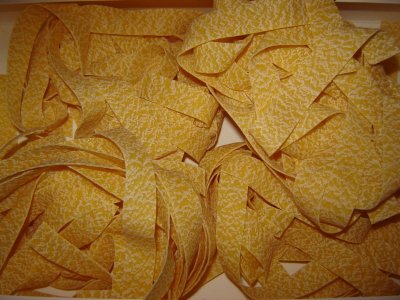
My preferred pasta for this recipe is this gorgeous egg pappardelle that I get from the Mediterranean Food Warehouse but you could use any pasta that you like.


Pappardelle with Chicken, Broccoli & Pesto Sauce Recipe
Click here for a printable copy of this recipe


For pesto:
approximately 2 cups of basil leaves
pinch of salt
2 cloves of garlic
3 tablespoons pine nuts, lightly toasted
2 tablespoons pecorino cheese, grated finely
2 tablespoons parmesan, grated finely
3-4 tablespoons olive oil
(Note: if you don't have pecorino cheese, substitute with extra parmesan)


Put a few of the basil leaves in a mortar with the salt and begin to crush. Continue adding leaves, a few at a time. Once all the leaves have been added, add the garlic to the mortar, and continue to pound with the pestle until a paste forms.

Add the pine nuts, and crush them into the paste. Then add the cheese, work that in a little, and then add the olive oil one tablespoon at a time. Keep working until you have a creamy paste.

This will make about 1 cup of pesto.

For the pasta:
1 cup of pesto
100-125ml cream
2 cups of cooked chicken, shredded
2 cups of broccoli florets
250g pappardelle (or other pasta)
1-2 tablespoons olive oil
generous handful pine nuts, lightly toasted
freshly grated parmesan to serve

Mix pesto with cream, until you have a pourable, sauce-like consistency. Set aside.

Drop pasta into boiling salted water. About 4 minutes before the pasta has finished cooking, add the broccoli to the pan and allow it to cook with the pasta.

Once the pasta is cooked, set a colander over the serving bowl that you intend to use, and begin to drain the pasta into the colander - take care not to "overflow" the bowl - once the bowl is full, move the colander to the sink and continue to drain. This does two things - firstly, you now have a really nice hot bowl in which to serve your finished dish, and secondly, you have some reserved pasta water if you need it to "loosen" the sauce. Drizzle a little olive oil over the pasta, and shake gently to distribute.

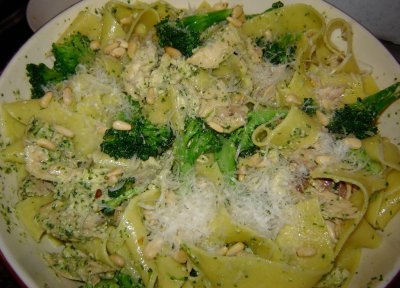
Return the empty pasta pot to the heat, along with about 1 tablespoon olive oil. Add the chicken to the pan and heat through - about 1 minute. Then return the pasta and broccoli to the pan. Pour over the pesto and cream, and toss everything gently together over the heat, until the sauce is warmed through and coats everything well. Add some of that reserved pasta water if you need to. Taste and add some salt and pepper if necessary.

Drain water out of the warmed bowl. Add pasta to the bowl, sprinkle toasted pine nuts and grated parmesan over the top. Serve with extra parmesan.

This makes 3 very generous portions, or could easily feed 4 with some bread and salad on the side.

Buon Appetito!

Tuesday, January 12, 2010

Chargrilled Calamari, Asparagus & Rice Noodle Salad Recipe


Once summer comes I whole-heartedly embrace "salad season". By this I mean a substantial salad which on its own constitutes a meal - such is my idea of the perfect summer meal!

Such a salad should, in my opinion, contain firstly some protein - this could come in the form of:

  • Cheese - grilled haloumi, feta, blue cheese, brie, soft goats-milk cheeses, bocconcini or mozzarella are all great in salads
  • Poultry - try chicken, duck or quail
  • Fish and seafood - salmon, smoked white fish, prawns, lobster, crab, squid, mussels are all wonderful additions to any salad
  • Meat - personally I don't use much meat in my salads other than perhaps some chorizo sausage or some crispy prosciutto or pancetta, but you could certainly experiment with the inclusion of some rare lamb or beef
  • Nuts and seeds - I like cashews, pecans, walnuts, pine nuts, hazelnuts, almonds, pistachios, peanuts, sunflower seeds, pumpkin seeds and sesame seeds
  • Pulses - try chickpeas, lentils, cannellini beans, lima beans, borlotti beans
  • And yes, if you must, tofu - I have to say it definitely wouldn't find its way into any salad of mine, but it would certainly be a good inclusion for those whose gastronomic ethos doesn't extend to the consumption of various other forms of protein and, apparently, some people even like it.

Secondly, I like a grain of some sort - noodles, pasta, rice, quinoa, couscous, croutons are a few suggestions. It is useful to know, if your diet doesn't include any animal products, that pulses combined with grains form a complete protein.

Thirdly, a great meal in a salad should have great texture and colour - consider the inclusion of some fruit (fresh or dried) and fresh herbs (mint, coriander, flat-leaf parsley, basil, tarragon are all wonderful in salads).

And lastly, your salad should have a great dressing which pulls the whole meal together - it's the dressing which really balances out all the ingredients you have chosen for your salad and creates beautiful layers of flavour.

Above all, don't be afraid to experiment and come up with your own wonderful creations. Like all experimenting in the kitchen, not everything will be a success, but along the way you will learn a great deal about flavours and textures that work well together, and you will without doubt get many pleasant surprises.

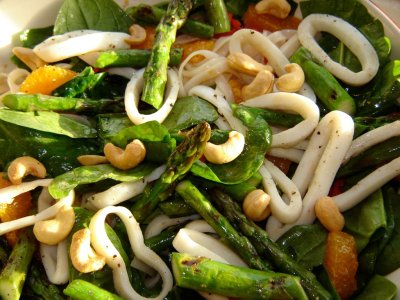
This particular salad was an exceptionally happy marriage of several things in my fridge and pantry that needed to be used up: a bag of calamari rings in the freezer, remains of a packet of Thai rice sticks in the pantry, a red chilli, half a bag of spinach, a bunch of asparagus, a handful of cashew nuts, an orange (in actual fact, if I'd been "planning" this salad I would have used a pink grapefruit, but an orange is what I had), and the remains of the Wagamama dressing from my last post. I didn't have any on hand at the time, but some fresh herbs would have made this perfect - coriander, mint, Thai basil or Vietnamese mint would have been ideal.

A word of caution: although this salad was a wonderful assemblage of some leftovers that I happened to have on hand, you do still need to think a little carefully about what you're putting into your salad - it shouldn't just become a "dumping ground" for everything you need to use up. That said, give this salad a try and go ahead and create some great salads of your own, and if you come up with a favourite of your own I would love to hear about it - leave me a comment or contact me by email - I really love to hear what's happening in your kitchen.

Chargrilled Calamari, Asparagus & Rice Noodle Salad Recipe
Click here for printable copy of this recipe
Gluten free
Makes 2 generous servings


300g calamari rings
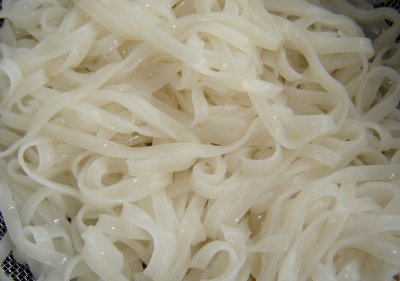
100g Thai rice sticks (or other rice noodles)
1x red chilli, de-seeded and sliced
6-8 asparagus stalks
1x pink grapefruit (or orange)
handful of cashew nuts (roasted, unsalted)
2x generous handfuls of baby spinach
olive oil
salt and pepper
fresh coriander or mint, approx 2T
Wagamama dressing from last post

Cook noodles in boiling water until soft, around 6-8 minutes. Drain and rinse well in cold water. Place in a bowl or spread on a serving platter.


Snap woody ends off asparagus stalks, toss with a little olive oil and a sprinkling of sea salt, then cook on a hot grill pan until lightly charred and just tender (but still with some bite). Alternatively, feel free to simply steam your asparagus if you prefer. Cut spears into 2-3 pieces.


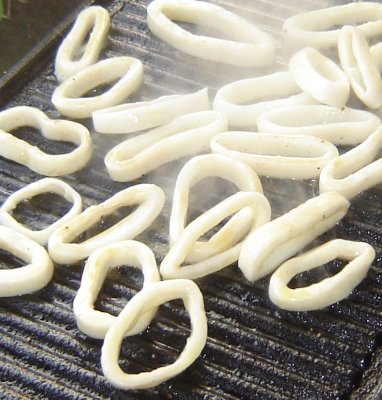
Similarly, toss calamari rings with a little olive oil, salt and pepper, and cook on a hot grill pan - this will take barely a couple of minutes.


Strew spinach leaves over the noodles.

Remove all skin and pith from the grapefruit. Then remove the segments of flesh from in between the membranes - do this holding the fruit over the spinach so that as you go the juice goes into the salad. Once all the fruit has been removed, squeeze the membrane over the salad to extract any remaining juice.

Distribute asparagus and grilled calamari evenly over the top of the noodles, spinach and grapefruit. Pour the dressing over everything, then sprinkle cashew nuts, chilli and chopped herbs over the top.

Sunday, December 6, 2009

Asparagus & Green-Tea Soba Noodle Salad


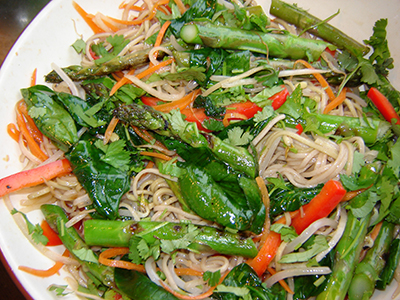
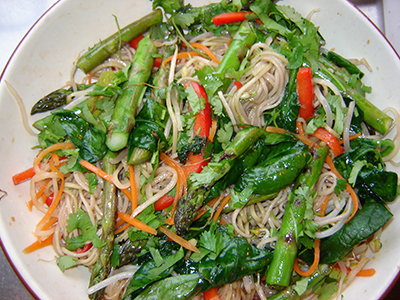
By now I think you all know about my love for fresh asparagus - I just never seem to tire of it. My beloved however doesn't share my passion for this spring treasure (he's more of a broccoli guy), so while he's been away this week I have been totally indulging my every asparagus whim. I've been cooking up dishes in which the asparagus is "the hero" - taking centre stage rather than being "the bit on the side" that I usually have. This asparagus and noodle salad, adapted from The Wagamama Cookbook, is one of my old favourites. It's also very adaptable - I have made this using broccolini instead of asparagus on occasions, and I imagine it would also be fantastic with the addition of prawns if you wanted something special and not entirely vegetarian.

This is the perfect summer salad - light, healthy, crunchy and tangy - enjoy.

Asparagus & Green-Tea Soba Noodle Salad Recipe
Click here for printable copy of this recipe

Vegetarian, gluten-free*
Makes 2 generous servings
(adapted from a recipe in The Wagamama Cookbook)

Salad ingredients:
Piece of daikon (Japanese radish) about 4" long, peeled
1 small carrot, peeled
90g green-tea soba noodles*
90g plain soba/buckwheat noodles*
1/2 red pepper
1 red chilli
1 bunch asparagus
2 handfuls of mung bean sprouts
1 tablespoon vegetable oil
handful of baby spinach
salt
small bunch coriander, chopped

Dressing ingredients:
1 medium shallot, finely chopped
1" piece fresh ginger, peeled & grated
1 clove garlic, finely chopped
1 1/2 tablespoons rice vinegar
1 tablespoon water
3 tablespoons tamari
1 tablespoon tomato ketchup
100ml vegetable oil

First make the dressing - simply combine all the ingredients in a screw top jar, give it a good shake and set aside. This will keep for at least a week in the refrigerator.

Begin the salad by shredding the daikon and carrot into long, fine strands - I use one of those wide blade peelers that has a shredder on the opposite side (you can see it in the picture). If you don't have a suitable shredder or tool for doing this, cut into the longest, finest juliennes that you can manage. Then put the daikon and carrot strands into a bowl of cold water and ice, and refrigerate for at least an hour until crisp.

Meanwhile, cook the noodles in boiling water - they will only take 2-3 minutes - drain and refresh under cold running water. Set aside.

Remove the seeds from the red pepper, and cut into thinnish strips. Remove the seeds and membrane from the chilli, and slice.

Drain the now crisp daikon and carrot. Mix with the noodles, red pepper and chilli, and 2-3 tablespoons of the dressing. Season with salt and set aside on serving platter or bowl.

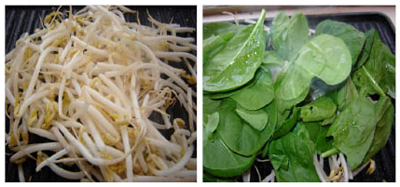
Heat a griddle pan until smoking. Toss the asparagus spears with a little of the oil and salt, and cook on the griddle for a few minutes until lightly charred. Remove from heat and cut spears in half. Similarly now toss the bean sprouts in a little oil and salt and add to the griddle. Give them a couple of minutes, turning them occasionally, then add the spinach. Almost immediately after adding the spinach turn off the heat. The spinach will begin to wilt in the residual heat, and once it has just wilted remove.

Add the asparagus, bean sprouts and spinach to the rest of the salad. Toss lightly to combine, and sprinkle chopped coriander over the top.


Notes

* I say gluten-free here because soba noodles are traditionally made from buckwheat flour which, as I understand it, is gluten-free. However, the packets of soba noodles I had both contained wheat flour as well as buckwheat flour, so check ingredients carefully if this is important to you. You could substitute with any wheat-free noodles.

* If you can't find green-tea soba noodles (though these are pretty much available in most supermarkets and Asian specialty stores now), you can cook plain noodles in boiling green tea.

Monday, November 9, 2009

Solitary Pleasures


Some of you will be surprised to know that I am a woman of few words in the morning. It's simply not my best time of day, and just being upright is challenging enough for me without being required to make any kind of meaningful conversation within the first hour of being roused. Once my general reticence to start the day has subsided, the first words that I usually utter are "what would you like for dinner?". The response usually goes along the lines of "I don't know - I'm not even dressed yet". Whilst this might be a fairly predictable reply, I'm sure you'll agree it's not particularly helpful!

Occasionally though my partner will be working late, or might be in a totally different "food mood" to me and will suggest that I fix something for myself and he will organize his own dinner. I used to be totally hopeless at cooking just for myself - solo dining used to be something like a couple of boiled eggs or a few crackers and a piece of cheese. Now I love such opportunities - these are the times when I can make something for myself that my partner doesn't like, or indulge in something that might be too extravagent to cook for a crowd but which is a wonderful treat for one.

When just such an opportunity presented itself the other morning, my mind immediately leapt to thoughts of two of my spring time favourites - asparagus and scallops. Casting my mind around for inspiration on how to put them together I remembered something I had seen Giada de Laurentiis do on Food TV (have I mentioned that I am a Food TV addict?) - a grilled asparagus and melon salad.

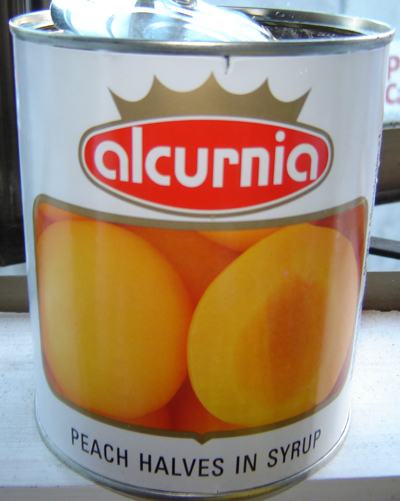
Using that as my inspiration I decided to use peaches instead of melon - this is after all not the season for melon, and I knew that any melons in the shops at present would be watery and tasteless. I know it's not the season for peaches either, but I have a peach secret ... in my opinion, even when they are in season, peaches these days just seem to be usually flabby, thick skinned and horrible - they taste nothing like the peaches of my childhood. But I have discovered these fantastic tinned peaches from Spain, available from the Mediterranean Warehouse, which of course you can have all year round.


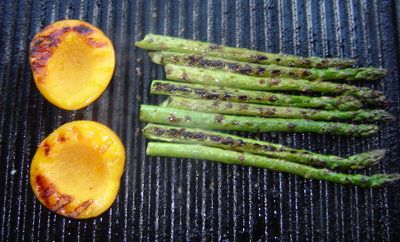
I drizzled the asparagus with a little olive oil, sprinkled them with a little flakey sea salt, put them on a hot grill pan, along with the peaches, until tender and charred.


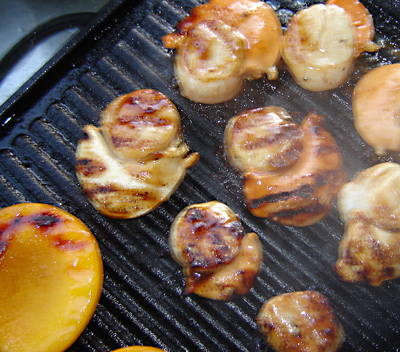
Meanwhile, I popped a couple of slices of prosciutto in a hot oven until crisp. I treated the scallops to a tamarind and maple syrup glaze, which I marinated them in for a while, before then cooking them also on the hot grill pan. They literally take only a couple of minutes.


Some peppery wild rocket I had picked up at the organic vege market went into the final assembly, along with a little drizzle of very good extra virgin olive oil, and I have to say this was a taste sensation. I know that I will be making this again and again.

The quantities in the recipe following are for one serving, but you could easily just multiply that if you wanted to serve more people - this would be fantastic served on a big platter for a light but luxurious lunch.

Tamarind Glazed Scallops
with Grilled Asparagus & Peaches Recipe
Click here for a printable copy of this recipe
Serves 1 or several

For each person:
6x asparagus spears
2x peach halves
6-8 scallops
1x slice of prosciutto
(I actually used 2 slices, because I am greedy)
handful of rocket leaves
extra virgin olive oil

Tamarind Glaze:
2T tamarind concentrate (refer Source Guide)
(you could use the pulp which you soak and then drain,
but I prefer to use the concentrate)
2T maple syrup
1tsp olive oil
salt & pepper
(this amount would easily be enough for 12x scallops)

Preheat oven to 180 degrees, with an empty baking tray in the oven while it heats.

Mix all ingredients for the Tamarind Glaze together in a small bowl. Add scallops to the bowl, making sure they are all completely covered with the glaze, and leave to marinate while you prepare the other ingredients.

Place slice/s of prosciutto on the hot baking tray, and place in the oven until crispy - this will really only take a few minutes, so keep an eye on it.

Drizzle a little bit of olive oil over the asparagus spears, and place on a very hot grill pan. Place peach halves on the grill pan at the same time. Sprinkle a little flakey sea salt over the asparagus and cook until charred and tender.

Remove asparagus from the pan. Continue cooking the peaches. Shake excess marinade off the scallops and add them to the pan. Cook until caramelised on each side - this literally takes just seconds on each side.

To assemble, place asparagus on plate. Arrange peach halves and scallops over the top. Strew a few torn up rocket leaves over the top. Crumble the crispy prosciutto over the top of everything, and finish with a drizzle of the best extra virgin olive oil you can lay your hands on.

I'm sharing this post at Food on Friday: Scallops, hosted by Carole at Carole's Chatter.

Friday, October 30, 2009

"Tuesday Pasta" - "Pantry Pasta" Recipe


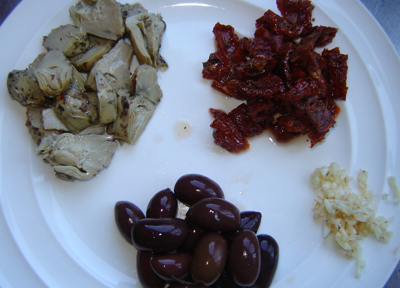
About 16 years ago, at a restaurant in Santa Monica (the name of which I have long since forgotten), my husband and I enjoyed a wonderful dish of pasta in a tomato based sauce with artichoke hearts, sundried tomatoes, and black olives.

We loved it so much that I couldn't wait to get home and try to recreate something similar. I'm pleased to say that my creation was a hit, and it became a "regular" in our household. So much so that we called it "Tuesday Pasta" because, you guessed it, I made it most Tuesday nights. For the life of me I don't remember why we always had it on Tuesdays - that, like the name of the restaurant where this dish was inspired, is but a distant memory. Much time has gone by since then, and habits have changed, as in fact have my marital circumstances, so I no longer make this pasta dish with quite the same regularity, and not necessarily on Tuesdays.

It is still, however, probably my all time favourite pasta dish, and if I could only ever share one recipe in my life this would probably be it. As I always have all of the necessary ingredients in my pantry all of the time, I now think of this as my "Pantry Pasta" recipe. This is the dish that I can whip up when I haven't had time to go shopping, and I want to get dinner on the table in about 15 minutes - really! All the preparation can be done while you are waiting for the pasta water to come to the boil, and then the sauce comes together in the time it takes for the pasta to cook.

I should also mention that what follows should be treated more as a guide than a recipe that needs to be strictly adhered to - simply use what you have on hand or if you want to add more of something you like and less of something you don't then simply adjust to suit your tastes. I use artichoke hearts - I like the roasted ones, but unroasted is fine; sundried tomatoes; black olives - green are just as good if they are your preference; capers - I like the salted ones best, but the ones in brine are fine if that's what you have, or leave them out altogether - I actually used green peppercorns once instead of the capers (not successful I might add, they just somehow didn't work in this dish at all); diced pancetta, or bacon, or chorizo sausage, or when I want a vegetarian option this works fantastically well with eggplant; a few anchovies (entirely optional) - these just melt into the sauce and add a bit of complexity to the flavour of the sauce without any discernable "fishy" taste; and fresh herbs - I think basil works best, but flat-leaf parsley and rocket are also good and I have on occasion even put in a handful of baby spinach just before serving. As you may now have suspected, I'm very much a "handful of this - a dollop of that" kind of cook, and that very much applies to this dish - I think I have made it hundreds of times and I'm sure it has never tasted exactly the same twice. So feel free to put your own twist on this, enjoy playing around with it, and if you come up with something sensational I would love to hear about it.

Pasta with Artichoke Hearts,
Sundried Tomatoes & Olives Recipe
"Pantry Pasta"
Click here for printable copy of this recipe

200g pancetta cubed, or bacon cut into small pieces
(substitute sliced chorizo sausage if desired)
(vegetarian substitute - 1 small eggplant cut into 1" cubes)
2x cloves of garlic, finely chopped
2T olive oil
2T tomato paste (I like the stuff that comes in tubes)
1/2tsp - 1tsp chilli flakes, optional
1x tin tomatoes or jar of tomato passata
8x artichoke hearts, roasted
(cut in half if smallish, or into quarters if large)
6x sundried tomatoes, cut into thin strips
2x handfuls of black olives
2T capers
4-6 anchovies, optional
generous handful of basil leaves, torn
salt & pepper
1 cup parmesan cheese, grated
250g pasta shapes, whatever is your favourite

Place a large pot of water over high heat, and bring to the boil.

While water is boiling, chop the bacon (or chorizo, or eggplant), mince garlic, chop artichoke hearts and sundried tomatoes, tear basil leaves into small pieces, and grate parmesan cheese (pecorino also makes a good substitute if you prefer).


Once water has come to a rolling boil, add a good handful of salt and pasta. Boil until al dente.

Meanwhile, heat oil in a large skillet, and cook bacon until brown. When bacon is almost brown, add garlic to pan (don't put the garlic in earlier or it will burn and turn bitter).

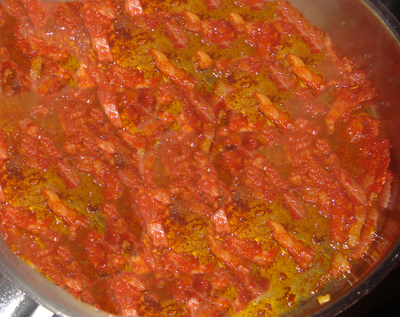
Once the bacon and garlic are browned, add the tomato concentrate and 1/2 tsp of the chilli flakes (if using), and cook for a couple of minutes allowing the sugars in the tomato concentrate to caramelise - it will turn quite a dark brown. This is a really important step - it adds lots of flavour and rich colour to your sauce.


Add the anchovies and cook for another 30 seconds.

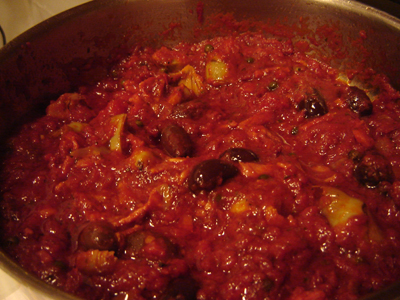
Next add the tinned tomatoes or passata to the pan. If using whole tinned tomatoes, break them up a bit with a wooden spoon. This will start to bubble immediately - keep stirring scraping up all the bits of browned tomato concentrate. Then turn heat down to a simmer. Add half of the torn-up basil leaves, artichoke hearts, sundried tomatoes, olives and capers.


Cook for another minute or two until everything is warmed through. Taste and adjust seasoning with salt and pepper if necessary. Then keep warm until pasta is finished cooking.

Drain pasta, reserving a little of the pasta water (use this reserved water to loosen the sauce if necessary).

Add the drained pasta to the sauce. Stir in half the parmesan cheese and another sprinkling of chilli flakes if you like it spicy. Lastly stir in the remaining basil leaves.

Serve in warm bowls with remaining parmesan sprinkled over the top.

This makes 3 generous servings, but could easily feed 4 with the addition of a fresh green salad, some good crusty bread to mop up the sauce, and I like to wash it down with a glass or two of Valpolicella.

Buon Appetito!
Thursday, October 15, 2009

Did I Ever Tell You You're My Hero


Actually I'm not talking about this guy. Or even these guys, heroic though they may be ...


I'm talking about my yoga students.


At our yoga school, Yoga Tapas, we begin every one of our classes by spending some time sitting and doing some breathing in Virasana - the Hero Pose. This is a poignant reminder to me every time I come before my students of the courage it takes for so many of them to keep coming back to their mats.

I frequently tell my beginners classes that, contrary to what they may believe, they don't require much in the way of strength and/or flexibility in order to develop a yoga practice - those are things that will come with time. What they do need is faith, courage and determination.

Every student at some stage hits that class or point in their practice when they think "that's it - I quit!" This is usually the time when they need their yoga practice the most, but most listen to that self-destructive little inner voice and quit. The brave ones carry on - these are the students who keep coming back (no matter how hard it is); these are the students I teach; and I am so grateful for the opportunity to do so.

Why is it so hard? Well, there is no doubt, that yoga can be a physically demanding practice and many students have physical obstacles to overcome in the way of illnesses and injuries. We also have numerous students who suffer from emotional and psychological obstacles such as various phobias, anxiety, ADHD, severe depression and bipolar disorder, stress related allergies and more. Through our yoga practice we begin to reconnect the body, mind and spirit - a process of self-discovery, self-awareness and eventually self-acceptance which is not always an easy journey, especially for students who have much self-doubt to overcome along the way.

It is tempting when you come into a class full of students and sit down on your mat to listen to that little voice that is telling you that "everyone else in the room has totally got their act together and can breeze effortlessly through a class, while you on the other hand are a total loser and shouldn't be there - you better quit real quick before everyone else finds you out". That sneaky little voice does not want you to discover that everyone else is actually feeling exactly the same way you do to one degree or another, and it will do anything it can to get you to quit before you discover your true potential, because once that happens you won't listen anymore.

I applaud everyone of you who hears the voice and keeps coming back to your mat despite it. You are my heroes.

Footnote: One new student, who has suffered for many years with severe depression, has decided to try regular yoga practice for 3 months and measure the difference it makes in her life. She is writing a blog to document her progress. I know that there is nothing unique about how she feels - there are many of you who have faced the same thing. Perhaps you might leave a comment on her blog or send her an email to let her know she's not the only one - maybe it will even be a surprise to you to learn that you are not the only one.