Tuesday, August 31, 2010

Another Mystery Photo - Random # 5

So here we have it, the answer to last week's mystery photo post ...

Barcelona 123, cropped & edited

As has been the case over the previous mystery food photo posts, there were some great guesses, and I love the enthusiasm you have all been showing for these posts.  Educated guesses included turmeric, cinnamon, some kind of pretzels, sassafras, salsify, and burdock root; but the correct answer, guessed by even-star, Elizabeth and Alaskan Dave Down Under was licorice root.  Looks so different in this state to the black liquorice confectionary which is produced from this, though the actual liquorice content in candy is actually very low.  As a herbal remedy, liquorice root appears to be very over-looked and underestimated, offering an impressive list of benefits for an astonishing number of ailments (almost anything you can think of) - read more here.

And now we come to this week's mystery food photo - I'm sure lots of you are going to get this one.  What are those long, brown, shiny things, with what look to be long, droopy tongues?  Once again this photo was taken on my visit to La Boqueria market in Barcelona.

Barcelona 134, edited

Leave your answer in a comment below, and remember to keep watching this space for the answer next week.

Once again I am submitting this post to the Two for Tuesdays blog hop.

Monday, August 30, 2010

How to Cook Chickpeas and Bittman's Hummus Recipe


Hummus 1, edited

Now I'm the first one to admit that I always have a can or two of chickpeas on my pantry shelves in the event of a culinary emergency, so to speak.  (With a tin of chickpeas in the house, you can always come up with a meal.)  In fact, it wasn't all that long ago that I only ever used tinned chickpeas.  Cooking my own just seemed like such a hassle - I would forget to soak them, or sometimes I would literally boil the bejeezus out of them and still they wouldn't soften (I've since discovered that this can have something to do with them having been heat treated), or they would cook inconsistently - some would be almost mushy and others would still be hard as all get out.  So I just stuck to the convenience of cans.

That was until I stumbled upon 100 Ways to Use Slow Cookers and Crockpots by Alison and Simon Holst, wherein I discovered Alison's method for cooking chickpeas in, of course, the crockpot.  (In case you were wondering, Alison Holst is the Delia Smith of New Zealand cookery.)  There is no pre-soaking required.  Simply put two cups of uncooked chickpeas into the slow cooker, along with six cups of hot water.  I like to add a couple of cloves of garlic (just peeled and left whole), a couple of bay leaves, a few black peppercorns, one carrot (just cut into about four large chunks), a celery stick (cut in two), and some fennel tops (I never throw away fennel tops - I keep them in the freezer to use for soups, stocks, and occasions such as this).  Then cook on high for 4-5 hours, adding 1 teaspoon of salt and 2 teaspoons of sugar after about 2 hours.  This will yield about 5 cups of chickpeas, which I then bag up by the cupful with some of the cooking liquid.

Like many things, although there is nothing wrong with the canned product, I do believe the taste and texture is superior if you can find the time and effort to cook your own, and once cooked, despite a minimal amount of defrosting a bag of frozen chickpeas is as convenient as opening a tin.

I use these a lot in all sorts of dishes and salads, but my most frequent use is an almost weekly batch of hummus.  As I've mentioned here before, hummus with pumpkin seed crackers is a frequent lunch for me, and as I don't eat a lot of meat is a good way of ensuring I get a serving of protein for the day (pulse + grain = complete protein).  Now I have my usual "go-to" hummus recipe that I always use - I can pretty much make it with my eyes closed, and I never measure anything, but since our theme this week at I Heart Cooking Clubs is "lunch box" I thought I would have a go at making Mark Bittman's hummus for my lunch yesterday, the recipe for which I found in my trusty How to Cook Everything iPhone application.  Now yesterday in Christchurch was definitely not a day for packing up a lunch box and heading out somewhere to enjoy this outside - more snuggle up on the sofa under a rug and watch a movie kind of day - but it nevertheless made a good lunch and easily lends itself to lunch box fare - great with any kind of crackers, pita bread or crisps, or even to dunk vegetables into.  I made this according to Bittman's recipe, except that I left out the garlic - since I usually have this for lunch and then shortly after have to get "up close and personal" with my yoga students, I prefer not to eat garlic during the day.  I have to say that my first taste of this (you know the one, when you dig your finger in - allegedly to test for seasoning - and then lick off a big blob of that velvety puree) was a little disappointing.  I thought there was too much tahini, but much to my surprise the minute this stuff hit a sesameal cracker it was sensational!!  I jazzed this up a bit by serving in a bowl, drizzled with some extra virgin olive oil and a sprinkling of sumac on top, instead of the cumin or paprika suggested in the recipe.  I also roasted a few extra chickpeas in a shallow pan and sprinkled those on top as well.  End result - despite my initial reservations about the tahini - I think this has just become my new "go-to" hummus, especially with the sumac and extra roasted chickpeas.

Hummus Recipe
Adapted from Mark Bittman's
Vegetarian
Click here for a printable copy of this recipe

2 cups cooked chickpeas
(reserve cooking liquid if possible)
1/2 cup tahini
1/4 cup extra virgin olive oil
2 cloves garlic (optional)
juice of 1 lemon
flaky sea salt
freshly ground black pepper

Garnish:
1 cup cooked chickpeas
extra virgin olive oil
sumac

Begin with the garnish - heat just enough olive oil in a pan so that the pan is not completely dry - sort of just greasing the pan.  Add chickpeas to the pan, tossing around from time to time, and cook until they are browned and toasty.  Remove pan from heat and set aside.

Hummus 4, edited

Now to the hummus - put chickpeas, olive oil, tahini, garlic (if you're using it), lemon juice, salt and pepper into the food processor, and blitz until a paste forms.  With the motor still running add a little of the reserved cooking liquid or barely warm water, until you achieve the consistency you desire.  Taste for seasoning, adding more lemon juice, salt or pepper if necessary.

Hummus 3, edited

Serve in a shallow bowl.  Drizzle a little extra virgin olive oil over the top and sprinkle on some sumac.

Hummus 2, edited

Lastly add the roasted chickpeas.

This post is submitted to I Heart Cooking Clubs, where we continue to cook with Mark Bittman for another month - I wonder who we'll be cooking with next?!

How to Cook Everything, Completely Revised 10th Anniversary Edition: 2,000 Simple Recipes for Great Food

Friday, August 27, 2010

Paprika Chicken - Quick & Easy # 2


Paprika Chicken 1, edited

Here is another one of my super quick and easy meal ideas.  This is a great no-fuss dinner for a week night, or one of those Saturday nights at home with a good bottle of wine and a movie.  All that's required is a little bit of marinating earlier in the day (you could do this before you go off to work or even the night before), and that is the only bit of prep-work involved in the dish at all.  Then stove-top to table-top is really only as long as it takes to cook chicken - about 30 minutes in total.

You will need:
free-range, organic chicken pieces
smoky paprika
dried oregano
flaky sea salt
chicken stock
white wine (optional)
creme fraiche
freshly ground black pepper
Some chopped fresh herbs to finish (oregano would be ideal, or flat-leaf parsley) is a great enhancement if you have them, but not essential.

Paprika Chicken 6, edited

Firstly, place your chicken pieces (I used 1kg) in a shallow dish (or plastic bag works well also);  drizzle over some olive oil;  sprinkle liberally with smoky paprika, dried oregano, and flaky sea salt.   Toss the pieces, or give them a bit of a massage, to make sure that all pieces are well coated with the oil and seasonings.  Put in the fridge to marinate for as much time as you are able to allow.  If you have 8-24 hours that's great, but if you only have half an hour that's fine as well - it's not critical.  Also, if you have the time, I like to take the chicken out of the fridge about 1-1/2 hours before I plan to cook, so that the chicken comes back to room temperature.

Paprika Chicken 5, edited

Heat some olive oil in a skillet over high heat.  Add the chicken to the hot oil, skin side down, and cook until golden brown, then turn and cook the other side.  This will take about 10 minutes, and you may have to do this in batches - take care not to overcrowd the pan during this "browning" stage.

Once you have browned all your chicken pieces, pour white wine into the pan if you're using it (I used about 75mls), allow it to bubble up and deglaze the pan.  Then pour in the chicken stock (I used about 150mls) and return all the chicken pieces to the pan, skin side up.  Simmer vigorously until the chicken is cooked through, about 15-20 minutes.

Paprika Chicken 2, edited

Meanwhile cook some rice.  Once the chicken is cooked through, dish rice up onto a large serving plate, and place cooked chicken pieces on top.

Paprika Chicken 3, edited

Return skillet to the heat, and add creme fraiche (I used 250g) to the chicken juices and stock in the pan.  Stir over heat until the creme fraiche has completely dissolved and sauce is hot and bubbling.  Pour some of the sauce over the platter of chicken, add a sprinkling of fresh herbs if you have them and serve immediately.  Serve the extra sauce in a jug.

Wednesday, August 25, 2010

Shredded Carrot Salad Recipe - Cooking Italy 10


Carrot Salad with Rocket, edited 2

Let me begin by telling you that carrots are probably my least favourite vegetable - okay, actually mashed swede is my least favourite, but carrots are a close second.  As a child I positively loathed & detested them, and many a "you're not leaving this table until you've eaten your carrots" battle was mounted as I tried to assert my early culinary independence - I think the triumphs were fairly evenly divided between parents and child, depending on whatever hidden agenda either party might have had at the time.  If I gave in fairly quickly and ate the carrots (trying not to gag on every mouthful), then you could be pretty certain that I was doing a "suck-up" for something else that seemed infinitely more important to me at the time - parents of course never see through that kind of stuff, yeah right!!

Anyway, as I've suggested, I'm not fond of carrots in most forms.  A raw carrot is ok, quite palatable, but generally not something I'd seek out or really bother with.  Roasted carrots, on the other hand, I positively love (go figure), and a roast to me is not complete without them.  Boiled or steamed carrots - absolutely loathsome - just never grew out of it!  Soups and stews - I use carrots in these all the time for the flavour they impart, and can't imagine making something like that without them, but when it comes to eating the finished dish, as much as possible I eat around the bits of carrots - I don't pick every last little bit out (I'm not quite that bad), but I just avoid them as much as possible.

So when one of our assignments this month for the Cooking Italy group was the Shredded Carrot Salad from Marcella Hazan's "Essentials of Classic Italian Cooking" I confess to being somewhat ambivalent about it.  I politely excused myself on the basis that it's not "salad season" here right now.  Actually, this group is pretty cool, and you don't really need an excuse if you don't like something;  everyone understands if you just come right out and say it.  But it's not so much that I don't like a carrot salad - I just can't get excited about it.

Needless to say then, I was somewhat surprised when I was fishing around in the veggie crisper of my fridge today, looking for lunch and a carrot leapt into my hand literally screaming "pick me, pick me"!  "I don't want you" my mind told the carrot.  "Oh, yes you do" replied the carrot, "and, some of that rocket, too".  Ah, so that's what the carrot really wanted - it just wanted to get friendly with my rocket (that's arugula to some of you folks on the other side of the world - in case you were wondering).  Well, let me tell you, the rocket that I got at the farmers' market on the weekend is so good (actually, quite possibly the best I have ever had) that if I were a vegetable I would want to get very friendly with it too.  But, carrot and rocket?  Not a pairing that immediately jumps to mind, but who am I to keep them apart if they're intent on each other.

Well, let's just see what's in this Carrot Salad recipe of Marcella's (if you have the book it's on page 549).  The recipe calls for nothing more than shredded carrot, salt, extra virgin olive oil, and lemon juice - hunnph, well that's nothing to get excited about!  Ok, I see she has a variation which includes rocket, but in which she replaces the lemon juice with red wine vinegar.

I decided I wanted the rocket, but (being the contrary soul that I am) I also wanted to stick with the lemon juice rather than the red wine vinegar.  Whilst I can't vouch for what the red wine vinegar would have tasted like, I can tell you that the lemon juice was a pretty darn good choice.  This must surely be the simplest salad on the planet to make - this is what I did.

Tear up some rocket leaves, and put them in your serving bowl.
Grate your carrot (I used one carrot for lunch for one person), using the largest holes on your grater.  Add the shredded carrot to the rocket leaves in your bowl.
Add the zest and juice of half a lemon (the zest is not called for in the original recipe, but why deprive yourself of it, and I think it really enhances the lemony taste without the sharpness that can come from too much juice).
Sprinkle over some flaky sea salt.
Drizzle over a little extra virgin olive oil.
Toss everything together well, taste and adjust seasoning with more salt or lemon juice if necessary.

Much to my surprise, this was astonishingly good.  Not just ok - but actually very good.  I loved the pepperiness of the rocket with the sweetness of the carrots and the tang of the lemon.  Marcella says to serve this straight away, but I actually let mine stand for about 45 minutes, and I think that was a good thing - the result was that some of the juice ran out of the carrots, and mixed in the bottom of the bowl with the olive oil and lemon juice, leaving me with a little puddle of delectableness that was so delicious I picked up the bowl and drank it, and then actually licked the bowl clean (one of the joys of eating lunch alone)!  This salad was so good, in fact, that it is distinctly possible that I will have this for lunch again tomorrow - now that's really surprising!

This salad is beautifully light and refreshing - would be a great inclusion for a summer barbeque;  or, as I discovered, makes a pleasing and healthy lunch on an "almost spring" day - rocket is a rich source of calcium, manganese, copper, iron, potassium, folic acid, and vitamins A, C and K, while the beta-carotene in carrots is an anti-oxident that combats the free radicals which contribute to heart disease, cancer and deterioration of eyesight.  I swear I could literally feel this salad doing me good while I ate it!

I'm a great believer that, if we really tune in, eating is a very instinctual thing - when you listen your body tells you what it needs.  So the next time you suddenly develop an eye for something you would ordinarily leave behind, there's a good chance that you are being offered something that your body is needing.  Take heed, and you may be pleasantly surprised.

Do visit my Cooking Italy page to learn more about the group (maybe you'd even like to join in - you don't have to have a blog to join the group and cook along with everyone else), find links to other members of the group, and links to all the Cooking Italy recipes I've cooked so far.

I'm also submitting this post to the Two for Tuesdays blog hop.

Essentials of Classic Italian Cooking 

Tuesday, August 24, 2010

Another Mystery Photo - Random # 4

I know you are all eager to know the answer to last week's mystery photo post ...

Barcelona 143, edited

There were some great guesses, and some funny ones - sea cucumbers or anemones, turmeric root, chickens' feet with in-grown toenails, and fossilised troll toes.  The correct answer (Anonymous, you were right) is gooseneck barnacles, or sometimes also called goose barnacles.  They grow on rocks in exposed coastal areas, and are harvested commercially on the northern coast of Spain -  a particularly hazardous occupation!  The barnacles are known in Spain and Portugal as percebes, and are widely consumed there as a somewhat expensive delicacy.  They were called goose barnacles because, back in the days before people learned that birds migrate, it was thought that Barnacle Geese grew out of these little barnacles - they were often found growing on pieces of driftwood, and people believed that they were attached to the branches (presumably "laid" by the geese) before they fell in the water.  This YouTube video will give you some idea of how they are eaten.

Time now for a new mystery photo  - can you guess what the brown, "twig-like" things in these photos are.  Once again, these photos were taken at La Boqueria market in Barcelona.

Barcelona 123, cropped & edited

Barcelona 122, edited

I am submitting this post to the Two for Tuesdays blog hop, and don't forget to come back to get the answer.

Saturday, August 21, 2010

Raspberry Gelato Recipe - Cooking Italy 9


Raspberry Gelato 1, cropped & edited

It's still the "fag end" of winter here, and we are still being subjected to fairly regular polar blasts coming straight off the Antarctic;  the mountains are still covered in snow and, despite the emergence of daffodils and some early blossom, warm, sunny spring weather still seems a little way off.  But for all that, no matter how cold it is outside, the dessert of choice for me is still usually something frozen - give me a bowl of sorbet or ice cream over an apple pie any day!  I infinitely prefer, no matter what the weather, a cold dessert to a hot one.  There is, however, one notable exception - my all-time-most-favourite dessert (the one I would ask for if I was on death row, heaven forfend) - and that is my Dad's steamed pudding.  There is just something about a dish which is made with a father's love that tastes better than anything else on earth.  (Note to self:  see if I can get Dad to show me how to make it and share the recipe, so that I can share it with you.)

But I have digressed.  Such is my passion for frozen desserts that I always have several tubs, in varying flavours, in the freezer at any one time.  What's more, that passion seems to have grown immeasurably since I discovered how ridiculously easy it is to make your own.  Not only is making your own sorbets and ice creams incredibly easy, you also know exactly what is in them - no artificial ingredients (thickeners, stabilisers, emulsifiers, things you can't pronounce - ick!) - just beautiful, fresh, natural ingredients (fresh, seasonal fruit, free-range eggs, cream, milk, maybe some vanilla).  Little wonder that home-made ice creams and sorbets taste soooooo good!

So that I can enjoy my frozen desserts all year round, I freeze fruit during the summer for turning into sorbets and ice creams during the winter.  I poach or roast fruits like apricots, peaches and nectarines, then bag them up in whatever quantity I need for a batch of ice cream, taking care to note on the bag what sugar went into the preparation of the fruit.  Berries I simply freeze, free-flow, and then bag.  I do all this, rather than making big batches of the ice cream or sorbet when the fruit is in season, because frozen desserts don't really keep so well much beyond about 3 months - it's not really that they "go off" so much, but they tend to get icy and the texture changes.  So I find it is better to freeze the fruit, and make batches of dessert as I need them.

Given my love for frozen desserts, I was very excited that one of our assignments this month for the Cooking Italy group was gelato - any flavour we liked, using this recipe from PickYourOwn.org.  Immediately, my imagination started to run wild - I had some roasted peaches in the freezer, and some amaretti biscuits leftover from some Sweet Potato Ravioli I had made a couple of weeks ago (post for that coming soon - promise), so Roasted Peach and Amaretti Gelato sounded pretty darn good to me.  Sadly the roasted peaches, turned out to be poached peaches, and since they were already in a vanilla-infused sugar syrup I decided to turn them into a sorbet instead, rather than risk upsetting the sugar-balance of the gelato (sugar doesn't freeze, so playing around with the quantity of sugar will affect how soft or firm your ice cream becomes).  So instead I opted to use up a bag of frozen raspberries from the freezer for a Raspberry Gelato.  I do still have roasted apricots and roasted nectarines in the freezer so they will get their turn next!

Now, before I go on, a word about ice cream makers.  I know that I have told you this before, but if you don't already own an ice cream maker, go and get one - contrary to what you may think, you don't have to spend a fortune.  You can get one for as little as about $40 (which will do a perfectly good job), and then the frozen confections which will come out of your kitchen will be limited only by your imagination.  I keep the bowl of my ice cream maker in the freezer at all times, so that I am always good to go when the urge takes me.

So what, you might ask, is the difference between gelato and ice cream - the best explanation I have found is this one given by David Lebovitz - but the simplest facts that I have been able to discern from a variety of sources is that gelato generally has less air and less fat than a traditional ice cream, resulting in a product which is more dense in texture and in which the flavour is not masked by the taste and texture of fat coating the palate.

This gelato is as simple as making an egg custard, pureeing some fresh fruit, and then letting the machine do the work - churn away.  The result is lusciously fruity, and with a greater ratio of milk to cream is not overly rich.  Incidentally this recipe uses 8 egg yolks, and in case you were wondering what to do with 8 egg whites (they can be frozen), I can recommend either Nigella's Prodigious Pavlova or Giada's Egg White Frittata with Lox and Arugula, both of which just happen to call for, yes you guessed it, 8 egg whites.  Talk about serendipitous!

Raspberry Gelato Recipe
Adapted from recipe on
Makes approx. 1.5 litres
Click here for a printable copy of this recipe

2 cups milk
1 cup sugar
1/4 cup skim milk powder
8 large free-range egg yolks
1 cup cream
1 teaspoon vanilla extract
3 cups raspberries
(if using frozen, thaw first)

Begin by setting up an ice bath - place a 2-quart (2l) bowl in a larger bowl partially filled with ice and water.  Set a strainer over the top of the smaller bowl and pour the cream into the bowl.

Separate the egg yolks into a medium bowl.  The whites can be discarded or set aside for another purpose.  Whisk the yolks until thickened.

Next heat the milk, sugar and powdered milk together in a large saucepan, bringing it to a gentle simmer and stirring to ensure the sugar is completely dissolved.

Remove from heat and gradually pour some of the milk into the yolks, whisking constantly as you pour.  Then pour the warmed egg yolk and milk mixture back into the saucepan containing the remainder of the milk.

Cook over low heat, stirring constantly and scraping the bottom of the pan with a heat-resistant spatula, until the custard thickens enough to coat the spatula.

Strain the custard into the bowl of cream, and stir over the ice bath until the custard is completely cool.  Add the vanilla extract.  Pour the custard into a jug (that will make pouring into the ice cream maker easier later on).  Cover with cling film, pressing the cling film right down onto the surface of the custard so that the whole surface is covered.  Refrigerate to chill thoroughly - at least about 8 hours, but preferably overnight.

Raspberry Gelato 6, edited

Now you're ready to make ice cream.  Puree the raspberries for a couple of minutes in the food processor or blender, and strain if you prefer to remove the seeds.  Remove custard from the fridge.

Raspberry Gelato 7, cropped & edited

Set your ice cream machine churning and pour in the custard followed by the raspberry puree.  (You could mix the custard and fruit together before pouring into your machine, but I found that my churn did a good job of mixing them for me.)  Churn according to manufacturer's instructions, then serve straight from the churn, or freeze for a couple of hours if you prefer a firmer texture.

Raspberry Gelato 5, cropped & edited

Visit my Cooking Italy page  to learn more about the group, find links to other participants in the group, and links to all the recipes I have so far contributed.

Interested in making more frozen desserts?  Then, I recommend The Perfect Scoop by David Lebovitz - you will also find loads of great recipes and information on his website.

The Perfect Scoop: Ice Creams, Sorbets, Granitas, and Sweet Accompaniments

Wednesday, August 18, 2010

Sweet Potato, Spinach & Chorizo Salad - Quick & Easy # 1


Sweet Potato Spinach & Chorizo Salad 1, edited

This is the first in a series of quick and easy meal ideas that I plan to bring to you - not strict recipes, as such, but more a suggestion of ingredients you can put together in whatever quantities or proportions suits your palate, your pantry or your wallet. Things that don't rely on precise quantities, that will serve more as a springboard for you to tweek and put your own spin on.

Now, if you've been following this blog for a while, then you know that one of my great loves is the "big bowl" salad - a salad which is substantial and which serves as a meal rather than a side dish.  You might be interested in this earlier post, in which I talk about what I consider to be the essential elements of a good salad.  The "framework" if you like that enables you to build great salads out of whatever takes your fancy.

It being winter here right now, this certainly isn't the time for light and leafy salads;  something altogether more substantial is called for, and I often like some "warm" ingredients in my winter salads.

So for this salad you will need:  some day-old bread - cut into chunks (I used ciabatta);  chorizo sausage - thinly sliced;  olives (I used a mixture of green and black);  sweet potato (I used an orange fleshed one) - cut into cubes;  spinach;  olive oil;  balsamic vinegar;  maple syrup;  and salt and pepper.

Begin by heating a little olive oil in a skillet over high heat, then toss the bread chunks in the hot oil and fry until the bread has soaked up all the oil and is golden brown on all sides and crispy.  Remove bread from pan, put into your salad serving bowl, sprinkle over some flakey sea salt, and toss well.

Return the pan to the heat and now fry the chorizo.  If necessary you could add a little more olive oil to the pan, but bear in mind that the chorizo will render quite a bit of fat of its own.  Keep tossing the chorizo around in the pan until it is nice and brown on both sides, and when it is nearly done add the olives to the pan for the last couple of minutes to warm through.  Then tip the entire contents of the pan, including all the pan juices, over the bread in the salad bowl.  Toss everything together well.
 
Sweet Potato Spinach & Chorizo Salad 5, edited

Add a little more oil to the skillet, and return pan to heat. Once the oil is hot, add the cubed sweet potato to the oil, sprinkle over some flakey sea salt and cracked black pepper, and toss from time to time, until the sweet potato is fork tender and golden brown all over.

Sweet Potato Spinach & Chorizo Salad 4, edited

At this stage, pour a generous drizzle of balsamic vinegar into the pan to deglaze, and then add some maple syrup. Allow everything to bubble up around the sweet potato, and keep tossing it around until all the pieces are well glazed. Then tip the entire contents of the pan over the other ingredients already in the salad bowl.

Sweet Potato Spinach & Chorizo Salad 3, edited

Now add some spinach leaves to the bowl, sprinkle with a little more flakey sea salt, and toss everthing together well. The spinach leaves should end up lightly coated with all the olive oil, chorizo fat, balsamic and maple syrup that you cooked the other ingredients in, but if you feel it needs a little more dressing, then drizzle over a little more olive oil or balsamic vinegar. Season to taste.

Sweet Potato Spinach & Chorizo Salad 2, edited

Click here for a printable copy.
I'm also submitting this post to the Two for Tuesdays blog hop.

Monday, August 16, 2010

Another Mystery Photo - Random # 3

Remember this mystery photo from a post last week ...

Greece 217, edited

There were guesses for tamarind (close), vanilla, almonds, macadamias, and a few others that I've forgotten, but the correct answer (guessed by Natalia at Gatti Fili e Farina) was carob.

Interested in knowing a little bit more about carob?  You can find some useful information here in Wikipedia.

And now for another mystery photo.  Clue  - I took this photo at La Boqueria market in Barcelona.

Barcelona 143, edited

Do have a guess, and leave your answer in a comment.

I am submitting this post to the Two for Tuesdays blog hop.

Saturday, August 14, 2010

Tandoori Salmon with Orange Date Mayonnaise Recipe


Tandoori Salmon 2, cropped & edited

Who doesn't love a pot luck dinner?  The thing I love about a pot luck is not so much the food - although that is invariably great, the food on such occasions seems almost irrelevant to me.  What really floats my boat is the generosity of spirit that prevails and sense of abundance;  the willingness of folks to share whatever they have, no matter how little or how simple that might be.  With such ingredients, a pot luck dinner can never fail to be a celebration.

And celebrate we will.  At I Heart Cooking Clubs we continue to cook with 
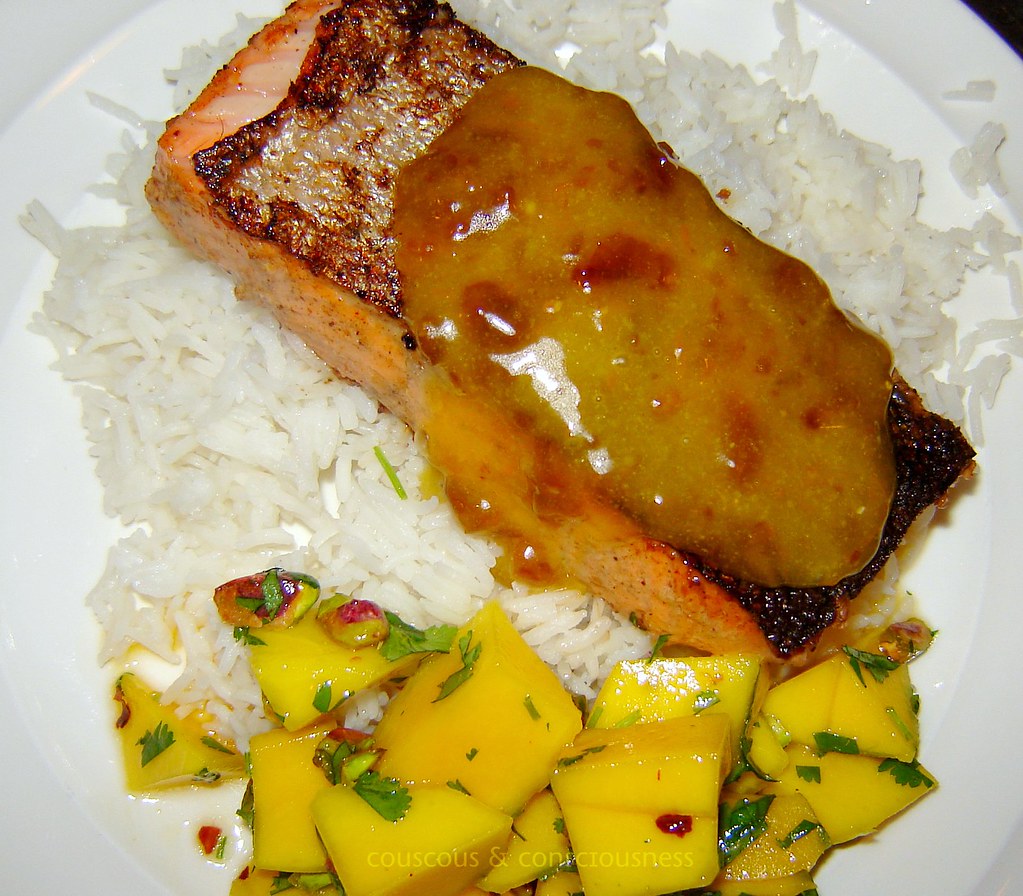
Mark Bittman, and our theme this week is Pot Luck.  I always love checking out everyone's contributions to our virtual pot luck dinners, and this Tandoori Salmon is great celebration food and exactly the kind of thing that I would like to share with others.

Salmon, cropped & edited

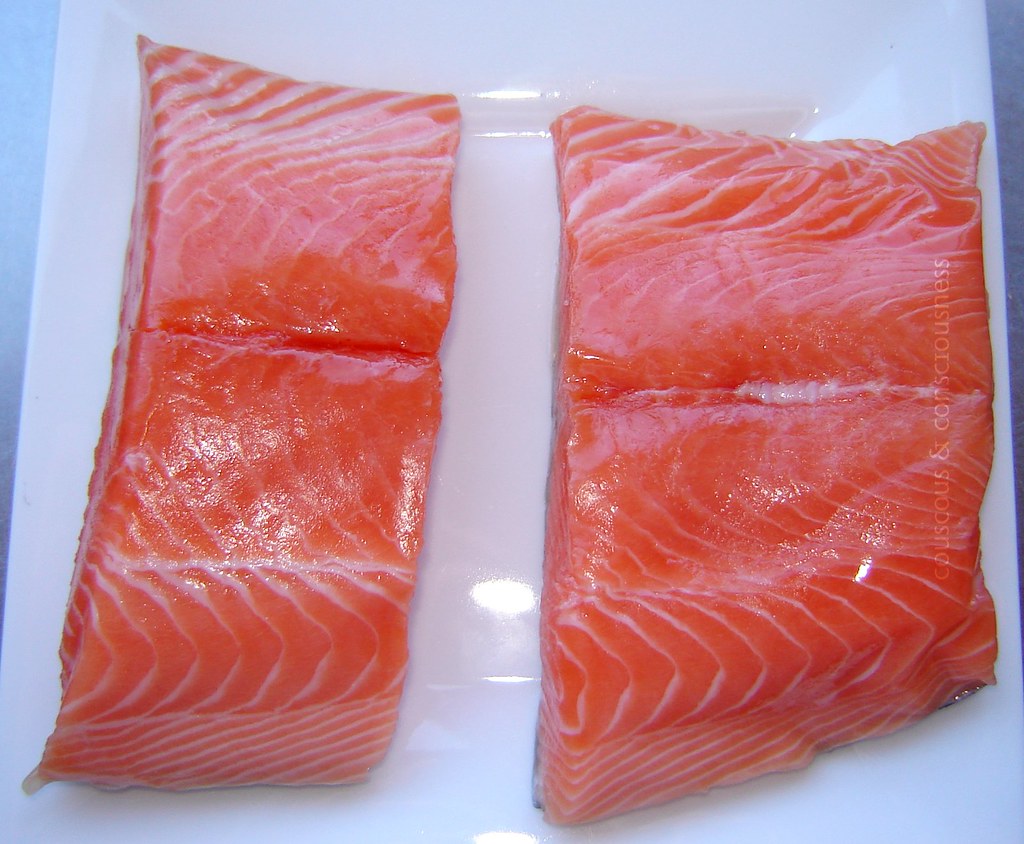
The salmon itself is unbelievably simple - salmon fillets (need I say, the freshest you can lay your hands on - I used beautiful ocean-farmed fillets from 
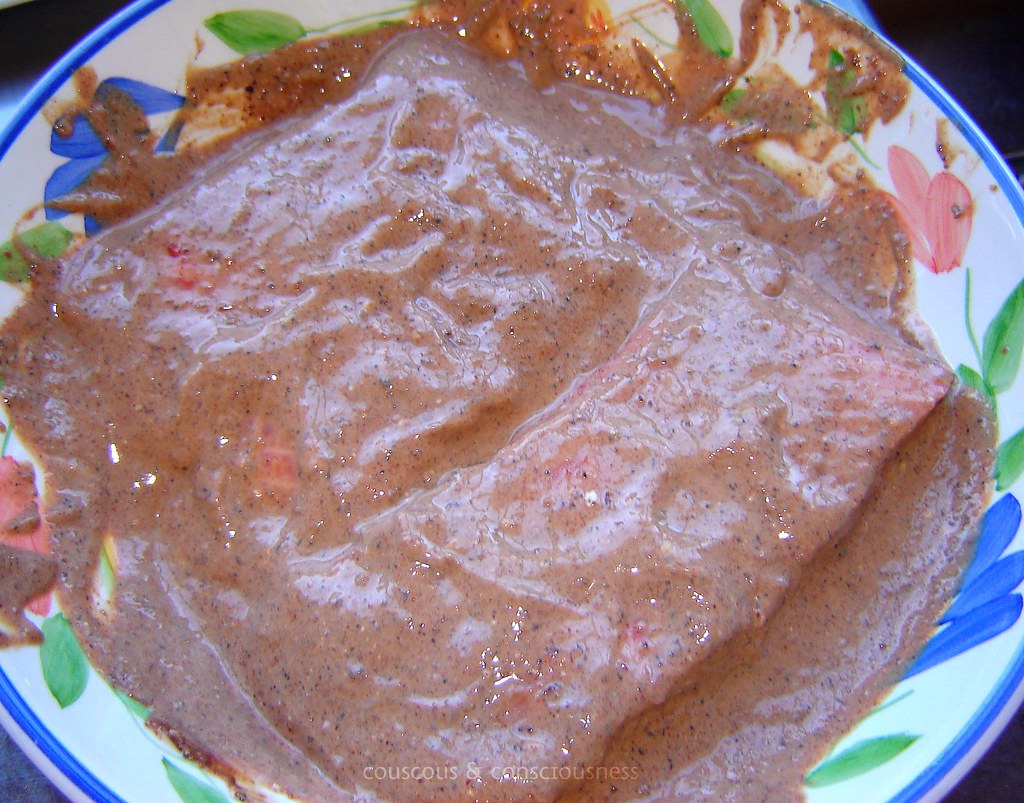
Holy Smoke) are simply marinated in a mixture of tandoori paste (as simple as opening a jar of Pataks) and yoghurt, then pan-fried until done - how easy is that?!  You could keep it as simple as serving this with just some steamed Basmati rice, a bit of mango chutney and some crispy pappadums.

Tandoori Salmon 1, cropped & edited

However, since this was a celebration I chose to take it up a notch with my accompaniments.

I made a cucumber-mint raita for those that like something cooling and refreshing.  Simply finely chop some cucumber, salt liberally, and set in a strainer over a bowl for about an hour.  Then rinse throughly to wash off the salt, and squeeze firmly to get rid of any excess water.  Mix through some natural yoghurt and add a generous handful of freshly chopped mint.  Taste and season with salt if necessary.

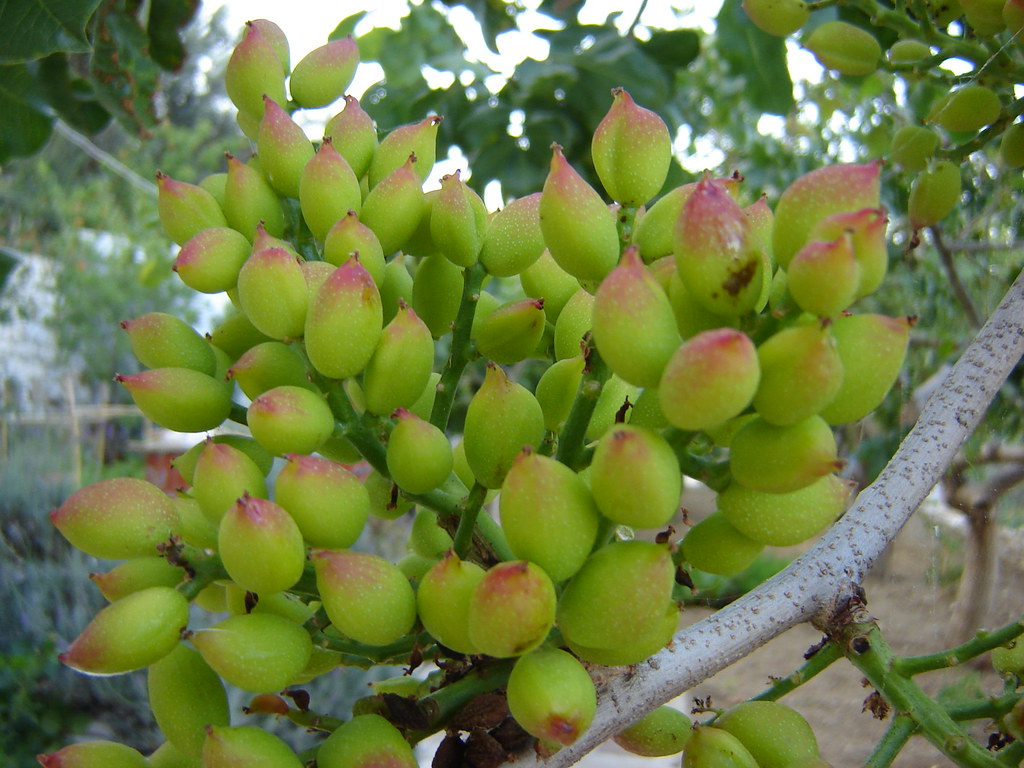
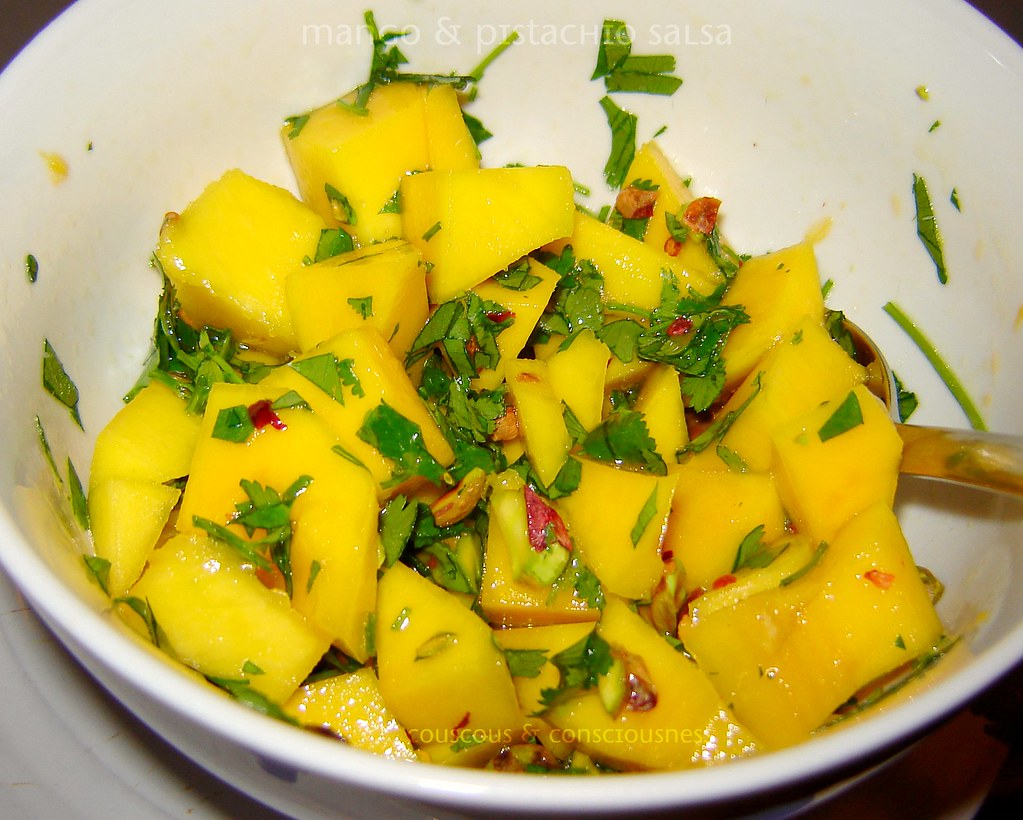
Personally I like something with a bit more zing and heat, so I also made a fresh mango salsa.  Now there is not much better in life than a beautiful fresh, soft, sweet, juicy perfectly ripe mango - but here I wanted firmer texture to contrast with the soft flesh of the salmon, and I wanted a little tartness, so I used a mango which was slightly on the under-ripe side.  After cutting the flesh of the mango into dice, I added a sprinkling of dried chilli flakes (actually a fresh red chilli would have been better, but they're out of season here right now, so dried made a good substitute), juice of 1/2 an orange (if I'd had a lime that would have been better, but use what you have), handful of chopped pistachio nuts, freshly chopped coriander, and a drizzle of olive oil.

Mango Salsa, cropped & edited

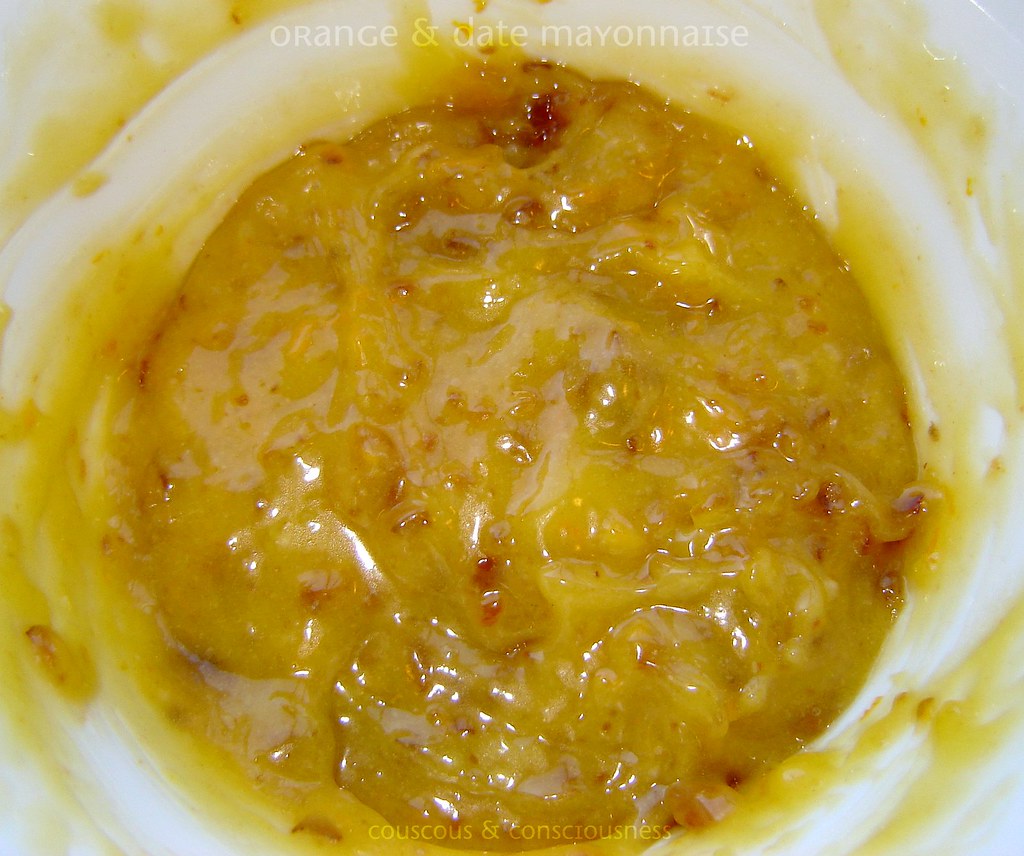
With these two side dishes, I also served some crispy pappadums and a bowl of steamed green vegetables.  I nestled the salmon on a fluffy bed of steamed Basmati rice, and topped it off with an orange and date mayonnaise - and, let me tell you, this mayonnaise was the real star of the show.  I was inspired by an Allyson Gofton recipe I clipped from a magazine some years ago, but long since lost the recipe.  Although my recollection of the recipe is a little hazy (I think tandoori salmon was baked and then served on top of roasted red peppers and grilled mango), memories of an orange date mayonnaise that topped the salmon have stayed with me.  I loved it back then, and it is exactly what I wanted to recreate here - I hope my version does Allyson justice.

Orange & Date Mayonnaise 3, cropped & editted

I hope you'll give this a try, and drop by and see what everyone else is bringing to our Pot Luck Dinner at I Heart Cooking Clubs.


Tandoori Salmon Recipe
Adapted from Mark Bittman's
Click here for a printable copy of this recipe

180g salmon fillet for each person

1/4 cup natural, unsweetened yoghurt
(this amount of marinade would be enough for 4 salmon fillets)

Mix yoghurt and tandoori paste together in a shallow bowl (or you could use a plastic bag), and completely smother the salmon fillets with the mixture.  Leave in the fridge to marinate, overnight if possible, but at least 8 hours.

Heat a saute pan over a high heat until pan is very hot.  If you have a non-stick pan you will be able to get away with a dry fry, as there will be quite a bit of oil that will come out of the salmon.  If not drizzle just about a tablespoon of oil into the hot pan.

Wipe most, but not all, excess marinade off the salmon, and add to the hot pan, skin side down.  Cook until the skin is browned and crispy (about 2 minutes), then turn over and cook until salmon is just medium-rare (about another minute or 2).  Take care not to overcook.

Serve on steamed Basmati rice, with a spoon of Orange & Date Mayonnaise on top.


Orange & Date Mayonnaise Recipe
Inspired by a recipe by Allyson Gofton
Click here for a printable copy of this recipe

1x egg yolk, free range
grated zest of 1/2 orange
2 teaspoons orange juice
1 teaspoon water
neutral flavoured oil (about 1/2 cup)
3x fresh dates
salt to taste

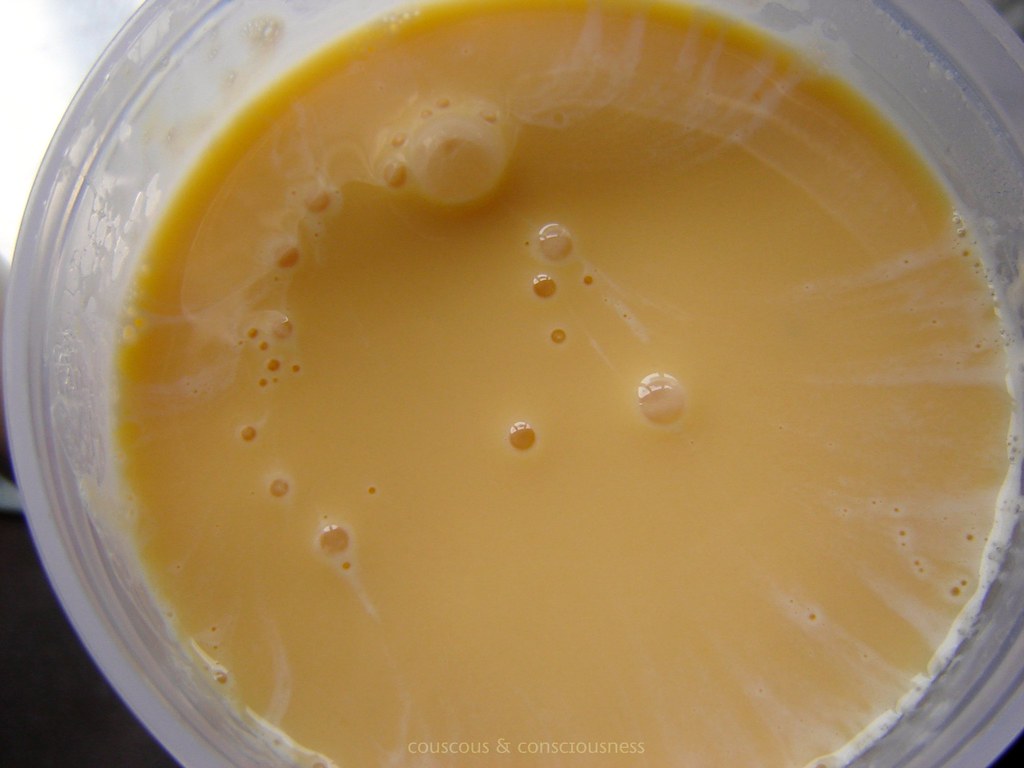
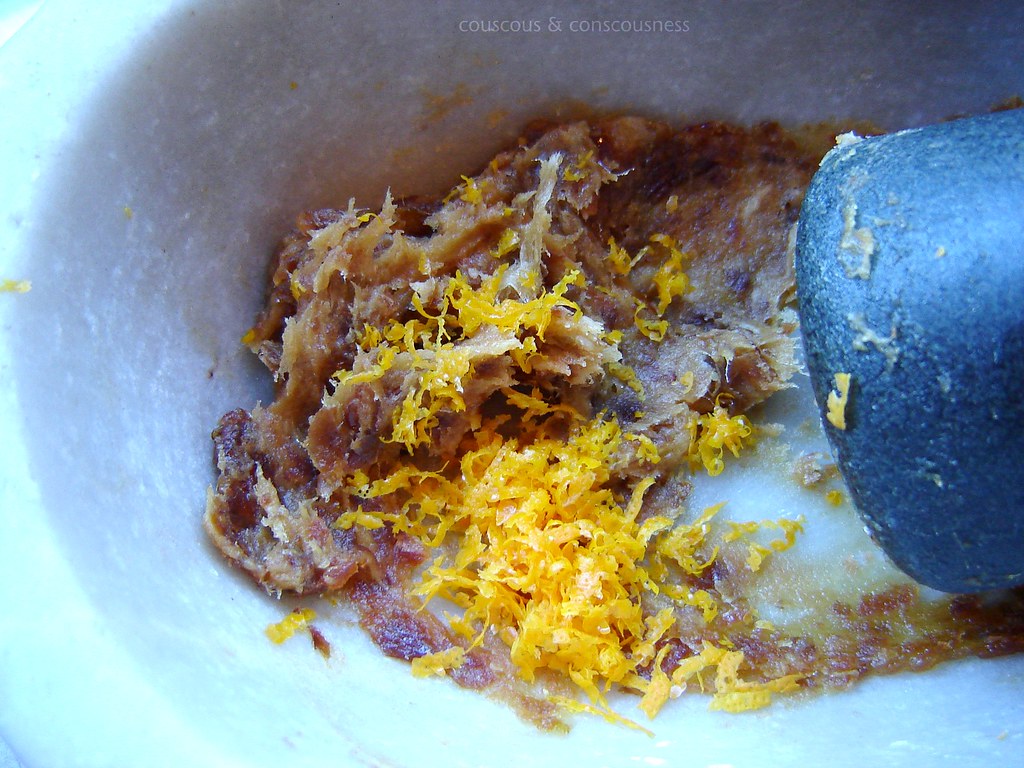
Remove stones from the dates, and then mash up in a mortar and pestle (or food processor if you prefer) until you have a paste.  Add the grated zest of the orange and set aside.

Orange & Date Mayonnaise 1, editted

In a bowl mix the egg yolk with the orange juice and water, and then start to add oil to the egg yolk mixture a few drops at a time, stirring constantly until each addition of oil is fully amalgamated.  Once the yolk starts to thicken a little, you can begin to add the oil in a slow steady stream, until you end up with a thick emulsion.

Orange & Date Mayonnaise 2, cropped & editted

If it gets too thick thin with a little more orange juice.  If your mayonnaise splits add a tablespoonful or two (just add them one at a time) of warm water and stir vigorously until it comes back together again.

Lastly, stir the date paste and orange zest into the mayonnaise until well incorporated, and add salt to taste.

Notes:

In my opinion, there are few things more magical in the kitchen than the alchemy of transforming egg yolks into mayonnaise.  It excites the heck out of me every time and why anyone would want to deny themselves the pleasure of doing this is beyond me.  It takes just moments;  demands nothing more of you than a bit of vigorous stirring;  you know exactly what's in your mayo;  and the taste is infinitely superior to any store-bought mayonnaise.  That said, if you're really nervous about making your own mayonnaise, or squeamish about raw egg yolks, or just can't be bothered, then go right ahead and use a store-bought mayonnaise and just tart it up with the mashed up dates, orange zest and  juice.  I, for one, will not hold it against you.

This mayonnaise would be equally good with grilled chicken or barbequed lamb chops, or I can even imagine it going pretty nicely with roasted beetroot.  I really enjoyed it the next day slathered on toasted ciabatta bread with avocado.

 How to Cook Everything: Bittman Takes on America's Chefs 

This post is also submitted to the January 2011 Culinary Smackdown, where the monthly ingredient is salmon, and the which is this month hosted by the lovely Brenda at Brenda's Canadian Kitchen.


Thursday, August 12, 2010

Mystery Photo - Random # 2

If you saw my post a bit over a week ago for Blood Orange and Black Olive Salad, then you will also have come across this "mystery food photo" that was in the same post ...

Greece 259

There were several guesses for olives, and one for immature red grapes, and although it does indeed look as though it could be either of those things, to my surprise no-one guessed that these are in fact pistachios.  Yes, surprised the heck out of me too.  Don't you think they look rather lovely, and apparently as they mature they turn almost completely red.  It was so exciting to me to see something that (to my knowledge at least) is not grown in this country, and which I only know from the harvested product we get at the supermarket.

So now another mystery food item, again photographed on my trip to Greece.  Can you see the bright green "pods" hanging in the tree in these two photos, and do you know what they are?

Greece 217, edited

Greece 218, edited

The answer will be posted next week.

I'm also submitting this post to the Two for Tuesdays blog hop.

A year ago:  Winter Vegetable Nonya Curry