Showing posts with label eggs. Show all posts

Monday, September 28, 2015

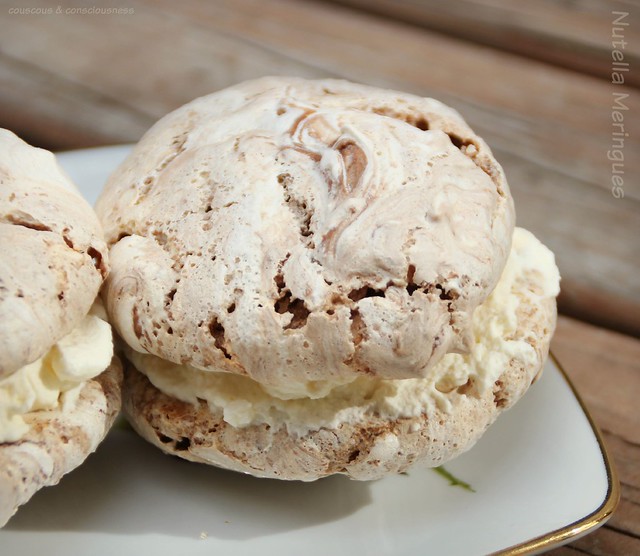
Nutella Meringues

Nutella Meringues 2

I love the serendipitous nature of things at times.

It's Secret Recipe Club** time again, and this month I was assigned to Shockingly Delicious, hosted by the lovely Dorothy.   With 25 years of food writing and developing behind her, Dorothy has an absolute plethora of what she describes as "scrumptious, tried and true, scary good recipes" for her readers to choose from.

Difficult though it was to choose, I had shortlisted a few recipes from Dorothy's blog that I wanted to try:  Mango Orange Cream Power Smoothie and Orange Things Fruit & Vegetable Smoothie - okay, I've been on a massive smoothie kick lately so there was no question they were going to be front runners on the list;  Cheesy Skillet Gnocchi with Kale - I have a big weakness for gnocchi, and kale is very plentiful right now, making this a very strong contender in the mix;  and Nutella Meringues - well, who even needs a "because" for Nutella meringues!!

And this is where serendipity comes into play.  While I was in the midst of an inner debate between mango smoothies and cheesy gnocchi, a friend arrived to stay for a few days bearing a box of duck eggs collected from the brother of another friend.  This occasioned a bit of a Google search for some information about using duck eggs, whereupon I discovered that apparently duck eggs make the best meringues.  Well no prizes for guessing that the decision over which dish I would make was instantly nailed.

Further serendipity came today in the form of the sister of the provider of said duck eggs coming for lunch, and being able to serve her the Nutella meringues for dessert.  Jennifer is not normally a woman of few words, but as she took a bite out of one of these babies, she had just four words to say ... "Oh.  My.  God.  Awesome".  What more can I say?!  There is actually nothing that can be said about these meringues that is not summed up in those few words.  For an "awesome" experience I urge you to try them too.

** Interested to know a little bit more about Secret Recipe Club?  Then let me explain.  The club has over a hundred members, divided into four groups, and each month one member is assigned (in secret) to another member from their group.  That person then selects a recipe (or more) to make, photograph, and prepare a blog post - all in secret.  Then everyone in the group posts their recipe on the same day, and of course the secret is then out.  It's always a thrill to find out who has posted something from your own blog, and is a great way to meet and discover some new blogs.   If you are a food blogger and interested in joining the Secret Recipe Club, be sure to check out the Join SRC page.
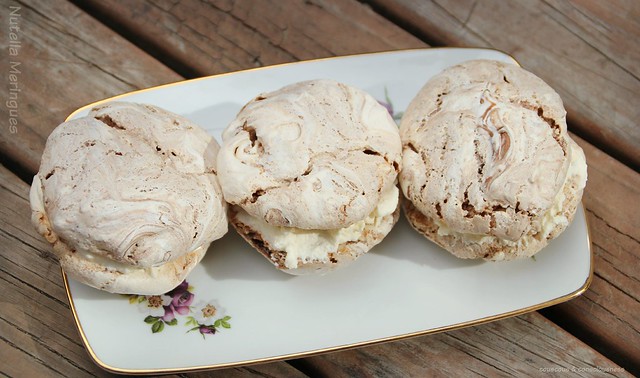
Nutella Meringues 1

Nutella Meringues
from Dorothy at Shockingly Delicious
Makes 12 largish meringues
Click here for a printable copy of this recipe

1/4 cup Nutella
3x large egg whites (duck eggs if you can get them are perfect, if not free range hen eggs)
pinch of cream of tartar
pinch of salt
1/2 cup of sugar

Preheat your oven to 150 degrees C (300 degrees F), and line a baking sheet with baking paper.

Put Nutella in a small bowl and microwave for around 30 seconds to "loosen" the consistency.  Allow to cool if it has become warm.

Using an electric mixer, beat the egg whites on medium speed until they are foamy.  Add the cream of tartar and salt, and continue beating until the egg whites reach a soft peak stage.  Now increase the speed to high, and begin to add the sugar one spoonful at a time, beating well after each addition to ensure that the sugar is fully dissolved - be patient!!  By the time you've finished the meringue will be very thick and glossy.

Add the Nutella to the meringue and, using a rubber spatula, gently fold the Nutella through - just enough to get a marbled effect.  Don't over mix.

Using two spoons drop dollops of meringue onto the lined baking sheet, and place in the preheated oven.  Turn the heat down to 95 degrees C (200 degrees F) and bake for one hour, by which time the meringues should feel "dry".  Turn the oven off and leave meringues in the oven until completely cold.

Remove and store in an airtight container.  Serve just as they are or sandwich together with whipped cream, then wait for the accolades.

I hope you enjoy this dish as much as I did, and visit the links below to check out all the other great dishes my Secret Recipe Club friends made.


Tuesday, February 3, 2015

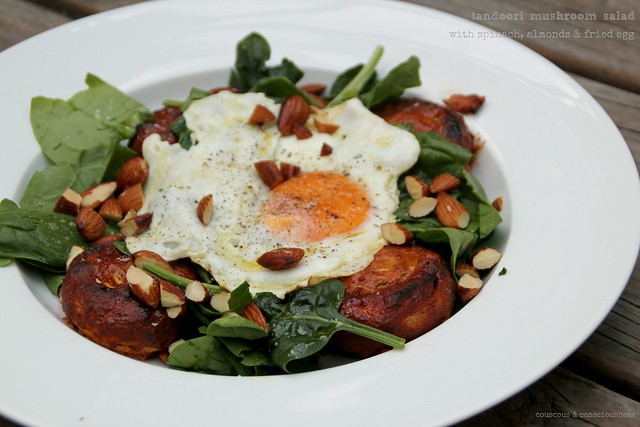
Tandoori Mushroom Salad with Spinach, Almonds & Fried Egg - Salad Days # 3

Tandoori Mushroom Salad 2

I've been addicted to tandoori roasted mushrooms ever since I tried them one night at the Indian Cafe.  Fortunately, they are quick and easy to make at home, especially if you always keep a jar of tandoori paste in the fridge as I do.  As you know, I'm a great believer in making as much as I can from scratch, and there is very little I buy at all in the way of processed foods.  That said, I'm not super woman, and I've long since discovered that a few sachets or jars of a variety of curry pastes in the pantry can be just the thing to transform a few humble vegetables into something fabulous when you want a quick and easy mid-week meal.

So tandoori mushrooms make a regular appearance around here for a quick and easy vegetable side.  I simply mix together equal quantities of yoghurt and tandoori paste (usually about 1/4 cup of each) to make a marinade, toss the mushrooms in the marinade and leave them to develop the flavour for at least an hour.  Finally the mushrooms are removed from the marinade and roasted in a hot oven until tender and slightly charred.

Often as I've made these mushrooms though, I'd never thought to turn them into a salad until I flicked on the TV one night just in time to see Anjum Anand serving up a tandoori mushroom salad.  Unfortunately, I was too late to get the recipe, I only saw what she put on the plate, so this is my version of how I think this dish might go.

I love the spicy, yet slightly lemony, zing of the tandoori flavour, which develops a kind of smokiness when roasted, the earthiness of the mushrooms and spinach, the velvety softness of the spinach leaves against the crunch of the almonds, and finally the oozy, runny egg yolk which combines with the mushroom juices and olive oil to make a rich, glorious dressing.

This salad is great to serve as a meal on its own, and is hearty enough for a cool, winter's evening.

Tandoori Mushroom Salad 1

Tandoori Mushroom Salad with Spinach, Almonds & Fried Egg Recipe
Inspired by a dish by Anjum Anand
Click here for a printed copy of this recipe

For each person allow:
4x large mushrooms
generous handful or two of baby spinach leaves, roughly torn
generous handful of roasted, unsalted almonds, roughly chopped
1x egg, fried

To marinate the mushrooms (this will be enough for 6-8 mushrooms, depending on size):
1/3 cup tandoori paste
1/3 cup natural yoghurt

To dress the salad:
juice of 1/2 lemon
extra virgin olive oil
flaky sea salt & freshly ground black pepper

Preheat oven to 220 degrees C (425 degrees F).

Mix together the tandoori paste and yoghurt in a medium bowl.  Add mushrooms to the bowl, and toss to make sure they are all well coated with the marinade.  Set aside for the flavour to infuse for at least an hour.  Place mushrooms in a single layer in an ovenproof dish, and roast in the preheated oven until the mushrooms are tender and slightly blackened around the edges.

Remove mushrooms from the oven and arrange on a serving platter.   Arrange spinach leaves amongst the mushrooms, and sprinkle almonds over the top.  Drizzle over lemon juice and olive oil.  Nestle fried egg on top, and season liberally with flaky sea salt & freshly ground black pepper.

Serve immediately.  Dig your fork into that runny egg yolk and enjoy!

This is salad number 3 in my Salad Days, 28 days of salad project.   What's that you ask?  Well,  I've said it here a dozen times or more ... I love salads.  A big bowl, substantial salad is hands down my favourite meal any time of the year.  Such is my love of salad, that I'm challenging myself to come up with a different salad every day for the month of February - that's 28 days of salads - and I plan to share as many of them as I can with you.  I'll also be doing some flashbacks to some of my favourite salads I've shared in the past.


What's more, I'm giving you the opportunity to share some of your favourite salads with me too.  Have a favourite salad you'd like to share?  Simply link up your salad recipe using the linky tool at the bottom of this post.  The linky will be open all month, and you can join in any day or every day, and link as many recipes as you like.  Feel free to grab the Salad Days badge from the sidebar to include in your post if you'd like to.  There's really no rules around linking up, other than please, use your manners and link your post back to this one.  Linking old posts is fine too, just please edit them to include the back link.  Thanks for sharing your favourite salad with us.


Monday, December 1, 2014

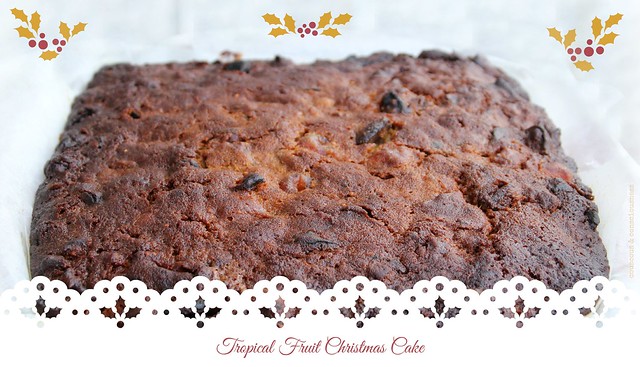
Tropical Fruit Christmas Cake

Tropical Fruit Christmas Cake

Every year since I started this blog it's been on my mind to post a Christmas cake recipe but, best laid plans and all of that, some years I just didn't get around to making a cake, other years the cake got made but planning for a blog post was off and somehow posting a Christmas cake recipe in the middle of January just didn't make sense.

This year, with family coming (from near and far) to stay over the Christmas holidays, it's an even bet that my hostessing skills will be called into serious question if I don't produce said cake.  Serendipitously, it's our monthly Pot Luck week at I Heart Cooking Clubs, and I felt sure that at least one of our IHCC chefs would have a Christmas cake recipe I could try.  I was pretty certain that if I looked hard enough Nigella Lawson, Donna Hay, Nigel Slater, Jamie Oliver and our current chef, Diana Henry, would probably all offer something suitable.

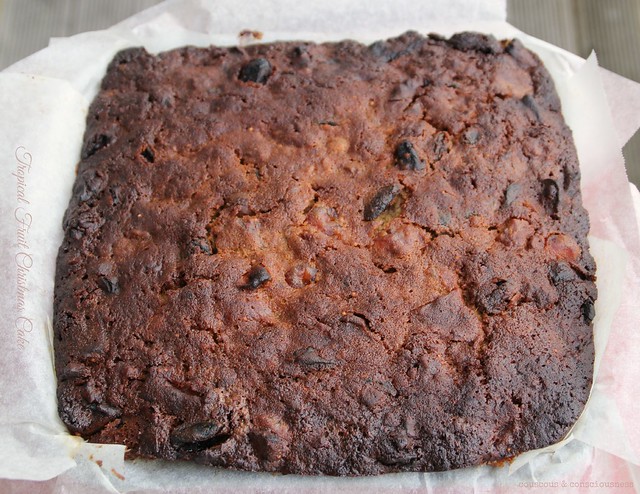
As it turned out, the first place I searched was Donna Hay's website, and on finding her Christmas cake recipe, I needed look no further.  Because we celebrate Christmas here in New Zealand in the height of summer, I decided to give my cake more of a tropical vibe than the traditional, rich, dark cake.  I used Donna's recipe as a basic template for quantities of eggs, butter, sugar, flour, etc, but I replaced most of the fruit with more tropically inspired dried fruit.  In keeping with my tropical theme I soaked the fruit in ginger beer instead of sherry, and replaced almonds with macadamia nuts.  I also added some rose water, orange flower water, and almond extract to the soaking liquid, as well as adding some ground ginger and nutmeg in with the spices.

I'd love to show you a slice of this cake and tell you how it tastes, but what you see in the picture is the cake straight out of the oven.  It has several hours of cooling in the tin ahead of it, before it could be sliced, and anyway, you know that it's bad luck to cut the cake before Christmas.  Of course, there's always a few spoonfuls of the mixture that don't make it into the cake tin, and if what I tasted out of the bowl is anything to go by we are in for a wonderful cake.

I think this cake will be delightful as it is, without any further adornment, but if you like to go the whole marzipan and royal icing route that would be great too.  Personally, I'm thinking that Christmas Eve this cake will get a liberal blanket of a white chocolate, ginger and cream cheese frosting - what do you think?

Tropical Fruit Christmas Cake 2

Tropical Fruit Christmas Cake Recipe
Inspired by this recipe from Donna Hay

1.1 kg (2-1/2 lb) mixed dried fruit
(I used a combination of jumbo raisins, cherries, mixed peel, apricots, pineapple, figs, prunes and rock melon)
100g (3-1/2 oz) macadamia nuts
300 ml (1-1/4 cups) ginger beer
2 tablespoons rose water
2 tablespoons orange flower water
1 tablespoon almond extract
300g (10-1/2 oz) butter, room temperature
220g (7-3/4 oz) soft brown sugar
2x vanilla beans
4x eggs
375g (13 oz) plain flour
1/4 teaspoon baking soda
1 teaspoon each ground cinnamon, ground ginger, mixed spice & nutmeg
1/4 cup ginger beer, extra

Place all the mixed fruit and nuts into a large bowl, cutting larger pieces of fruit as you go - I cut everything into pieces about the size of the cherries.  Pour the first measure of ginger beer over the fruit, along with the rose water, orange flower water and almond extract.  Mix everything together well, cover bowl with a clean tea towel, and place in a cool, dark place to soak for 24 hours.  Give it a stir occasionally if you think of it.

Preheat oven to 140 degrees C (275 degrees F).  Grease a 20cm (8 inch) square cake tin, and line with two layers of non-stick baking paper, greasing each layer of paper as you go.

Place butter and brown sugar in the bowl of a stand mixer.  Split the vanilla beans lengthwise down the middle and scrape out the seeds, adding the seeds to the butter and brown sugar.  Set the machine running, and beat the mixture for 5 to 8 minutes, until light and creamy.  Add the eggs to the mixture, one at a time, beating well after each addition.

Sift together flour, baking soda and spices.  Add to the soaked fruit, and stir well to ensure that all the fruit is well coated with the flour.  Lastly add the butter and sugar mixture, and stir until everything is well combined.

Spoon the mixture into the tin (reserving a couple of good spoonfuls for the cook), smooth the top, and place in the preheated oven.  Bake for 2 hours 25 minutes to 2 hours 35 minutes, or until a skewer inserted into the centre of the cake comes out clean - I'd suggest you start testing after 2 hours 15 minutes.

Remove from the oven, and brush the top of the cake liberally with the extra ginger beer while still warm.  Allow to cool in the tin completely before removing and wrapping well in plastic wrap to store.  Should keep for at least four weeks.

If you would like to get to know Donna Hay a little better, or any of our other IHCC chefs, and to see what everyone else has cooked up this week, then do go and visit my friends at I Heart Cooking Clubs and check out the links (who knows, you might even want to join the journey and cook along with us) ...

Diana Henry badge 1A


Sunday, November 2, 2014

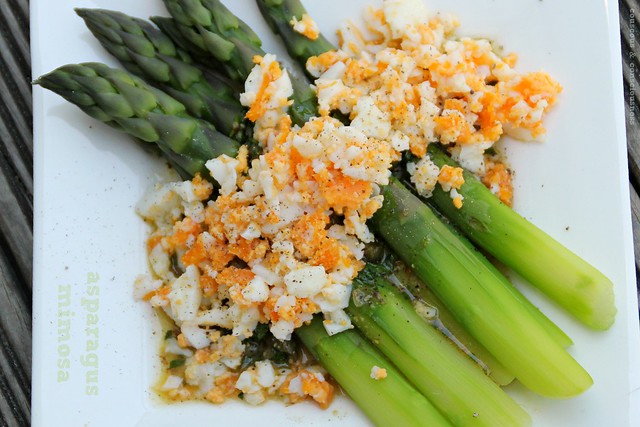
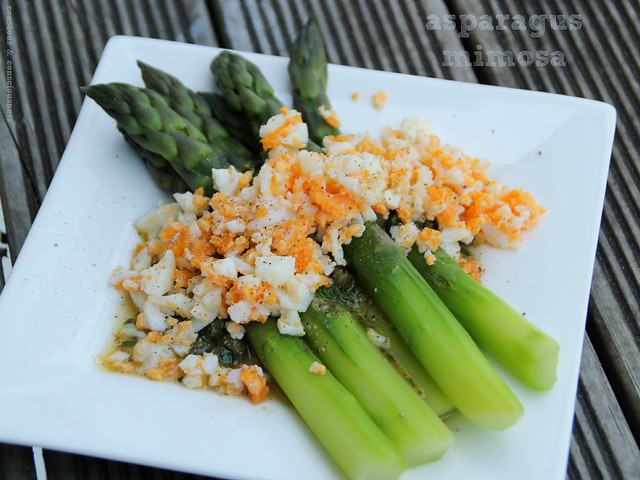
Asparagus Mimosa

Asparagus Mimosa 2

I have no notion which came first ... the chicken or the egg?  That's our theme this week at I Heart Cooking Clubs, which gives us the opportunity to explore Diana Henry dishes featuring, naturally enough, chicken or eggs.  And, whilst I'm pretty certain no one is going to come up with a definitive answer to that age old question, some of the dishes my friends have come up with would definitely answer just about any other woes.

I was certainly looking for a dish to satisfy a few woes myself this week.  We've had two weeks of builders, gib stoppers, electricians, etc doing flood damage repairs on our house, including ripping out and replacing the kitchen and dining room ceiling.  This would be disruptive enough in itself, but the fact that the workmanship and trade practices of some of these workmen left a bit to be desired, has been frustrating at best, and at times downright infuriating.

So I was looking for something verging on comfort food, which meant I was heading down the egg route, rather than the chicken route.  When all is said and done, is there anything more comforting than a simple, soft boiled egg?!

After picking up a fresh bunch of asparagus (hands down my favourite vegetable) at the market yesterday, I thought this asparagus mimosa would make a delightful, light and simple lunch, before tackling the big post-repair clean-up - a project which has kept me busy for most of the weekend.

Now, let's be truthful here - asparagus mimosa is nothing new - it's one of those classic dishes that has been around forever.  But, to be honest, I have often wondered what all the fuss is about ... after all, just how good could a few asparagus spears with a crumbled boiled egg over the top really be.

Well, I don't know about the original, but Diana Henry's version provided proof positive, if ever it were needed (and really I've said it here so often I should not have been surprised), that combining a few good quality ingredients, and "messing with them" as little as possible, will deliver sensational results.  Every! Single! Time!

Here simple steamed asparagus stems, drizzled with a lemony-herby-caper dressing, and topped with a soft-boiled free range egg, delivers on every front.  It provides all the comfort of dunking asparagus spears straight into a soft boiled egg in a cup, with the added flavour punch of the dressing, and turns it into a dish which is easily elegant enough to serve to company.

This would make a great appetiser as part of a large meal, but is also the perfect dish for a light spring lunch.  You don't need to be too particular about quantities - I've just given you a rough guide for one person, and you can easily multiply it up to feed as many as you like.

Important note:  A dish such as this is all about the ingredients, so use the best you can get your hands on.  Use only in-season asparagus IN YOUR PART OF THE WORLD.  Right now, I'm sure those of you in the northern hemisphere can probably buy asparagus shipped from New Zealand, or Australia, or South Africa - please don't!  Bookmark this recipe instead and wait until spring returns.  If you have a local farmer's market where you can buy asparagus picked fresh that morning, even better.  A juicy, organic lemon picked straight from the tree, and flat-leaf parsley picked straight from the garden, are perfect if you have them, but I know that's not always possible.  Good quality capers are a must - I like the ones packed in salt, but brined are fine too.  Extra virgin olive oil, should be the best that you can afford, and it goes without saying that only a free-range organic egg will do.  Also, although I never bother peeling my asparagus, I think it is worth doing here.  In a dish so simple, in which you really want the ingredients to shine in every possible way, it just seems right - it looks beautiful, and really helps the asparagus to soak up that dressing.

Asparagus Mimosa 1

Asparagus Mimosa Recipe
Adapted slightly from recipe by Diana Henry
from A Change of Appetite

For each person allow:
1x bunch (5-6 spears) asparagus
1x free range egg
zest and juice of 1/2 lemon
2 tablespoons extra virgin olive oil
1/4 teaspoon wholegrain mustard
flaky sea salt & freshly ground black pepper
small bunch flat leaf parsley, finely chopped
1 tablespoon capers, rinsed and drained, roughly chopped

Place egg in a small pot, cover with cold water, and bring to the boil.  Boil for four minutes.  Remove egg with a slotted spoon and place in a bowl of cold water, until egg has cooled enough to handle, but is still warm.

In a small bowl, whisk together lemon juice, olive oil, mustard, salt and pepper, until well combined.  Stir in the parsley, and capers.  Set aside.
Snap the woody ends off the asparagus spears, and peel the ends.  Boil the asparagus until just tender to the tip of a sharp knife - about four minutes, depending on the thickness of the spears.

Meanwhile, peel the egg, place on a plate or board and mash with a fork, until crumbled and yolk and white mixed together.

Drain asparagus as soon as it is ready and place on a serving plate.  Drizzle over a generous amount of the dressing, and spoon the crumbled egg over the middle of the asparagus.  Finish with another drizzle of olive oil if you like.
If you would like to get to know Diana Henry a little better, and to see what everyone else has cooked up this week, then do go and visit my friends at I Heart Cooking Clubs and check out the links (who knows, you might even want to join the journey and cook along with us) ...

Diana Henry badge 1A

... or check out A Change of Appetite and Diana's many other great titles available from Amazon USA, Amazon UK, or Fishpond NZ.


Thursday, October 2, 2014

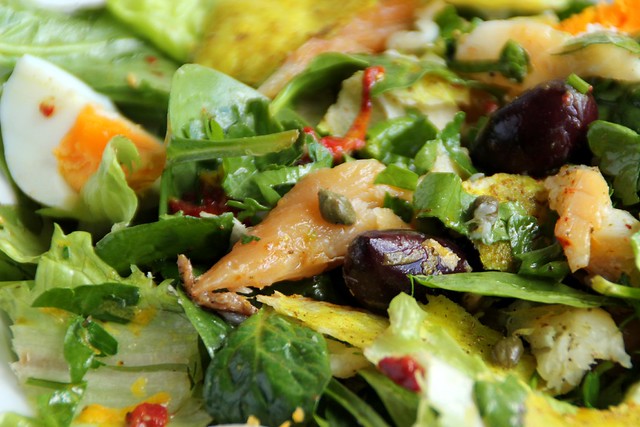
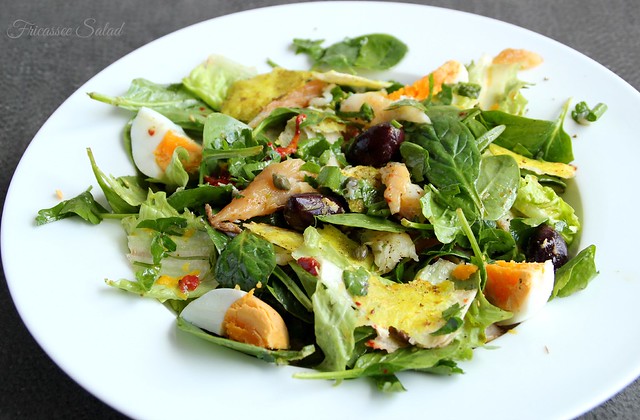
Fricassee Salad

Fricassee Salad 1

Just when I was thinking he couldn't surprise me any longer, Yotam Ottolenghi comes along and damn nearly blew my mind.

I've been cooking and posting Ottolenghi dishes for the last four and a half years, when I first introduced him to you with this Baked Aubergine with Saffron Yoghurt Sauce and Pomegranate.  We often hear the term "genre-bending" applied to movies, novels, works of art, and pieces of music - I'm not sure if such a term can be applied to food and cooking, but if it can then I'm sure it certainly applies here.  That was a dish unlike anything I'd eaten or cooked before, and it was for me the beginning of a whole new food journey.

Over this time, I've been stunned by the wonderful flavour and texture combinations Ottolenghi pulls together.  He's introduced me to unique ingredients, which I had never previously heard of, and which have now become part of my every day pantry staples.

Yet, even though ingredients such as harissa paste, preserved lemons, pomegranate molasses, za'atar, dried Persian limes, rose petals, and orange flower water, have all now become almost "common place" in my kitchen, the flavour punch that these ingredients deliver is anything but.

So it should have come as no surprise that this dish, adapted from Ottolenghi's book Jerusalem, completely knocked my socks off, but I was still seriously "wowed" by it.

Fricassee Salad 2

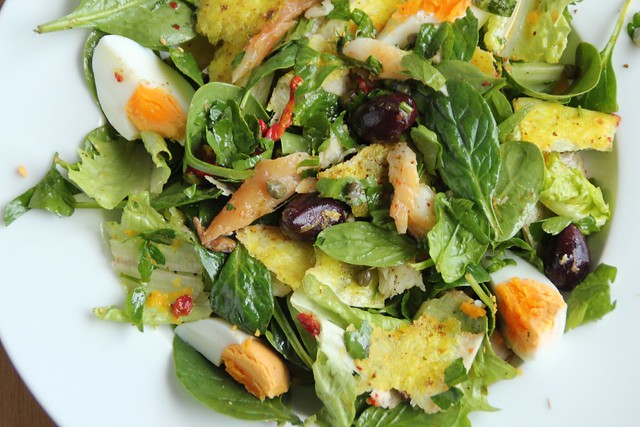
In his preface to the recipe, Ottolenghi says that "This salad is a deconstruction of Tunisian fricassee - a fried bun stuffed with tuna, harissa, olives, anchovies, a spicy pumpkin relish, pickled lemon, cooked potato and hard boiled egg."  He remarks that the resemblance to the classic French Nicoise salad is no coincidence, "and is evidence of the interaction between French and Tunisian cuisines during the years of French occupation".

I made a few changes to the recipe, mostly for the sake of convenience.  Firstly, the original recipe called for fresh tuna to be gently poached in oil and then left to stand for 24 hours.  For ethical reasons, much as I love tuna, I choose not to eat it.  And, although, I thought this technique could just as readily be applied to a nice piece of salmon, I was after lunch in half an hour - not tomorrow.  Ottolenghi does suggest a good canned tuna as a substitute for the confiting process, but it turned out I had a nice piece of smoked mackerel on hand and decided that would make an acceptable alternative.  Ottolenghi's recipe also calls for boiling potatoes in water flavoured with plenty of turmeric, but again I was looking for something a little more instant.  Instead I brushed a flour tortilla (any flat bread would do) with a mixture of olive oil and turmeric, for that gorgeous golden colour, and sprinkled it with a little za'atar for good measure, then baked until crisp, and crumbled it into the salad.

I'm sure the original recipe is sensational, and I will definitely take the time to make it as written (subbing in some salmon for the tuna) very soon, but this shortcut version made a fast, flavourful lunch that ticked all the boxes for me.  The bold combination of harissa, anchovies, black olives, capers, and preserved lemons packed a flavour punch that delivered so much more than I expected.

If you own a copy of Jerusalem, you will know that every time you pick it up (constantly), there are a couple of recipes that you frequently tell yourself "I have to make that", and yet somehow it hasn't happened yet.  Our mandate this month at Tasting Jerusalem* group is to do just that.  I had a couple of recipes lined up and let me tell you this was not one of them.  This was one of the recipes that I've kind of just skimmed over so many times and, if it wasn't for the fact that I was looking for lunch and recognised that I had pretty much all the ingredients on hand, I probably would have done so again.  I'm ever so grateful that this recipe stopped me in my tracks - it's worth so much more than a fleeting glance, and has definitely been bookmarked by me now as one of the standout recipes in the book.  I hope you'll give this a try.

Fricassee Salad 3

Fricassee Salad
Makes one very generous meal, or two appetisers
Adapted from recipe by Yotam Ottolenghi & Sami Tamimi
from Jerusalem: A Cookbook

150-200g (5-7 oz) smoked fish, flaked into bite sized chunks
1x flour tortilla
extra virgin olive oil
1/2 teaspoon turmeric
za'atar
anchovies, as many as you like (I used four), roughly chopped
1 tablespoon harissa paste
capers, again as many as you like
1/4 of a preserved lemon, rind only (flesh discarded), thinly sliced
black olives, as many as you like
1x fresh lemon, zest and juice
1/2 roasted red pepper, cut into thin slices
1x boiled egg, shelled and quartered
2x generous handfuls salad greens (I used a mixture of baby spinach & cos)
1x generous handful flat-leaf parsley, roughly chopped
flaky sea salt & freshly ground black pepper

Preheat oven to 180 degrees C (350 degrees F).  Mix 1 tablespoon of extra virgin olive oil and the turmeric together to make a paste, and brush over the surface of the flour tortilla.  Sprinkle liberally with za-atar. (If you don't have za'atar, try a sprinkling of dried thyme and sesame seeds instead.)  Place on a tray and bake in the preheated oven until puffed and crispy - this will only take a few minutes.  Remove from oven and set aside to cool.  It will crisp up some more as it cools down.

Place anchovies, harissa paste, capers, black olives and preserved lemon rind in a small bowl.  Add plenty of freshly ground black pepper and a generous slosh of olive oil (I used the oil that the roasted peppers had been preserved in).  Toss together gently to combine.

Place salad greens, parsley, red peppers, and flakes of smoked fish in a large bowl.  Season with just a touch of flaky sea salt, and add the grated zest of the lemon, along with its juice.  Gently combine.

Now add the anchovy mixture to the salad bowl, and toss gently to combine everything well.  Place everything in a serving bowl.  Arrange boiled eggs over the top, and finish with another drizzle of extra virgin olive oil.  Serve immediately.

If you're interested in more great food from Ottolenghi check out Jerusalem and his other great titles available from Amazon USA, Amazon UK or Fishpond NZ.

* Have a look also at what my "Tasting Jerusalem" friends have been doing - you'll find plenty of great inspiration. (“Tasting Jerusalem is a virtual cooking community exploring the vibrant flavors and cuisine of the Middle East through the lens of “Jerusalem: A Cookbook” by Ottolenghi and Tamimi published by Ten Speed Press. You can follow along and cook with us by subscribing to omgyummy.com, following the hashtag #TastingJrslm on Twitter and Instagram, liking our Facebook page or joining our Google+ Community and finally checking out all of our groups’ dishes on Pinterest.”)

Sunday, June 29, 2014

Broad Bean Frittata

Broad Bean Frittata

This week at I Heart Cooking Clubs our theme is Mediterranean Magic.  Now I don't know what springs to mind for you when you think "Mediterranean magic", but I imagine that your vision is probably not too dissimilar from mine.  I picture places like this ...

Paros 47

... and food like this ...

Watermelon & Feta Salad 2

Instead, my reality this week has been winter woollies, root veggies and hearty soups, and a severe storm that left me spending several hours trying to mop up the flood.  In short, life this week (distance from the Mediterranean aside) has been about as unmagical as it could get.

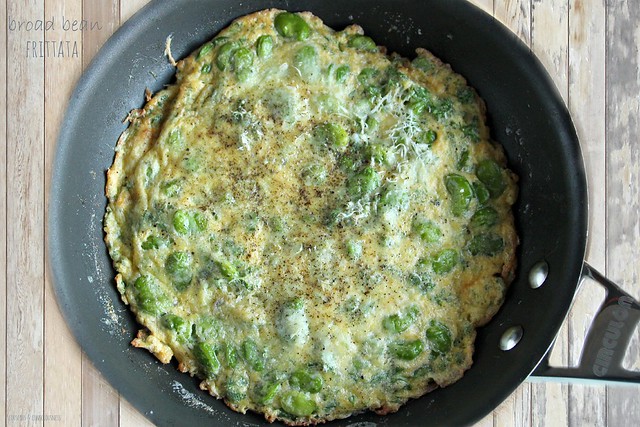
So getting in the spirit of this theme has been a bit challenging.  I was pretty much going to forget about the theme, make a comforting bowl of soup and call it a day.  Until thumbing through Nigel Slater's Tender, Vol I, I came across his Broad Bean Frittata.  Eggs are great for a quick and simple meal when you're low on energy and enthusiasm.  Frittata is Italian, and therefore Mediterranean, and there is something about a perfectly cooked, golden frittata that evokes sunshine.  And even though broad beans at this time of year in my world come out of a freezer bag, they still make me think of summer.

Frittata is not one of those things that really needs a recipe and, to be honest I didn't even actually read Nigel's recipe.  I just read the title and ran with it in the same way that I usually make frittata.  This is what I did, for two generous servings.  This is delicious straight out of the pan - of course it is, but I also love it cold the next day with fresh ciabatta bread as a kind of frittata sandwich.

Broad Bean Frittata Recipe
Inspired by recipe from Nigel Slater
from Tender, Vol. I
Click here for a printable copy of this recipe

250g (9 oz) frozen broad beans
4x large free range eggs
very generous handful parsley, finely chopped
flaky sea salt & freshly ground pepper
2x large handfuls of parmesan, freshly grated
(feta would also be a great alternative)
large knob of butter

Bring a small pot of water to the boil.  Add broad beans to the water, return to the boil and cook for 1 minute.  Drain and refresh under cold water.  Remove and discard thick skins from the beans and set aside.

In a small bowl lightly whisk the eggs.  Add the parsley and season liberally with salt and pepper.  Add half the grated parmesan, and whisk just until everything is combined.  Stir in the broad beans.

Add butter to a 24 cm (9 inch) non-stick skillet and set over a medium heat.  Once butter is melted and sizzling, pour egg and bean mixture into the pan.  Turn heat down to low and cook until the eggs have thickened and set, the bottom is cooked and golden, and just the surface is still a little runny.

Sprinkle the rest of the parmesan over the surface.  Grind over a little more black pepper.  Remove pan from the heat and finish under the grill (broiler) in your oven, until puffed and lightly golden on top.  This will only take a few minutes.

Remove from the oven, slide the frittata out onto a board or serving platter, and cut into wedges to serve.

If you would like to get to know Nigel Slater a little better, and to see what everyone else has cooked up this week, then do go and visit my friends at I Heart Cooking Clubs and check out the links ...


... or check out Tender, Vol. 1 and Nigel's many other great titles available from Amazon USA, Amazon UK, or Fishpond NZ.

I'll also be sharing this post this week at See Ya In the Gumbo hosted by the delightful Michelle at Ms. enPlace, at Weekend Cooking hosted by Beth Fish Reads, and at Foodie Fridays hosted by Designs by Gollum.

See Ya in The Gumbo Badge     Weekend Cooking Badge     Foodie Friday Badge


Saturday, January 11, 2014

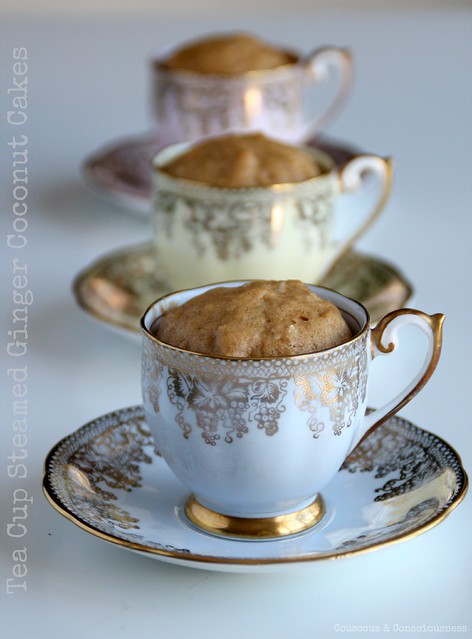
Tea Cup Steamed Ginger Coconut Cakes

Tea Cup Steamed Ginger Coconut Cakes 2

This week at I Heart Cooking Clubs our theme is "Time for Tea" - creating Donna Hay recipes which are perfect to enjoy with a cup of tea, are inspired by tea drinking, or even use tea as an ingredient.

I have to say that Donna has literally dozens and dozens of recipes that would fit the bill, so narrowing the choice down was by far the hardest part of this challenge.

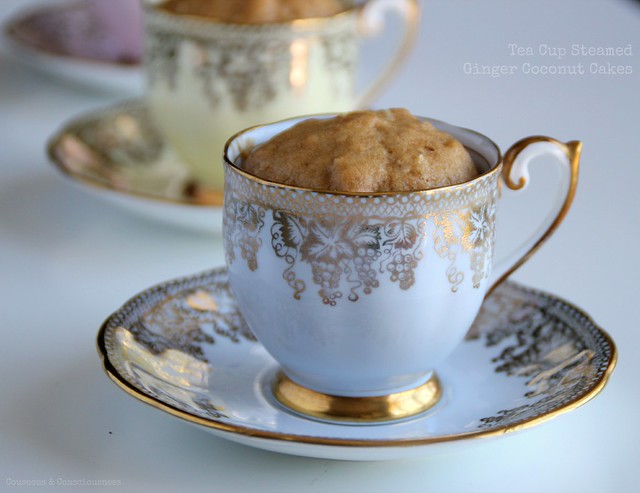
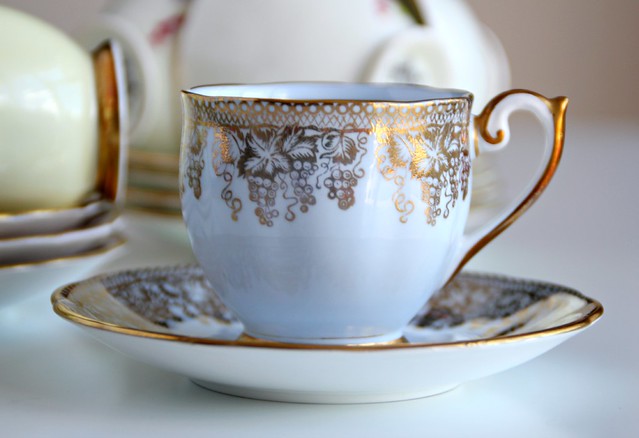
Leafing through my copy of "Dining" (which is now published as "Entertaining"), I came across these Tea Cup Steamed Coconut Cakes.  Donna prepared hers in little Chinese tea cups, but I chose to use a selection of these gorgeous little demi-tasse cups which used to belong to my mother.

Tea Cup

I made a few minor changes to the recipe:  I replaced the 1/2 cup of white sugar and 1/4 cup of palm sugar called for in the original recipe with 1/2 cup of coconut sugar, and I added some ground ginger for a little extra flavour.

The coconut sugar brought beautiful caramel flavours to these little cakes, which were very easy to put together (even for a non-baker like me), and they made a delicious afternoon treat with a cup of jasmine tea.  I also loved that, by virtue of these little cakes being steamed, I didn't need to use the oven on a hot and sunny afternoon.

Tea Cup Steamed Ginger Coconut Cakes 1

Tea Cup Steamed Ginger & Coconut Cakes Recipe
Adapted from recipe by Donna Hay
Makes 6-8 (depending on size of your cups)
Click here for a printable copy of this recipe

4x free range eggs
1/2 cup coconut sugar
1-1/2 teaspoons ground ginger
1-1/4 cups self raising flour
3 tablespoons dessicated coconut

Place eggs and sugar in a medium sized bowl and, using an electric mixer, beat mixture until it is light and thick - about 8-10 minutes.

Gently fold the sifted flour and ginger, along with the coconut, into the mixture.

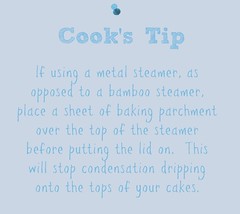
Spoon the mixture into lightly greased small tea cups, and place cups in a steamer over boiling water.

Cook's Tip Steamer

Cover and steam until the cakes are puffed and firm - 10-15 minutes depending on the size of your cups.

Serve with jasmine tea.

If you would like to get to know Donna Hay a little better, and to see all the fabulous tea-inspired dishes my friends have come up with, then do go visit I Heart Cooking Clubs and check out the links.

IHCC Donna Hay Badge resized

I will also be submitting this post to Sweet New Zealand.  Inspired by Alessandra Zecchini, Sweet New Zealand is an event for all Kiwi bloggers (whether living at home or abroad), or all foreign bloggers living in New Zealand, to link up their sweet treats.  This month, the event is also hosted by Alessandra.

Sweet New Zealand Badge A

I'll also be sharing this post this week at See Ya In the Gumbo hosted by the lovely Michelle at Ms. enPlace, Weekend Cooking hosted by Beth at Beth Fish Reads, at Cook your Books hosted by Joyce at Kitchen Flavours, and at Foodie Fridays hosted by Designs by Gollam.

See Ya in The Gumbo Badge     Weekend Cooking Badge     Cook Your Books Badge     Foodie Friday Badge

Thursday, November 28, 2013

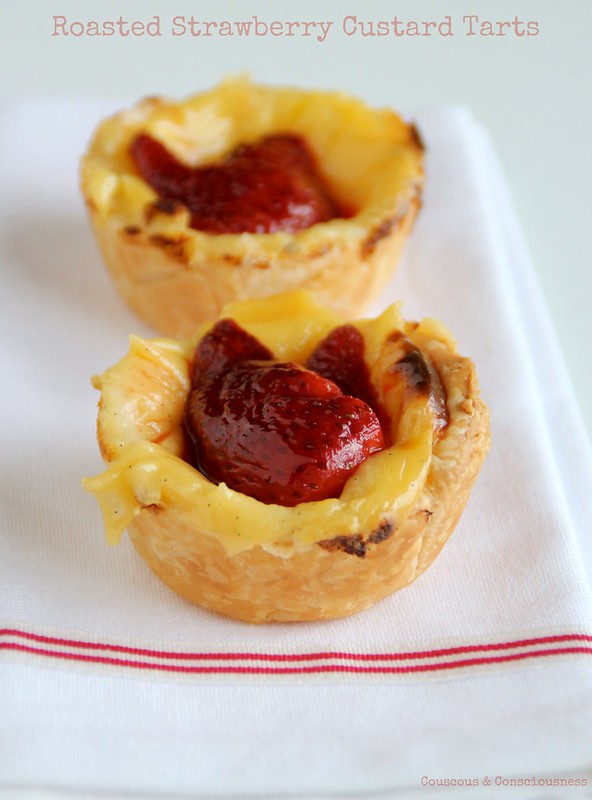
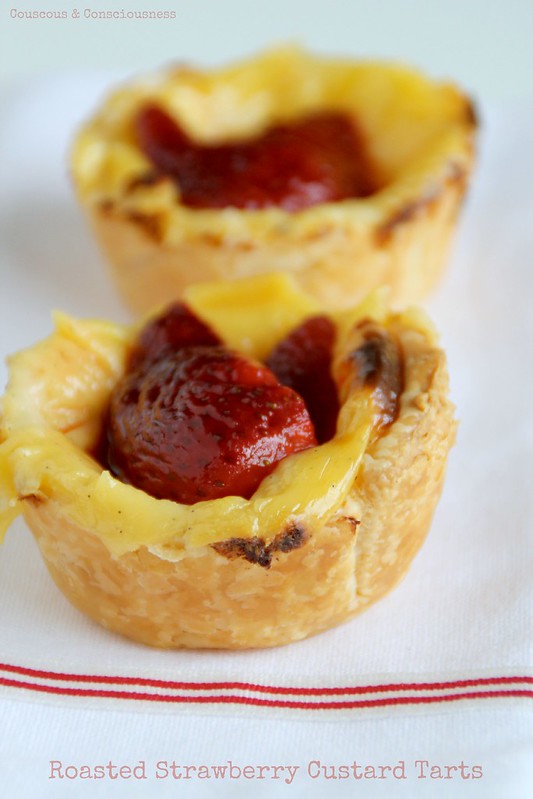
Roasted Strawberry Custard Tarts

Roasted Strawberry Custard Tarts 1

This week at I Heart Cooking Clubs, we continue cooking with the gorgeous Donna Hay, and our theme for the week is Easy Entertaining ... or, put another way, how to entertain effortlessly without finding yourself crying over spilt custard.

Now let me begin by telling you that I actually love to entertain.  The nurturer in me, the one who loves to feed others, enjoys nothing more more than a group of friends or family around my dinner table, and the opportunity to fill them with as much food as I can manage.  There is no amount of effort that seems like too much trouble to me.

Where it all goes off the rails for me is dessert.  No matter how much I love to cook and entertain, I hate making dessert.  There are people I know who see this part of the meal as the opportunity to really shine, to pull out all the stops and go for something truly spectacular ... I'm not one of them.  Dessert terrifies me.  It definitely has to be something which can be made the day before, so that a fall-back position can be found if it all goes wrong.  So dessert at my house will usually be some homemade ice cream or sorbet (one of the few things I'm actually quite good at, thanks to the trusty ice cream machine), maybe a pavlova (yes, on a good day, I can manage to turn out a passable pav, though I've had my failures there too), or a simple fruit platter.  Anything else really ... forget it.  My hands down favourite dessert is a Citron Tart - never made one, as there is way too much that can go wrong with that.  Second favourite dessert is my Dad's steamed pudding - never made that either, since there is the terrifying possibility that it will be either under cooked or over cooked, and worse still might completely fall apart when turned out of the pudding basin.  And that would just be downright embarrassing, especially when you're going for that "Ta Dah" moment.

So, although there were literally dozens of "Easy Entertaining" meal ideas I could have chosen from any one of my Donna Hay books (in fact nearly everything Donna produces fits that criteria perfectly), I thought that I might challenge myself, and Donna, to see if she could come up with an easy entertaining dessert idea that I could manage to put together without it all going horribly wrong.  It had to be suitable for preparing the day ahead;  it had to be easy enough for even a "dessert-dunce" to create;  and it needed to look spectacular, or impressive, or at the very least pretty.  And, I've got to say, between us we very nearly pulled it off ...

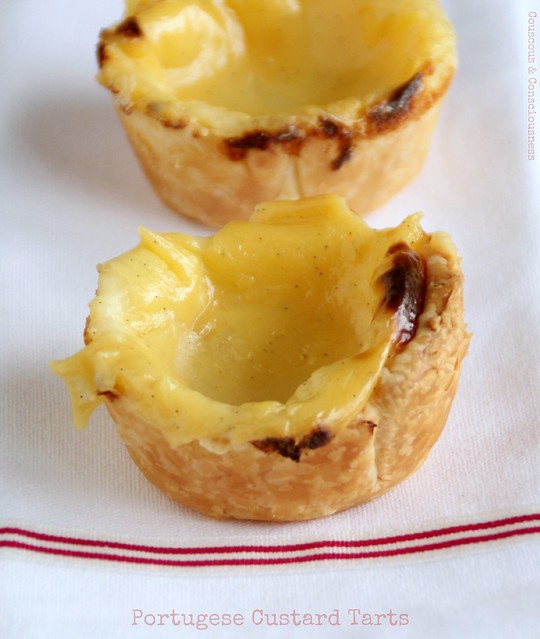
Flicking through my copy of Marie Claire Dining by Donna Hay (now published as Donna Hay Entertaining), I came across her recipe for Portugese Custard Tarts.  The recipe sounded achievable (even for me) ... store-bought flaky pastry, so no making pie crust (always a bonus);  the custard filling seemed simple enough;  and I could see that these could be made the day before - in fact you could even make the tarts the day before you want them, and make the custard the day before that if you wanted.  Recipes which can be broken down into several prepare ahead stages are always winners for me.   They sure looked kind of cute ...

Portugese Custard Tarts

... and, in fact, they also tasted pretty good just like this too, but somehow these just seemed like a little treat to enjoy with a cup of coffee, and not quite dessert.  A little something else was needed.  And then I cast my eye over the punnet of fresh strawberries I'd just brought home from the market, and remembered back to the Honey Roasted Strawberry Compote I made a while back to go over French toast.  I also remembered my lovely friend, Beth, at OMG! Yummy recently making some roasted fruit with pomegranate molasses, and thought that swapping out the balsamic vinegar in my compote for some pomegranate molasses, and adding a shot of orange liqueur, would make a wonderful topping for these little tarts and magically transform afternoon tea into dessert.

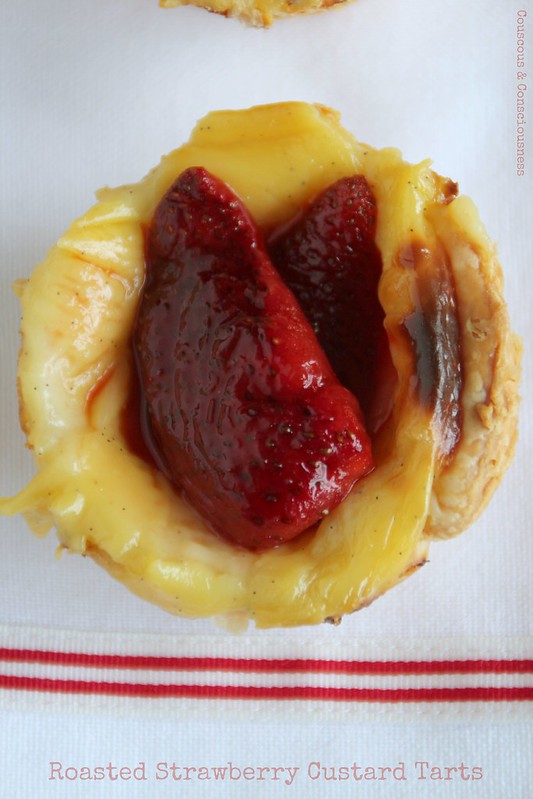
Roasted Strawberry Custard Tarts 2

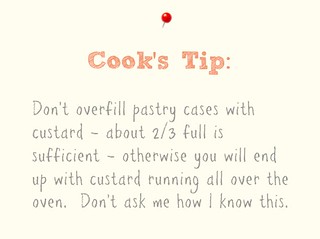
The only thing that prevented this from being completely effortless was having to clean the oven afterwards ...

Custard Tart Cook's Tip

... 'Nough said.  I know you won't make the same mistake.

Roasted Strawberry Custard Tarts 3

Roasted Strawberry Custard Tarts Recipe
Adapted from a recipe by Donna Hay
Makes 8
Click here for a printable copy of this recipe

2x sheets ready rolled puff pastry, thawed

for custard filling
1/3 cup sugar
1/3 cup water
2 cups milk
2 tablespoons cornflour
2 egg yolks
1x vanilla bean

for strawberry topping
1x punnet strawberries
2 tablespoons honey
1 tablespoon pomegranate molasses
1 tablespoon orange liqueur, such as cointreau (I used "44")

To make the custard filling, put sugar and water into a small saucepan, set over low heat, and stir constantly until the sugar has dissolved.  Increase heat until syrup is boiling, reduce heat and simmer for 1 minute.  Remove from heat.

Place cornflour in a medium sized bowl, and add just enough of the milk to mix the cornflour to a smooth paste.  Once completely dissolved, slowly add the remainder of the milk, whisking constantly.  Whisk in the egg yolks.  Slowly pour in the sugar syrup, again making sure that you whisk constantly to avoid curdling the eggs.

Return everything to the saucepan.  Split the vanilla bean lengthwise, scrape out the seeds, and add both seeds and bean to the saucepan.  Set pan over gentle heat, and stir constantly until the mixture thickens.

Remove from heat and pour into a clean bowl.  Allow to cool slightly, then cover the surface of the custard with a piece of plastic wrap - this will avoid a skin forming on the surface of the custard.  Now leave to cool completely, leaving the vanilla bean in the custard to allow maximum flavour to be infused from the bean.  (You could easily do this a day in advance.)

To make the tarts, preheat the oven to 200 degrees C (400 degrees F), and lightly grease a muffin or patty tin.  Cut pastry into 10cm (4 inch) circles, and use to line the muffin or patty tins.  Remove vanilla bean from custard, and spoon custard into the pastry shells, no more than 2/3 full.  Bake in the preheated oven until the custard is golden and firm - about 20 minutes, depending on the depth of your tins and filling.  Remove from the oven and cool slightly before removing tarts from the tin and leaving on a wire rack to cool completely.

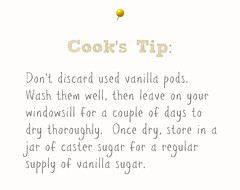
Vanilla Pod Cook's Tip

To make the strawberry topping.  Cut strawberries in half (or quarters if they are very large), and place in an ovenproof dish which is only just big enough to fit all the strawberries snugly but in a single layer.  Drizzle over the honey, pomegranate molasses and orange liqueur, and stir gently to combine everything.  Bake in a preheated oven at 180 degrees C (350 degrees F), until the strawberries have softened slightly, but still retaining their shape, and juices have begun to run and become syrupy.  Remove from oven and cool completely.

To complete the tarts, arrange two or three pieces of strawberry in the centre of each tart and drizzle over a little of the strawberry syrup.  Serve immediately.

If you would like to get to know Donna Hay a little better, and to see all the fabulously "easy entertaining" dishes my friends have come up with, then do go visit I Heart Cooking Clubs and check out the links.

IHCC Donna Hay Badge resized

I will also be submitting this post to Sweet New Zealand.  Inspired by Alessandra Zecchini, Sweet New Zealand is an event for all Kiwi bloggers (whether living at home or abroad), or all foreign bloggers living in New Zealand, to link up their sweet treats.  This month, Sweet New Zealand is hosted by my very lovely friend Mairi at Toast.

Sweet New Zealand Badge A

I'll also be sharing this post this week at See Ya In the Gumbo hosted by the lovely Michelle at Ms. enPlace, Weekend Cooking hosted by Beth at Beth Fish Reads, and at Foodie Fridays hosted by Designs by Gollam.

See Ya in The Gumbo Badge     Weekend Cooking Badge     Foodie Friday Badge

Friday, November 22, 2013

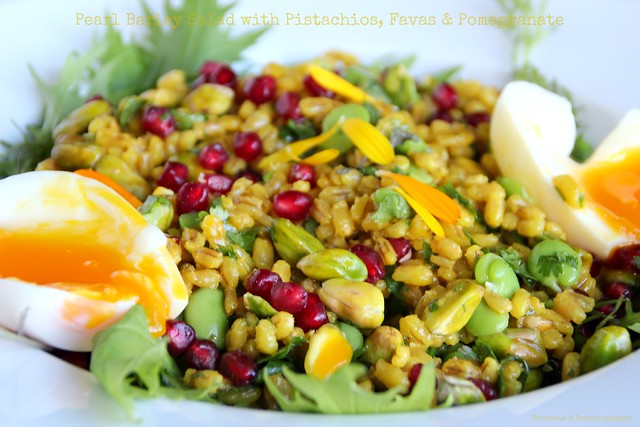
Pearl Barley Salad with Pistachios, Fava & Pomegranate

Pearl Barley Salad with Pistachios, Favas & Pomegranate 2

This week is Pot Luck week at I Heart Cooking Clubs.  That means we get to choose and post any dish we like from either our current IHCC chef, the lovely Donna Hay, or any one of our previous eight chefs, which includes my personal favourite, the highly inspirational Yotam Ottolenghi.

Donna, meet Yotam ... Yotam, meet Donna.


I was a bit torn between two different recipes.  In her latest issue spring issue of Donna Hay magazine, Donna has a recipe for a Pearl Barley, Asparagus and Egg Salad.  It's so delicious I've made it a couple of times and wanted to share it with you.  With no "wilty stuff", it's the perfect salad for picnics and barbeques that can be made in advance and won't mind sitting around for a while.  With pistachios being our ingredient of the month at Tasting Jerusalem**, I was also quite keen to try Yotam Ottolenghi's recipe for Saffron Rice with Barberries, Pistachio & Mixed Herbs.

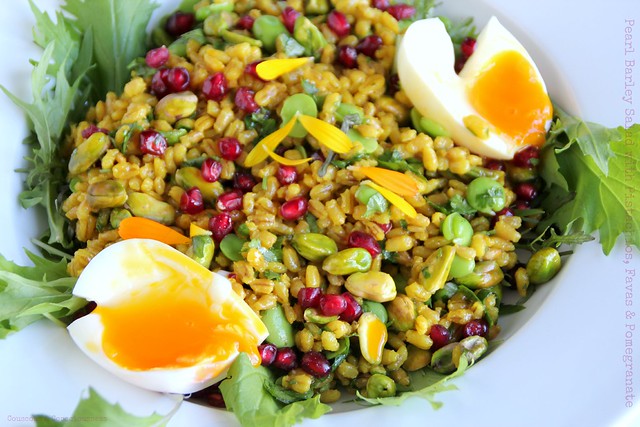
In the end, I took inspiration from both recipes, and came up with a dish which is a happy marriage of both.  I ran with the pearl barley used in Donna's recipe as opposed to the basmati rice in Ottolenghi's recipe - I love the nutty, chewy flavour and texture of the barley and found that it stands up well to plenty of bold flavour additions, like the saffron called for in the Ottolenghi recipe.  We don't have barberries here in New Zealand (leastwise not that I've found anywhere), but with the abundance of pomegranates available at the moment I decided they would make a great substitute.  Donna's recipe called for the inclusion of almonds, but the pistachios included in the Ottolenghi recipe seemed like the obvious choice.  I would have loved to use the mixture of fresh herbs, suggested by Ottolenghi, of dill, chervil and tarragon, but as I couldn't find any of those, I ran with flat leaf parsley.  I omitted the asparagus used in Donna's recipe in favour of fava (broad beans) picked fresh from the garden, and inspired by so many Ottolenghi dishes I've enjoyed, I added a generous slosh of pomegranate molasses to the dressing.  In hindsight, I'm thinking that some finely slice preserved lemon would also make a great addition to this salad.

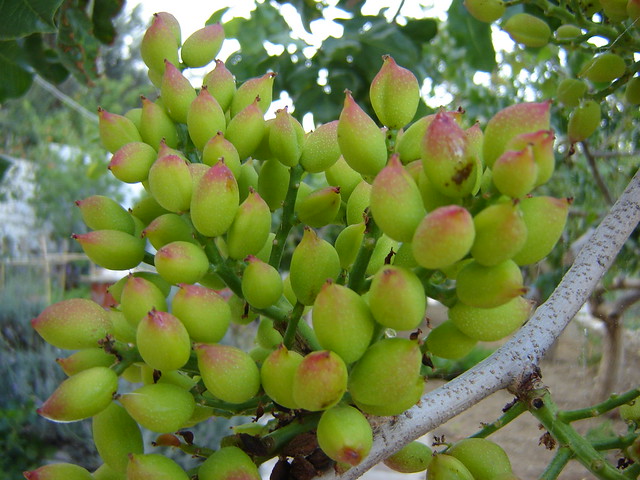
Now, digressing for a moment, can you guess what this is?

Greece 259

I actually ran this photo a bit over three years ago, and there were numerous guesses for olives and grapes.  In actual fact it's pistachios.  I took this photo while I was holidaying on Paros in the Greek islands, and was fascinated to come across a whole field of pistachio trees.

Back to the recipe.  The final addition is a couple of soft boiled eggs.  I know not everyone likes runny eggs, but to be perfectly honest, if you don't like eggs with ooey, gooey, runny yolks, I would forget about adding them to this dish - I think it's the contrasting texture of the soft eggs with the chewy barley and crunchy nuts and pomegranate, as well as the oozing egg yolk combining with the other dressing ingredients that makes this dish.  I don't think a hard boiled egg would really add anything to the mix.

Boiled Eggs Cook's Tip

I hope you give this salad a try.  I found it substantial enough to make a meal of it, but with plenty of robust flavour it would also make a great accompaniment to roasted or barbequed meat dishes.  It also keeps well and leftovers are great for a "take-to-work" lunch the next day.

Pearl Barley Salad with Pistachios, Favas & Pomegranate 1

Pearl Barley Salad with Pistachios,
Favas & Pomegranate Recipe
Inspired by recipes from both
Donna Hay & Yotam Ottolenghi
Makes 2 substantial servings
Click here for a printable copy of this recipe

3/4 cup pearl barley
1-1/2 cups vegetable stock
generous pinch saffron threads
flaky sea salt & freshly ground black pepper
1/2 cup shelled pistachios
large handful pomegranate seeds
1 cup fava (broad) beans, blanched and skins removed
generous handful flat leaf parsley leaves, finely chopped
juice of 1x lemon
1 tablespoon pomegranate molasses
1 tablespoon extra virgin olive oil
2x soft boiled eggs

Put barley, saffron threads, stock, salt and pepper into a small saucepan.  Set pan over high heat and bring to the boil.  Reduce heat to very low, cover with a tight-fitting lid and cook for 40 minutes.  Remove from the heat, without removing the lid, and allow to stand for 10 minutes.  Rinse under cold water and drain thoroughly.

Place favas, parsley, barley, most of the pistachios, and most of the pomegranate seeds in a bowl and gently mix together.  Add lemon juice, pomegranate molasses and olive oil to the bowl and toss gently until everything is well combined.  Taste and adjust any of the flavourings and seasonings to suit your personal taste.

To serve, arrange a few peppery salad greens on a platter, and spoon the barley mixture over the top.  Finish by sprinkling over the remaining pistachios and pomegranate seeds, and the halved eggs.

If you would like to get to know Donna Hay or Yotam Ottolenghi a little better, or one of our other IHCC chefs, and to see all the wonderful pot luck dishes my friends have come up with, then do go visit I Heart Cooking Clubs and check out the links.

IHCC Donna Hay Badge resized

**Tasting Jerusalem is a virtual cooking community exploring the vibrant flavors and cuisine of the Middle East through the lens of Jerusalem: A Cookbook by Ottolenghi and Tamimi published by Ten Speed Press. You can follow along and cook with us by subscribing to omgyummy.com, following the hashtag #TastingJrslm on Twitter and Instagram, liking our Facebook page or joining our Google+ Community and finally checking out all of our groups’ dishes on Pinterest.

I'll also be sharing this post this week at See Ya In the Gumbo hosted by the lovely Michelle at Ms. enPlace, Weekend Cooking hosted by Beth at Beth Fish Reads, Souper (Soup, Salad & Sammie) Sundays hosted by my special friend Deb at Kahakai Kitchen, and at Foodie Fridays hosted by Designs by Gollam.

See Ya in The Gumbo Badge     Weekend Cooking Badge     Souper Sundays Badge     Foodie Friday Badge