Showing posts with label apricots. Show all posts

Monday, December 1, 2014

Tropical Fruit Christmas Cake

Tropical Fruit Christmas Cake

Every year since I started this blog it's been on my mind to post a Christmas cake recipe but, best laid plans and all of that, some years I just didn't get around to making a cake, other years the cake got made but planning for a blog post was off and somehow posting a Christmas cake recipe in the middle of January just didn't make sense.

This year, with family coming (from near and far) to stay over the Christmas holidays, it's an even bet that my hostessing skills will be called into serious question if I don't produce said cake.  Serendipitously, it's our monthly Pot Luck week at I Heart Cooking Clubs, and I felt sure that at least one of our IHCC chefs would have a Christmas cake recipe I could try.  I was pretty certain that if I looked hard enough Nigella Lawson, Donna Hay, Nigel Slater, Jamie Oliver and our current chef, Diana Henry, would probably all offer something suitable.

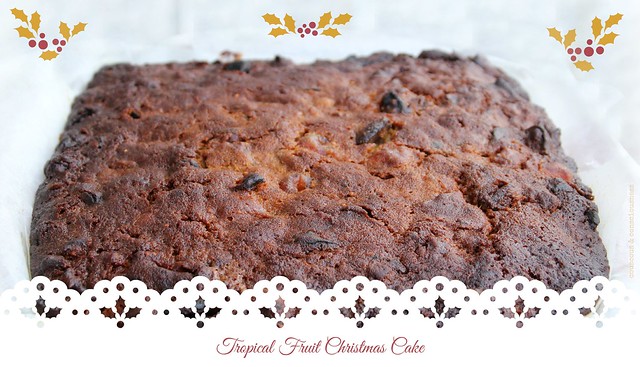
As it turned out, the first place I searched was Donna Hay's website, and on finding her Christmas cake recipe, I needed look no further.  Because we celebrate Christmas here in New Zealand in the height of summer, I decided to give my cake more of a tropical vibe than the traditional, rich, dark cake.  I used Donna's recipe as a basic template for quantities of eggs, butter, sugar, flour, etc, but I replaced most of the fruit with more tropically inspired dried fruit.  In keeping with my tropical theme I soaked the fruit in ginger beer instead of sherry, and replaced almonds with macadamia nuts.  I also added some rose water, orange flower water, and almond extract to the soaking liquid, as well as adding some ground ginger and nutmeg in with the spices.

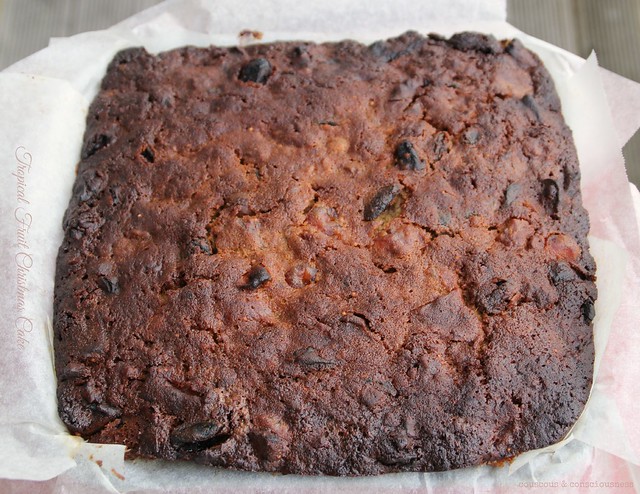
I'd love to show you a slice of this cake and tell you how it tastes, but what you see in the picture is the cake straight out of the oven.  It has several hours of cooling in the tin ahead of it, before it could be sliced, and anyway, you know that it's bad luck to cut the cake before Christmas.  Of course, there's always a few spoonfuls of the mixture that don't make it into the cake tin, and if what I tasted out of the bowl is anything to go by we are in for a wonderful cake.

I think this cake will be delightful as it is, without any further adornment, but if you like to go the whole marzipan and royal icing route that would be great too.  Personally, I'm thinking that Christmas Eve this cake will get a liberal blanket of a white chocolate, ginger and cream cheese frosting - what do you think?
Tropical Fruit Christmas Cake 2

Tropical Fruit Christmas Cake Recipe
Inspired by this recipe from Donna Hay

1.1 kg (2-1/2 lb) mixed dried fruit
(I used a combination of jumbo raisins, cherries, mixed peel, apricots, pineapple, figs, prunes and rock melon)
100g (3-1/2 oz) macadamia nuts
300 ml (1-1/4 cups) ginger beer
2 tablespoons rose water
2 tablespoons orange flower water
1 tablespoon almond extract
300g (10-1/2 oz) butter, room temperature
220g (7-3/4 oz) soft brown sugar
2x vanilla beans
4x eggs
375g (13 oz) plain flour
1/4 teaspoon baking soda
1 teaspoon each ground cinnamon, ground ginger, mixed spice & nutmeg
1/4 cup ginger beer, extra

Place all the mixed fruit and nuts into a large bowl, cutting larger pieces of fruit as you go - I cut everything into pieces about the size of the cherries.  Pour the first measure of ginger beer over the fruit, along with the rose water, orange flower water and almond extract.  Mix everything together well, cover bowl with a clean tea towel, and place in a cool, dark place to soak for 24 hours.  Give it a stir occasionally if you think of it.

Preheat oven to 140 degrees C (275 degrees F).  Grease a 20cm (8 inch) square cake tin, and line with two layers of non-stick baking paper, greasing each layer of paper as you go.

Place butter and brown sugar in the bowl of a stand mixer.  Split the vanilla beans lengthwise down the middle and scrape out the seeds, adding the seeds to the butter and brown sugar.  Set the machine running, and beat the mixture for 5 to 8 minutes, until light and creamy.  Add the eggs to the mixture, one at a time, beating well after each addition.

Sift together flour, baking soda and spices.  Add to the soaked fruit, and stir well to ensure that all the fruit is well coated with the flour.  Lastly add the butter and sugar mixture, and stir until everything is well combined.

Spoon the mixture into the tin (reserving a couple of good spoonfuls for the cook), smooth the top, and place in the preheated oven.  Bake for 2 hours 25 minutes to 2 hours 35 minutes, or until a skewer inserted into the centre of the cake comes out clean - I'd suggest you start testing after 2 hours 15 minutes.

Remove from the oven, and brush the top of the cake liberally with the extra ginger beer while still warm.  Allow to cool in the tin completely before removing and wrapping well in plastic wrap to store.  Should keep for at least four weeks.

If you would like to get to know Donna Hay a little better, or any of our other IHCC chefs, and to see what everyone else has cooked up this week, then do go and visit my friends at I Heart Cooking Clubs and check out the links (who knows, you might even want to join the journey and cook along with us) ...

Diana Henry badge 1A


Saturday, October 18, 2014

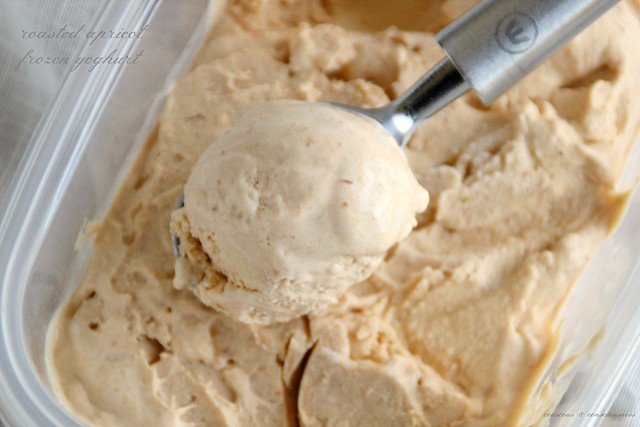
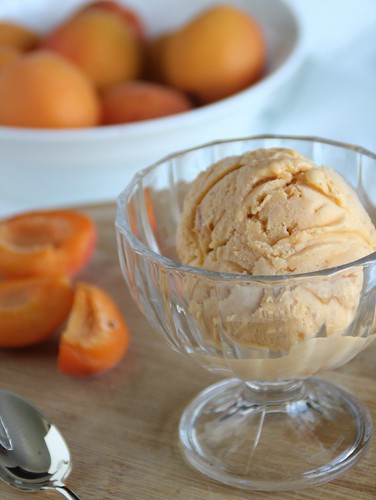
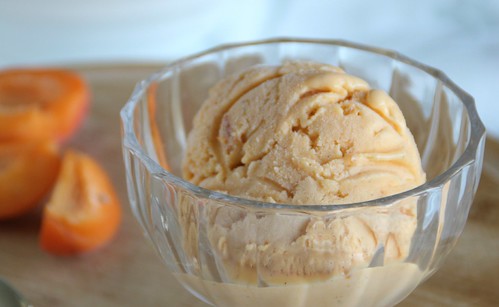
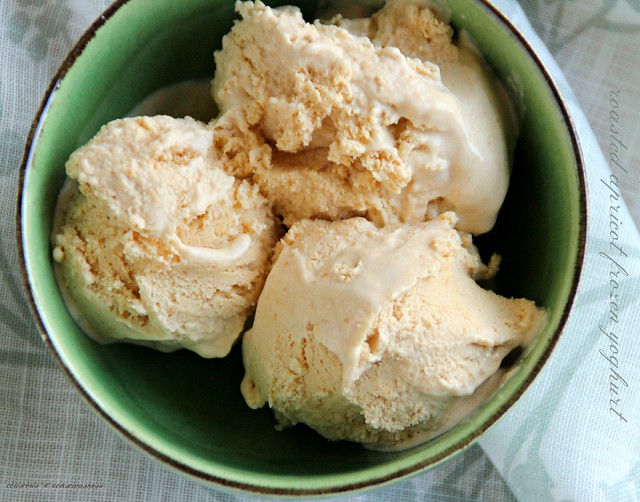
Roasted Apricot Frozen Yoghurt

Roasted Apricot Frozen Yoghurt 2

It's not that we're giving the gorgeous Diana Henry the cold shoulder so early in our relationship at I Heart Cooking Clubs, but we are giving her a bit of a frosty reception this week.  Yes, we're going "Icy Cold" and coming up with all manner of icy, chilled and frozen treats.

Now, I've told you before, I'm sure, that my dessert of choice pretty much any time of year is a frozen one, so I needed little encouragement to break the ice cream maker out of the cupboard and get churning.  Since I love ice cream, and Diana has loads of ice cream and sorbet recipes in her repertoire, making a bit of frozen magic together seemed inevitable.

My favourite new cookbook, A Change of Appetite, offered lots of gorgeous sorbets which have now been bookmarked, but it was the Greek yoghurt and apricot ice cream that took my fancy.

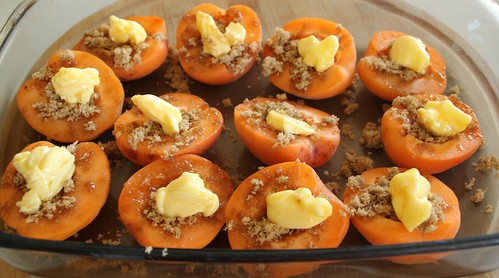
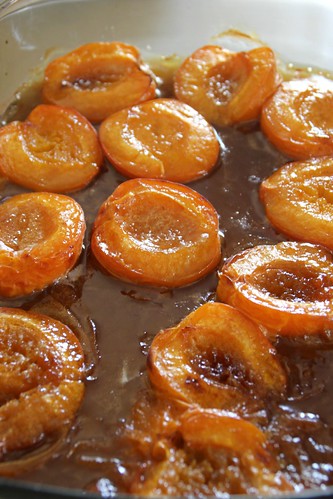
When apricots are at the height of the season, I usually roast them in batches with a little butter and brown sugar.  The butter and brown sugar more or less turns to caramel and the flavour of the apricots really intensifies.  Then I freeze them in batches to use in ice creams and smoothies all year long.

Roasted Apricot Gelato 2

In the original recipe Diana uses dried apricots and stews them in apple juice, before pureeing and mixing with the yoghurt.  With summer (and apricot season) just around the corner, it seemed like the perfect opportunity to use up one of my remaining bags of roasted apricots.  Diana recommends straining the pureed apricots, to avoid getting "bits" in the ice cream, but I'm personally a bit of a fan of the bits - it reminds me that I'm eating something with real fruit in it - so my apricots got a simple blitz with the food processor only.

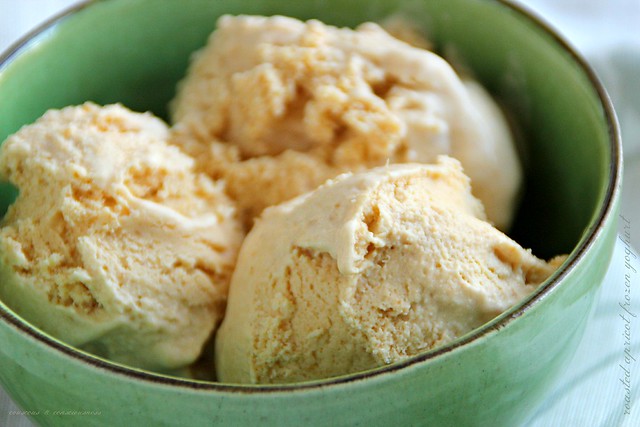
When I made this Roasted Apricot Gelato, way back when, I didn't really think it could be improved on.  But I can honestly say that this frozen yoghurt version is a distinct improvement.  I love the slight tartness of the yoghurt with the richness of the roasted apricots.  The yoghurt and creme fraiche provide all the creaminess you would normally get from a custard based ice cream, and is a whole lot quicker and easier to make.  I also like to think that this is a healthier option than a regular ice cream - that may possibly be deluded, but I like to believe it.

Roasted Apricot Frozen Yoghurt 1

Roasted Apricot Frozen Yoghurt Recipe
Adapted from recipe by Diana Henry
from A Change of Appetite
Click here for the free recipe card

6x medium-large fresh apricots
brown sugar
butter

400g (14 oz) Greek yoghurt
4 tablespoons creme fraiche
2 tablespoons runny honey

Preheat oven to 180 degrees C (350 degrees F).  Cut apricots in half - remove and discard the stones.  Place apricots cut side up in an ovenproof dish that is just big enough to fit them quite snugly.  Sprinkle each apricot half with a little brown sugar, and top each with a small knob of butter.

Roasted Apricot Gelato 1

Place in hot oven and roast until the apricots have softened and started to collapse, and the sugar and butter have merged with the oozing fruit juices to become almost the consistency of caramel sauce.

This will take about 30 minutes, and it is helpful to baste the fruit with the juices half way through.  Allow to cool completely then, using a food processor or stick blender, blitz to a puree.

Add yoghurt and creme fraiche to the apricot puree and blitz again until combined.

Churn the mixture in a ice cream maker according to manufacturer's instruction.  Halfway through the churning process, drizzle in the honey.  Serve straight away or freeze for a few hours to firm up.

Roasted Apricot Frozen Yoghurt 3

If you would like to get to know Diana Henry a little better, and to see what everyone else has cooked up this week, then do go and visit my friends at I Heart Cooking Clubs and check out the links (who knows, you might even want to join the journey and cook along with us) ...
Diana Henry badge 1A

... or check out A Change of Appetite and Diana's many other great titles available from Amazon USA, Amazon UK, or Fishpond NZ.

I will also be submitting this post to Sweet New Zealand.  Inspired by Alessandra Zecchini, and hosted this month by Lesley at eat, etc ..., Sweet New Zealand is an event for all Kiwi bloggers (whether living at home or abroad), or all foreign bloggers living in New Zealand, to link up their sweet treats.

Sweet New Zealand Badge A


Sunday, October 12, 2014

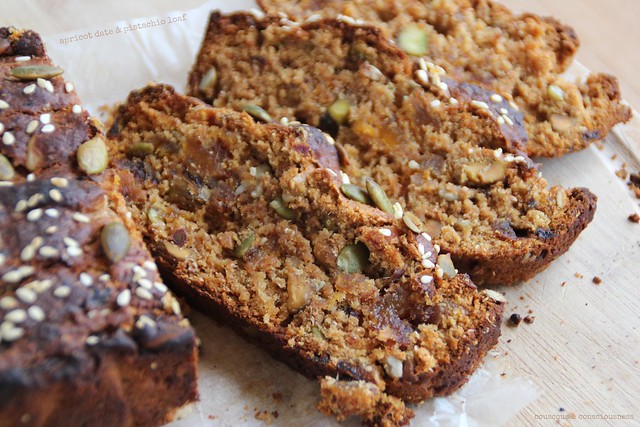
Apricot, Date & Pistachio Loaf

Apricot, Date & Pistachio Loaf 1

So far at I Heart Cooking Clubs we've cooked with some great chefs:  Nigella Lawson, Mark Bitman, Giada de Laurentiis, Jamie Oliver, Tessa Kiros, Rick Bayless, Madhur Jaffrey, Yotam Ottolenghi (my favourite), Donna Hay, and Nigel Slater.  I'm excited now to tell you that a new chef joins the line up this week - we will spend the next six months cooking with Diana Henry.

Raised in Northern Ireland, and now living in London, Diana started cooking when she was just six years old, and has never looked back.  She is not just a passionate and adventurous cook, but also a gifted food writer.  Diana has published eight stunning cookbooks, writes a regular column for The Sunday Telegraph's Stella magazine and several other magazines, has her own website and appears on UKTV's Market Kitchen.

Diana talks a lot about the sense of connectedness that food and cooking gives her, something I relate to completely.  To welcome Diana this week to the IHCC fold I turned to her Date, Apricot & Walnut Loaf Cake from her latest book, A Change of Appetite.  In this book she turns towards lighter, fresher, healthier dishes (without any compromise in flavour) inspired often by dishes of the Middle East, Scandinavia, and the Far East.  There are some stunning recipes in this book, and I swear I want to make nearly everything.

I can imagine that if I could sit down in my kitchen for an afternoon with Diana, we would find a great deal to talk about.  Of course there would be coffee, and cake (there has to be cake), and this delicious loaf packed full of dried fruit, seeds and nuts would fit the bill perfectly.

I made a couple of changes to the recipe - don't I always?!  In the original recipe, Diana has you soften the fruit in apple juice and cook it down to a puree - I opted for an infusion of apricot tea and date syrup instead - but really you could use any fruit juice or even just water for that matter.  I cut down the amount of sugar just a little, and I used coconut sugar instead of brown sugar.  In the original recipe, Diana uses a mixture of regular flour and malted brown flour (which is not available here) - I used all wholemeal flour instead.  Lastly, because thoughts of apricots and dates and date syrup always transport me to the Middle East, I used pistachios instead of walnuts.  Once again, you could really use any kind of nuts that you like.

An important note here - my loaf tin is a tiny bit bigger than that called for in the recipe, so I didn't get the nice big slices that I was hoping for.  It also took quite a bit less cooking than that specified in the recipe.  The recipe offers a cooking time of 1-1/4 hours, but I noticed that mine smelled like it was done after about 45 minutes - a quick check, and I found that it was indeed ready, in fact ever so slightly over-done.  This could have been because of my larger tin size, but my tin was not that much bigger that it would have taken half an hour off the cook time I don't think, so I suggest that you keep a close eye on the time.

This is a deliciously moist and flavourful loaf, so fragrant with spices that your house will smell like Christmas while it's baking.  Like anything of this nature, this is fabulous with a generous smear of butter (although entirely unnecessary), and I found that it kept well for a week.  The only reason it lasted so long around here is that someone else in the house is not fussed on apricots - in most normal households I would expect this to be gone in a few days!

Apricot, Date & Pistachio Loaf Recipe
Adapted from recipe by Diana Henry
from A Change of Appetite
Click here for the free recipe card

1 cup chopped dried dates
1/2 cup chopped dried apricots
1/2 cup apricot tea
1 tablespoon date syrup
175g (6 oz) butter
130g (4.5 oz) brown sugar
grated zest of 1x orange
1x large free-range egg
225g (8 oz) wholemeal flour
1 teaspoon baking powder
1 heaped teaspoon mixed spice
generous grating of fresh nutmeg
1/3 cup pistachios, roughly chopped
generous handful of pumpkin seeds, plus extra for the top
generous handful of sunflower seeds
sprinkling of sesame seeds

Put dates and apricots in a small saucepan with the apricot tea and date syrup.  Set over medium heat, bring to a boil, then reduce heat and simmer until softened to a thick puree - 10 to 15 minutes.  Set aside to cool.

Also melt butter and leave it to cool.

Meanwhile, preheat oven to 180 degrees C (350 degrees F).  Grease a 22cm x 12cm x 6cm (8" x 4-3/4" x 3") loaf tin, and line the base with non-stick baking paper.

Add the cooled butter to the date and apricot mixture, along with the brown sugar, grated orange zest, and the egg.  Mix together well.

Place the flour in a large bowl with the baking powder, mixed spice, nutmeg, pistachios, pumpkin seeds, and sunflower seeds. Mix together well, then add the fruit mixture and mix until everything is just combined - don't over-mix.

Tip everything into the prepared baking tin, using a rubber spatula to even out the top.  Sprinkle over the extra pumpkin seeds and sesame seeds.  Place tin in the preheated oven, and bake for up to 1-1/4 hours or until golden on top and a skewer inserted into the centre of the loaf comes out clean.


Remove from the oven and cool for 10 minutes in the tin before removing to a wire rack to cool completely.

If you would like to get to know Diana Henry a little better, and to see what everyone else has cooked up this week, then do go and visit my friends at I Heart Cooking Clubs and check out the links (who knows, you might even want to join the journey and cook along with us) ...
Diana Henry badge 1A

... or check out A Change of Appetite and Diana's many other great titles available from Amazon USA, Amazon UK, or Fishpond NZ.

I will also be submitting this post to Sweet New Zealand.  Inspired by Alessandra Zecchini, and hosted this month by Lesley at eat, etc ..., Sweet New Zealand is an event for all Kiwi bloggers (whether living at home or abroad), or all foreign bloggers living in New Zealand, to link up their sweet treats.

Sweet New Zealand Badge A

I'm also linking this post to Tea Time Treats, hosted by one of my favourite bloggers - the lovely Karen at Lavender and Lovage, and The HedgeCombers.  The theme this month is vegetables, and technically there's no vegetables in this recipe, but I've been wanting to join in here for ages, so I'm taking the creative leap that since this loaf contains pumpkin seeds that's near enough :-)

Tea Time Treats

Monday, January 14, 2013

Roasted Apricot Gelato

Roasted Apricot Gelato 3

I love this time of year, when the ice cream maker comes out of the cupboard and starts to work overtime, and beautiful summer berries and stone fruit are available in abundance.  Now I make and enjoy homemade ice creams and sorbets all year round, but this is the time when I really want to go to town churning out tubs full of luscious, deep flavoured, fruity gelato.

A bowlful of apricots I had on hand this week were destined for exactly this treatment I decided.  I actually used slightly under-ripe fruit because I wanted that little bit of tartness, but I was also looking for the depth of flavour that comes from fully ripe fruit, so achieved that by roasting the apricots first with a little brown sugar and butter.  The brown sugar and butter more or less turned into caramel, and the apricots really intensified in flavour.  Then it was just a matter of blitzing the roasted apricots to a puree.  This is a really good way of preserving apricots for use in ice cream throughout the year - simply freeze the pureed fruit in a snaplock bag in batches ready to whip out any time you want to make ice cream.  You can also do the same thing with nectarines and peaches.

I hope you'll give this a go - it's pretty darn good.  If you fancy a little extra texture, you could try serving this with crumbled amaretti biscuits sprinkled over the top.  Don't have an ice cream machine - take my advice and invest in one - I promise you it will be worth it.  I shared this with my good friends, Cliff & Clare, who came to stay on the weekend - they were so smitten Cliff was thinking that he would get Clare an ice cream maker for her birthday!

Roasted Apricot Gelato Recipe
Makes approximately 1 litre
Click here for a printable copy of this recipe

6x medium-large fresh apricots
brown sugar
butter

6x large egg yolks, free range
1/2 cup sugar
325 ml (11 fl oz) milk
100 ml (3.5 fl oz) cream
1x vanilla bean

Preheat oven to 180 degrees C (350 degrees F).  Cut apricots in half - remove and discard the stones.  Place apricots cut side up in an ovenproof dish that is just big enough to fit them quite snugly.  Sprinkle each apricot half with a little brown sugar, and top each with a small knob of butter.

Roasted Apricot Gelato 1

Place in hot oven and roast until the apricots have softened and started to collapse, and the sugar and butter have merged with the oozing fruit juices to become almost the consistency of caramel sauce.

Roasted Apricot Gelato 2

This will take about 30 minutes, and it is helpful to baste the fruit with the juices half way through.  Allow to cool completely then, using a food processor or stick blender, blitz to a puree.

Place egg yolks in a medium bowl with half of the sugar, and whisk until pale.  Set aside.

Put the remaining sugar in a medium sized, heavy bottomed pan, with the milk and cream.  Split the vanilla bean down the middle and scrape out the seeds, adding both the seeds and the bean to the pan with the milk and cream.  Set pan over moderate heat and bring just to a boil.  Remove from heat immediately.

Now, whisking constantly, slowly pour about half of the milk and cream mixture into the egg mixture.  Then return all of this mixture to the remaining milk and cream in the saucepan - keep whisking constantly as you go.

Return pan to a low heat, and stir constantly until the mixture begins to thicken.  A good indication that it's ready is when all the frothy bubbles from the surface disappear.  Also the mixture will coat the back of a spoon, and when you run your finger through the mixture the edges of the mixture will not run back together.

Remove from the heat and immediately strain through a sieve into a clean bowl set over an ice bath.  Keep stirring until the mixture has cooled completely.

Now stir the cooled apricot puree into the custard, add the vanilla bean which was strained out back into the custard, and refrigerate for 24 hours.  Now remove the vanilla bean (do not throw away), and churn the custard in an ice cream maker according to manufacturer's instructions.  Serve straight away or freeze for several hours to firm up.

Roasted Apricot Gelato 4

What to do with that vanilla bean?  There's plenty of flavour left in that bean so don't discard it.  Rinse thoroughly under cold water, then set on a paper towel on your kitchen window sill until dry.  Then put into your jar of caster sugar to have a constant supply of vanilla flavoured sugar.

This will be my submission to Sweet New Zealand, inspired by Alessandra Zecchini and hosted this month by the lovely Arfi at HomeMadeS.

Sweet New Zealand Badge A

Thursday, November 8, 2012

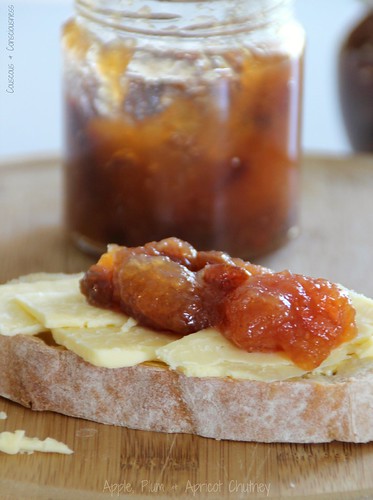
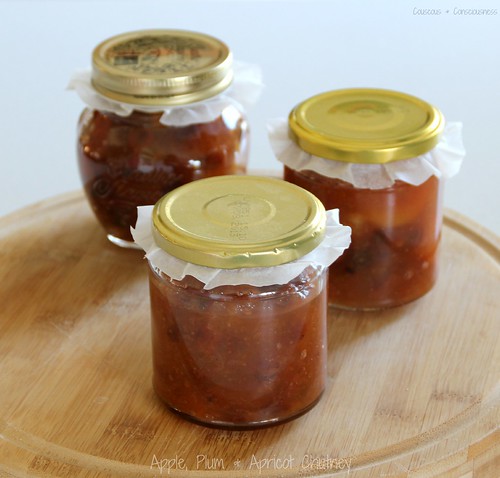
Apple, Plum & Apricot Chutney

Apple, Plum & Apricot Chutney 2

At I Heart Cooking Clubs, where we are discovering the joys of Indian cooking with Madhur Jaffrey, our theme this week is "Relishes, Chutneys and Pickles".  With Christmas looming large, my thoughts are turning to putting aside a bit of a stash of edible goodies for Christmas gifts, and I thought Madhur's Apple, Peach & Apricot Chutney would fit the bill perfectly.

I did play with the recipe a little ... subbing in some dried plums in place of dried peaches.  I also substituted soft brown sugar for the caster sugar called for in the recipe, because I like the greater depth of both flavour and colour that brown sugar brings.  Lastly, I replaced the white wine vinegar in the recipe with cider vinegar, as I thought this would work well with the apple.

I've always been a big lover of mango chutney, but with mangoes being a bit of a luxury commodity here in New Zealand, this chutney makes a great substitute.  There is a good bit of warmth from the ginger and cayenne pepper, acidity and sourness from the vinegar and apples, balanced with a delicious sweetness from the plums and apricots.  Although this would be great with all sorts of Indian dishes, it was sublime with nothing more complicated than good crusty bread and cheddar cheese, and I know it is going to be the perfect accompaniment to the ubiquitous ham sandwich on Boxing Day.

This could not be easier to make ... about five minutes of chopping, then everything in the pan together (I used a good, heavy, cast iron pan), and simmer for 30 minutes.  Cool and bottle.  I only made this yesterday and it tastes fantastic already.  I'm looking forward to seeing what it's like in a few weeks time - if I can keep my hands off it that long, that is.

Apple, Plum & Apricot Chutney 1

Apple Plum & Apricot Chutney Recipe
Adapted from a recipe by Madhur Jaffrey from
Makes 3x 250ml (8 fl oz) jars
Click here for a printable copy of this recipe

3x large sour apples, peeled, cored & roughly diced
(I used Granny Smith apples)
100g (4 oz) dried apricots
(I used plump Turkish ones, left whole)
100g (4 oz) dried plums, quartered
50g (2 oz) sultanas
6x cloves garlic, minced
5cm (2 inch) piece ginger, peeled & grated
400ml (14 fl oz) cider vinegar
385g (14 oz) soft brown sugar
2 teaspoons salt
1/2 teaspoon cayenne pepper

Put all ingredients into a heavy-based pan (cast iron is ideal) and bring to the boil.

Reduce heat to a vigorous simmer, and cook until the chutney has reached a thick, "jammy" consistency - about 30 minutes.  During this time, stir the chutney regularly and, as you get towards the end of the cooking time and the chutney thickens, you may need to reduce the heat a little to ensure that it doesn't stick to the bottom of the pan.

Remove from the heat and allow to cool for about 15 minutes.  Pour into warm, sterilised jars and cool completely before covering.  (Note:  The original recipe says to use non-metallic lids.  Not having any of those, I placed a square of baking paper over the top of my jars, before then screwing on my metal lids.)

Store jars in a cool, dark place or in the fridge.

If you would like to get to know Madhur a little better, then do go and visit my friends at I Heart Cooking Clubs and see what they've all cooked up ...

IHCC

... or check out Madhur Jaffrey's Indian Cooking and many of Madhur's other great titles available from Amazon USA, Amazon UK or Fishpond NZ.

          Madhur Jaffrey's Indian Cookery

I am sharing this post this week with my friends Michelle at Ms. enPlace hosting See Ya In the Gumbo, and with April at The 21st Century Housewife hosting Gallery of Favourites.


Friday, July 20, 2012

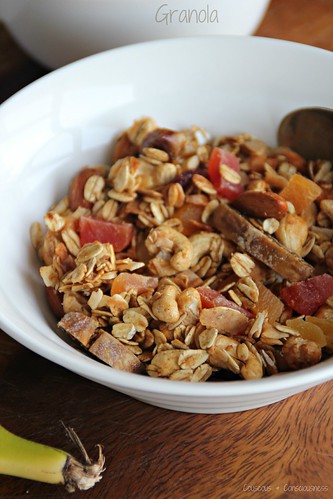
Tropical Fruit Granola

Granola 1

Let me begin by telling you, and this has absolutely nothing to do with granola, that last night we watched When Harry Met Sally - for the umpteenth time I might add, but there was not much else on and it's one of those movies that's always worth another watch, if only for the fake orgasm scene in Katz's Deli.  Anyways, it disturbed me as I was watching to realise that during the course of the 80s and 90s I wore every single one of the hair-dos Sally paraded in the movie - many of them cringe-worthy when I look back.

Such are the things we do over the years as we struggle to develop our personal style - or certainly so it was for me.  Took me I think the best part of 48 years to really get comfortable in my own skin, and to realise what my own style was without trying to make myself look good in someone else's.

Breakfast is like that.  I know all the rhetoric, which is no doubt backed up by plenty of sound nutritional research, about breakfast being the most important meal of the day.  I'm well acquainted with the expression "eat breakfast like a king, lunch like a prince, and dinner like a pauper".  And, I've spent many years trying to follow that advice.  But the reality is that I am just not a breakfast person - not even a morning person, in fact.  The truth is that given the choice I prefer not to rise to a vertical position before 10 am at the earliest, and midday is ideal.  Of course, there are jobs to go to and languishing between the sheets till noon is not always an option.  But no matter how early I do get up I generally like a lapse of a couple of hours to pass between the bed and the breakfast table, by which time of course it often is pretty much lunch time.

Then, of course, the dilemna arises of what to eat - lunch or breakfast.  French toast (check out my Chocolate Panettone French Toast Sandwiches and Caramelised French Toast with Raspberry Compote) and pancakes are popular choices, as is this granola.  Work day mornings, I will on rare occasions scarf down a slice of toast and marmalade before racing out the door, but I'm just as likely to skip breakfast, throw a couple of handfuls of this granola into a tub and take it to work with me for lunch.

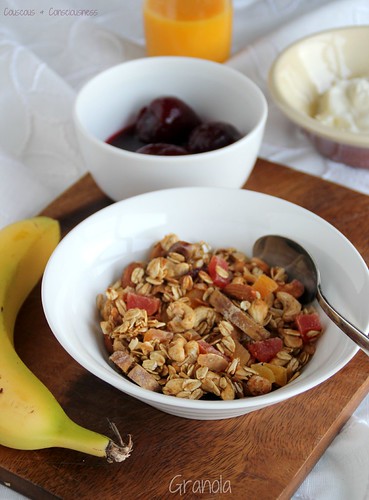
This granola is a breeze to make, better than anything you will pick up at the supermarket, cheaper and minus the fat too, and it's loaded with nuts and tropical fruit.  I like to use cashews and almonds, along with cranberries, apricots, figs, dates, mango and papaya, but really you can use any combination you like.  Hope you give this a try I know you won't be disappointed.

Granola 2

Tropical Fruit Granola Recipe
Click here for a printable copy of this recipe

6 cups rolled oats
1 cup almonds
1 cup cashew nuts
(you can substitute these with 2 cups of any nuts or seeds that you like - pecans, walnuts, macadamias, sunflower seeds, pumpkin seeds, sesame seeds would all be good)
1 cup shredded coconut
(go for long thread or even better flaked coconut - avoid dessicated)
1 teaspoon cinnamon
1/2 teaspoon ground ginger
generous pinch of salt
1/2 cup honey
1/4 cup agave nectar
1/4 cup maple syrup
2 cups dried fruit of your choice
(cranberries, figs, dates, cherries, papaya, apricots, mango, pears, peaches, raisins, sultanas are all good - cut larger fruit into smaller pieces)

Preheat the oven to 150 degrees C (300 degrees F).

Put the rolled oats into a large bowl.  Add the nuts, coconut, cinnamon, ginger and salt.  Pour the honey, agave nectar and maple syrup over the dry ingredients and using your hands mix everything together well.

Spread everything out in a thin layer in a shallow baking tray (you may need to use a couple of trays), and put into the preheated oven.  Bake until golden brown.  This will take approximately 20 to 30 minutes, depending on how "toasty" you like it, but keep in mind that it will continue cooking after you take it out of the oven, so take care not to over do it.  Give it a bit of a stir every 10 minutes during cooking.

Once toasted to your liking remove from the oven and allow to cool.  Add your dried fruit and mix well, then transfer to an airtight container for storage.

I sometimes also throw in a handful of yoghurt covered raisins at this stage, and would even consider chocolate coated raisins or peanuts acceptable inclusions for an indulgent treat.

I can enjoy this as a wee snack, by the handful, straight out of the jar, or eaten on its own simply moistened with a bit of fruit juice (personally not too fussed on milk).  It is also great with fresh or stewed fruit, and some Greek-style natural yoghurt.  You could even use this to make your favourite granola bars.

Granola 3

I sharing this post with Sweet New Zealand, a monthly blog event created by the very lovely Alessandra Zecchini, and which this month is hosted by After Taste. This is an opportunity for all Kiwi bloggers (whether you are living in New Zealand or overseas), as well as for non-Kiwi bloggers living in New Zealand, to connect and share some of those sweet treats from your kitchen.  So, head on over and share something sweet.

Sweet New Zealand Badge A


I'm also sharing this at Foodie Fridays hosted by Designs by Gollum.

Foodie Friday Badge

Tuesday, September 27, 2011

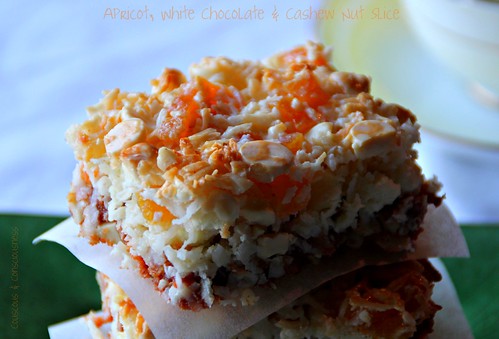
Apricot, White Chocolate & Cashew Nut Slice for Julia


Apricot, White Chocolate & Cashew Nut Slice

To those Kiwi bloggers who live in Auckland, Zarbo Cafe & Delicatessan will require no introduction whatsoever.  I was first introduced to Zarbo by one of my dearest friends, Julia.  Julia and I saw each other through many trials and tribulations, from the wild and mis-spent days of our twenties, to more "grown-up" times in our forties, including marriage and children (in her case) and marriage and divorce (in mine).  Sadly I lost Julia to her long battle with cancer about four years ago, and it saddens me greatly that now in my fifties (which I happen to think is the best time of my life so far) I cannot share this time with her.  But while she was still alive, Zarbo was "our place" - it was the place we used to frequently meet at and hang out together whenever I was visiting Auckland, and when they published their first cookbook, "Zarbo, Recipes from a New Zealand Deli", Julia was quick to gift me a copy.

Zarbo: Recipes from a New Zealand Deli

I miss Julia's friendship a lot, and think often about those long afternoons sitting in Zarbo, nattering over a cup of coffee (or two) and a piece of cake or slice.  So today when I was looking for a contribution to this month's Sweet New Zealand blogging event (more about that in a minute), I knew that I would find the perfect little something in my trusty Zarbo book.  The "Hello Rosie" Slice on page 95, was exactly reminiscent of the kind of thing Julia and I would have shared, though I have made a few changes.  The first change was more by accident than intent - because I am an idiot, and didn't read the recipe correctly, my chopped nuts ended up in the base instead of the topping - an accident I didn't discover until the slice was actually in the oven!!  I was worried that the end result would be something altogether too crumbly, but the slice has held together just fine and doesn't appear to have suffered in anyway from my mistake.  Accordingly, that is exactly how I have instructed you here, but if you feel like putting the nuts back into the topping, then go right ahead.  I also made a few substitutions - I have used cashew nuts instead of walnuts, dried apricots instead of sultanas, and white chocolate instead of dark.  I think you could easily experiment with all sorts of different fruit, nut and chocolate combinations in this recipe.  I hope you will feel inspired to have a go and come up with one of your own special combinations to share with someone close to your heart.

Sweet New Zealand Badge

The Sweet New Zealand monthly blog event was created by the very sweet Alessandra Zecchini, and is hosted this month by the equally sweet Alli at Pease Pudding.  This is an opportunity for all Kiwi bloggers (whether you are living in New Zealand or overseas), as well as for non-Kiwi bloggers living in New Zealand, to connect and share some of those sweet treats from your kitchen.  You can find a round-up of last month's special treats on this page of Alessandra's blog, or go and visit this page of Alli's blog to find out how you can join in this month.  Alli will be posting a round-up of entries at the end of the month.  I think I'm only just going to manage to slip in under the wire with this post, but if you feel like joining in and you don't have time to conjure up something new, you are welcome to link up an older post.

Now on with the recipe ...

Apricot, White Chocolate & Cashew Nut Slice Recipe
Adapted from
Vegetarian
Makes 18 bars
Click here for a printable copy of this recipe

For the base:
100g butter, melted
250g malt biscuits, crushed
2 cups raw cashew nuts, roughly chopped

For the topping:
1-1/2 cups white chocolate morsels
1 cup chopped dried apricots
3 cups long strand coconut
500g sweetened condensed milk

Grease a 20cm x 30cm (8 inch x 12 inch) slice tin, line with baking paper, and set aside.

Mix the crushed biscuits, chopped nuts, and melted butter together, and press into the tin.

Mix the chocolate, apricots, coconut and condensed milk together and press over the base.

Bake at 160 degrees C (320 degrees F) for approximately 30 minutes, or until lightly browned on top.  Take care not to overcook as the finished slice should be sticky, chewy and slightly moist.  If you find that the slice is browning too quickly, cover with a piece of baking paper until finished cooking.

Leave until cold before slicing.

Monday, February 8, 2010

Making the most of summer's bounty


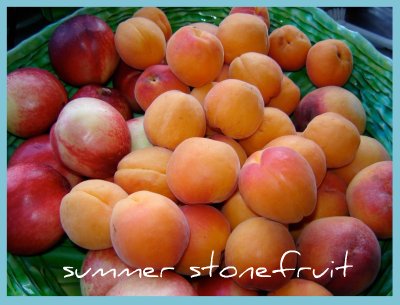
Well it's that time of year when my love affair with asparagus has given way to summer fruit. Really nothing says summer to me more than an abundance of apricots, peaches, nectarines, raspberries and strawberries, and this year (perhaps because the summer weather has actually been pretty crappy!) the fruit seems to be especially good. Interesting parallel - worst summer I can remember for about 15 years, best summer fruit I can remember for about as long.

So, needless to say, I have of course been indulging in plenty of unadulterated fresh fruit - big bowls of it every morning, but I've also been cooking with them and trying to set some aside to enjoy a bit of summer in the middle of winter.

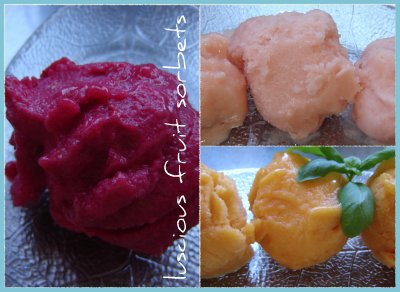
I've made lots of sorbet ...

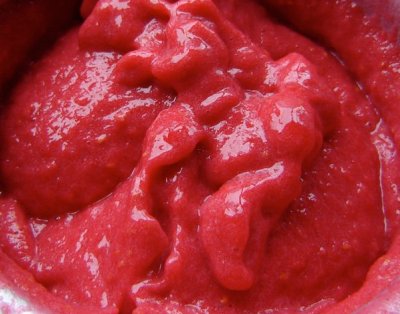
... raspberry, white fleshed nectarine, and apricot. My apricot sorbet is made using this recipe from Stone Soup. For my nectarine sorbet I used David Lebovitz's recipe - David is after all close to Godliness, in my opinion, in matters of frozen desserts! That's my nectarine sorbet in the top right corner of the picture above, which as you can see is quite a lot paler than that in the picture on the recipe link. I suspect that is because the nectarines I had were white fleshed ones, and that yellow fleshed ones would deliver a deeper pink sorbet, though I still think my pale pink version is very pretty. My raspberry sorbet is made using the following recipe adapted from the "River Cafe Italian Kitchen" cookbook. This has really intense flavour, and the colour is just drop-dead gorgeous.

Raspberry Sorbet Recipe
Makes about 1.5 litres
vegan, gluten free


800g fresh raspberries
1 whole Meyer lemon, preferrably organic, plus
juice of 1/2 lemon
350g caster sugar

Wash the lemon thoroughly, and if you are not using an organic lemon give it a good scrub to remove any wax that might be on the skin. Then cut the lemon (skin and all) into smallish pieces, discarding any pips, and put into a food processor. Put the caster sugar into the processor with the lemon, and blitz until you have a thick puree with little bits of lemon peel still visible. Add the raspberries and blitz again until everything is combined. Add the lemon juice, and taste. At this point you may add a little more sugar if the raspberries are too tart, or you may want to add a little more lemon juice - the lemon flavour should be noticeable but not overpowering.

Chill the puree for several hours (I like to leave it in the fridge overnight). Then pour the puree into an ice-cream maker and churn according to your machine's directions.

First note: You may want to strain the puree before churning to remove the pips. Personally I don't - I think it is inherent in the nature of raspberries to have pips, and I like the slightly more rustic nature and texture of an unstrained sorbet.

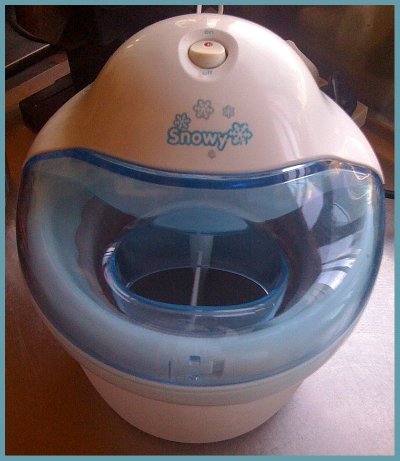
Second note: If you don't have an ice-cream maker - go and get one today before summer is over. I promise you won't regret it. Contrary to what you may think, this does not have to cost you a lot of money. Whilst it is true that I covet a "serious ice-cream machine", with a built-in refrigeration unit, that might set me back $1,000-$2,000, Mr Snowy here does the job just fine and he only cost about $40. I think normal retail for this is about $80, but I picked this up in one of those 50% off electrical goods sales that Briscoes have just about every second weekend. Or there are literally dozens of similar machines available on TradeMe at almost any time.


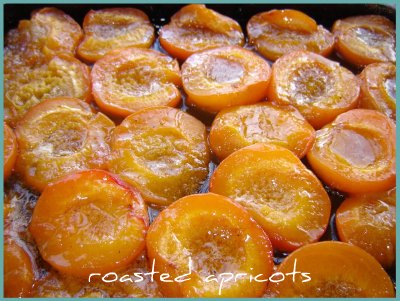
Of course the sorbet you make now is not going to keep all winter - after a while it starts to go all icy and the texture changes. But I'm very excited to have come across this recipe for Roasted Apricot Sorbet on Couldn't Be Parve. I haven't actually made this recipe yet (though I did pass the link on to a friend who has made it and declared it to be "absolutely divine"), but I have roasted several batches of apricots (6kg in all) and put them in the freezer to make into sorbet during the winter. Let me tell you that when I had a wee taste of the first batch I almost went weak at the knees - they taste soooooo good!! I know that these are going to make the most heavenly sorbet, but they would be divine as they are on good vanilla ice-cream, or dolloped on top of crumpets instead of jam, or used to fill a tart ... or just eat them straight out of the pan when no-one's watching.


I have plans to also roast some nectarines and some peaches this week, as I see no reason why I shouldn't be able to treat them exactly the same way. Will keep you posted on progress.


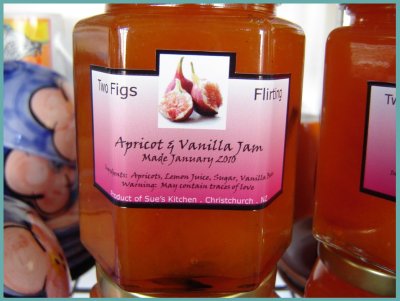
I made this jam, exactly according to the recipe and I will definitely make this again. There is absolutely nothing that I would change about this - it is probably the best apricot jam I think I've tasted for years. It is not too sweet and the set is just perfect - I think it's the lemon juice that helps on both these fronts. I ended up with about a dozen jars, and don't you just love my special labels I produced ....


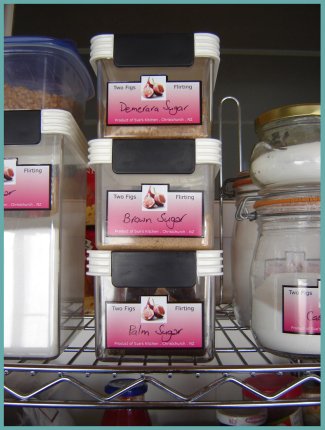
I'm so excited I have been labelling everything in my pantry!! These are relatively inexpensive, and available in any quantity - even very small quantities (just half a dozen, or even just 1 or 2) if you want them. If you're interested in some labels of your own for your pantry ingredients or preserves send me your query via the "Contact Me" box on the sidebar of this blog. I know that's a little bit Martha, but then for someone who is obsessive about folding (my folding of fitted sheets is legendary), this should come as no surprise.


I hope this has inspired you to do something with all that beautiful summer fruit that's out there right now. Please leave me a comment and let me know what you've been doing with summer's bounty.