Sunday, December 5, 2010

Salad of Asparagus with Artichokes, Arugula, Pomegranate and Beetroot with White Balsamic Dressing

Salad of Asparagus, Artichokes, Beetroot & Pomegranate 1

I know that many of you right now are wrapped in thermals and "downy" jackets, and shivering beneath several feet of snow.  Meanwhile, down here in the southern hemisphere, we are throwing off our "cardies", booking in for an emergency pedicure and breaking out our jandals (that might be flip-flops or thongs where you come from).  It's time to bring out the sunhats, beach towels and togs (or that may be bathers, cossies, or swimsuit to you), which of course raises the issue of how far away from the beach can you wear your togs before they become undies ... check out this hilarious NZ television ad which addresses the issue.


Okay, so I headed a little off topic there, but as we head towards Christmas you might now be starting to get the idea that down here it's definitely not all about holly berries and snow, roasted turkey and plum pudding.  Down here, it's more about sun, sand, surf and pohutakawa flowers, barbeques, seafood, shandies, salads, strawberries and pavlova.

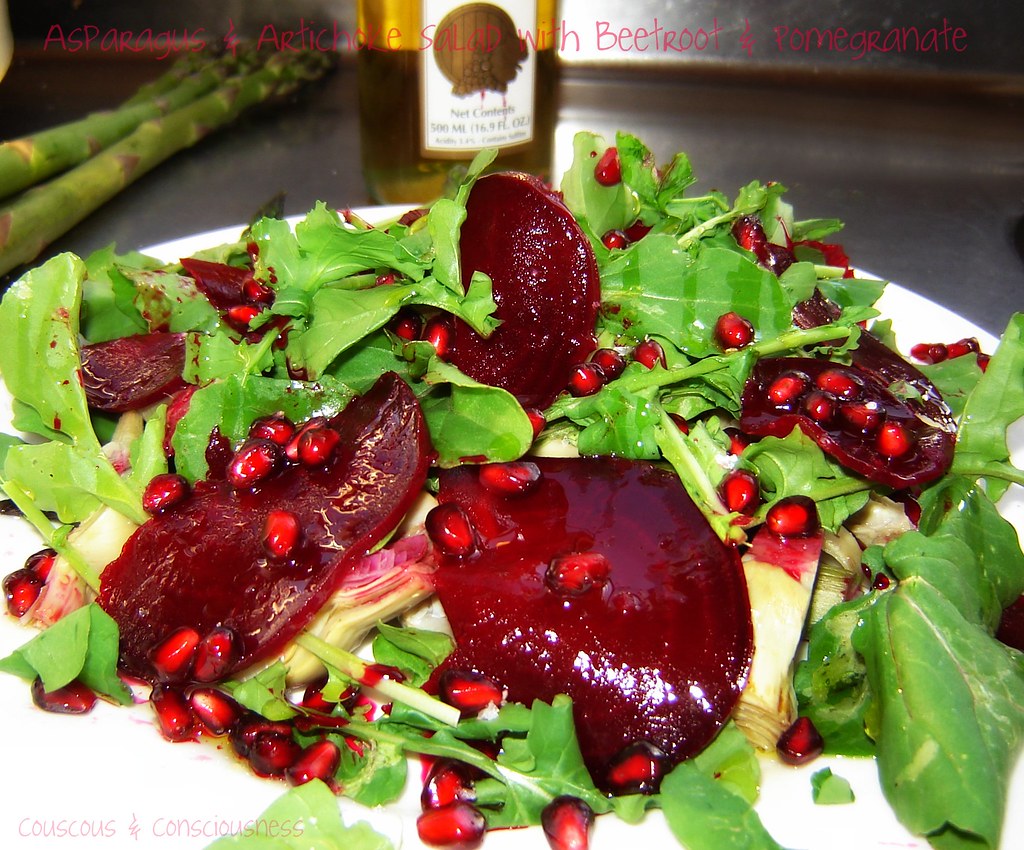
The recipe I'm sharing with you today, could not be more quintessentially Kiwi summer if it tried, and I make no apology for that - even if it doesn't fit with you right now, bookmark it for later because I'm pretty sure you are going to want to try this one.  The dramatic colours of this salad give this a very festive look, making it the perfect addition to the Kiwi Christmas table, very reminiscent of those flowering pohutakawa trees.  In my opinion, this salad has real class - it is stylish and sophisticated in its choice of ingredients and compositon, which is a great counter-point to the flavours which are bold and earthy.  This would be perfect as a main course salad for a light lunch, or would make a very elegant starter to a more substantial evening meal.  And, as if all that is not Kiwi enough, I chose this recipe from "Salads: The New Main Course" by Peter Gordon - a Kiwi chef, now living in London where he co-owns The Providores and Tapa Room, he is considered by many to be at the absolute forefront of "fusion food".

A couple of small changes I made to the recipe - I couldn't get pretty pink striped beetroot, as suggested, so used regular red ones instead;  also, I couldn't get purslane and nasturtium leaves, so substituted rocket (arugula) instead - I think watercress would also be a good alternative, and Peter Gordon also suggests that sea kale if you can get it is a great substitution - really any good looking, great tasting leaves will work.

Another note - this salad uses white balsamic vinegar, which you should be able to find in most specialty stores (New Zealand residents refer to my Source Guide).  This has a similar, though less intense flavour, to regular balsamic vinegar, but is pale in colour - this makes it perfect to use on occasions where you don't want such a dominant flavour profile (for example to accompany a fish dish perhaps), or where you don't want the colour of your dressing to spoil the look of your dish.  If you can't get white balsamic vinegar, then I suggest that you substitute with something like a cider or champagne vinegar.

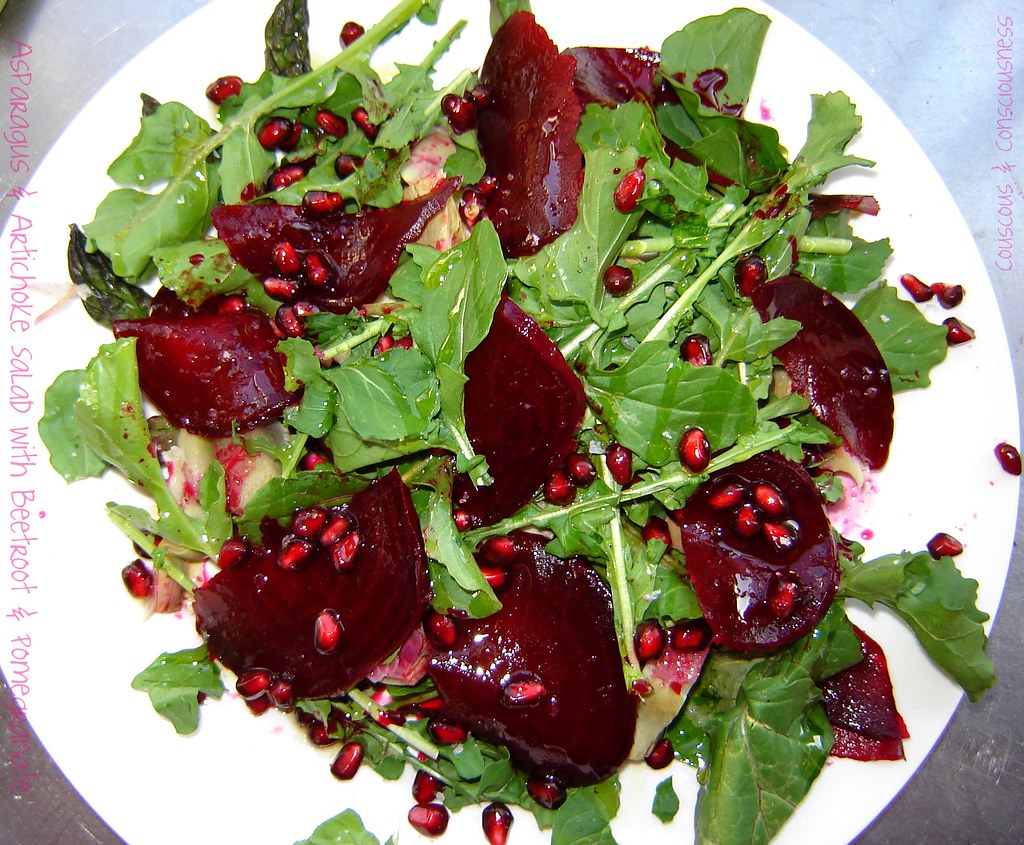
Salad of Asparagus with Artichokes, Arugula, Pomegranate and Beetroot with White Balsamic Dressing Recipe
Slightly adapted from Peter Gordon's
Vegetarian
Serves 2 as a main meal or 4 as an appetiser
Click here for a printable copy of this recipe

2 medium sized beetroot
2 tablespoons cider vinegar
1 teaspoon salt
2 tablespoons white balsamic vinegar (refer Source Guide)
4 globe artichokes
2 lemons
1 large pomegranate
12 asparagus spears
fresh rocket (arugula), or other leaves
nasturtium leaves to garnish, if available
extra virgin olive oil

Put beetroot into a pan with the cider vinegar and salt, cover with cold water, bring to the boil, and cook until tender - about 30-40 minutes.  Set aside to cool in the cooking liquid, then remove and peel.  Slice as thinly as you possibly can with a sharp knife, or even better with a mandoline if you have one.  Mix with the white balsamic vinegar and set aside.

Slice one of the lemons into rounds and put into a pot of cold water.  Juice the other lemon (don't discard the shells), and add the juice to the pan of water.  The artichokes oxidise quickly, so keep rubbing them with the inside of the reserved lemon shells as you work.  Firstly peel off the tough outer leaves - they will kind of snap off near the base.  Then using a knife, trim around the bottom of the artichoke and peel away the tough, fibrous, outer layer of the stem.   Cut off the top half of the leaves. Then cut them in half lengthwise,  and scoop the "hairy" choke out of the middle.  Add each one to the pan of "lemony" water as you go, and once they are all done, set the pan over heat and bring up to the boil.  Cook at a fast simmer until a knife slides easily into the thickest part of the heart - about 20 minutes.  Drain, run under cold water, then leave to cool.  Slice into pieces about 1cm thick.

Cut the pomegranate in half and remove the jewel-like seeds - I find the "spanking" method works best - hold one half of the pomegranate over a bowl, flesh side down, and "spank" firmly and repeatedly on the shell with a wooden spoon until all the seeds and any juice drop out into the bowl.  Discard any of the white pith that might also fall into the bowl.

Lastly, bring a pan of salted water to the boil, add the asparagus, bring back to the boil, and cook until the asparagus is just tender - about 2 minutes depending on thickness of the spears.  Drain and immediately refresh in iced water, and drain again.

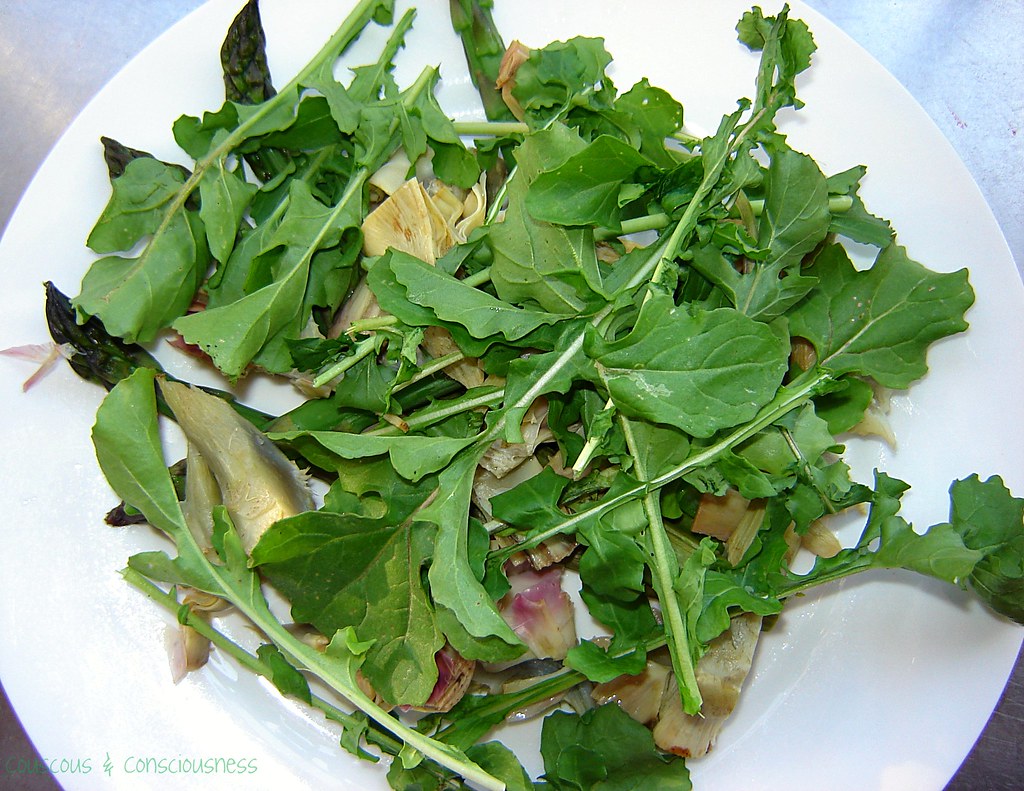
To assemble:  Arrange asparagus spears on a plate and place slices of artichoke over the top.


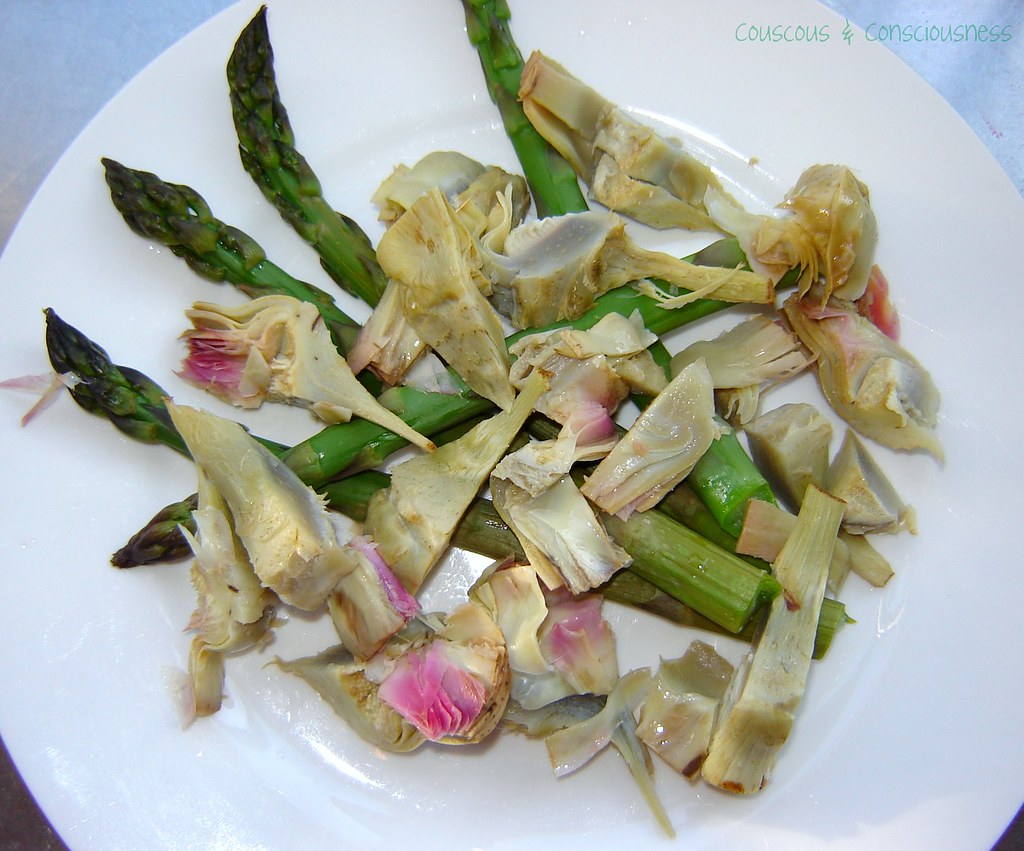
Scatter over the rocket, or whatever leaves you are using.

Salad of Asparagus, Artichokes, Beetroot & Pomegranate 3

Nestle the beetroot slices in amongst the leaves.  Scatter the pomegranate seeds and their juice over the top, garnish with the nasturtium leaves if you have them.  Drizzle the vinegar from the beetroot over the salad, and finish with a good drizzle of extra virgin olive oil and a sprinkling of flaky sea salt.

Salad of Asparagus, Artichokes, Beetroot & Pomegranate 2

I hope you give this beautiful salad a try, and if you're interested in more wonderful and innovative salad ideas then I highly recommend this book - imagine Cape Gooseberry, Smoked Duck, Sunflower Seed, Yoghurt & Chive Salad on Deep-Fried Tortilla Chips as an appetiser, or Panko-Crumbed Turkey, Honey-Glazed Parsnip & Watercress Salad, Cranberry-Pomegranate Compote & a Deep-Fried Egg as a substantial main, or Warm Salad of Brioche-Honey Croutons, Saffron-Poached Pear, & Rum Sultanas with Vanilla Mascarpone for a heavenly dessert.   Of course, I'll be bringing you more recipes from this wonderful book, but why wait? - why not get your very own copy by following the link below.

Salads: The New Main Course

Available from Amazon

I'm submitting this post to Cookbook Sundays, hosted by the lovely Brenda at Brenda's Canadian Kitchen.  She's worth a visit any day of the week, but why not head over there right now and see who else has dusted off their cookbooks - you'll almost certainly find some great recipes, and maybe you'll discover a new book you'd like to add to your collection.

cookbook sundays          

I'm also submitting this post to the Hearth and Soul blog hop, a place where you'll find lots of wonderful people who are passionate about great food and cooking from the heart - do go and have a look at what they're all cooking this week.

I'm also sharing this post at Food on Friday:Beetroot hosted by Carole at Carole's Chatter.

Friday, December 3, 2010

Going Crackers with Bittman

Parmesan & Rosemary Crackers 1

Funny how things just kind of fall into place sometimes.  I had been going ever so slightly "crackers" for about two weeks trying to decide what to make for my contribution to this month's Tackling Bittman event.  Don't get me wrong, this was not because there are any shortage of great Mark Bittman recipes to make, as a browse through his fabulous book "How to Cook Everything" or HTCE iPhone application will reveal.  It was more a case of there being so many great recipes to choose from that I was having trouble deciding.  The solution in the end, virtually found itself.

You see, lunchtime rolled around yesterday, at which time I headed for the fridge and pulled out the bowl of hummus I'd made the day before, which quite coincidentally had been made using this Mark Bittman recipe I've posted before.  That was when I realised that I was completely out of the pumpkin seed crackers I usually like to have.  Toast didn't seem right, no pita bread in the freezer, and I didn't feel like going out just to get crackers, and that was when I decided to turn to Bitty for help.

Out with my trusty iPhone, and sure enough a quick search turned up a recipe for homemade crackers.  The dough is very simple, takes just moments to make, and is infinitely variable.  I chose to use olive oil instead of butter as the shortening (as I wanted the olive oil flavour);  I also added in some freshly grated parmesan and fresh rosemary, and sprinkled a little flaky sea salt over the top before baking.  You could really add any herbs or freshly ground black pepper to dough;  nuts and seeds would also make good additions either gently kneaded into the dough or sprinkled over the top;  you can also make cream crackers by substituting cream as the binding liquid when you make the dough.  Are you starting to get the picture?  All told, about 20 minutes from start to finish and I had a batch of beautiful, crispy, Parmesan and Rosemary Crackers.  These tasted fantastic, and were a beautiful compliment to the hummus.  I'd like to be able to tell you that these keep well, but the truth is that they're gone already - next time I'll be doubling the recipe!!

Parmesan & Rosemary Crackers
Adapted from Mark Bittman's
Makes about 24
Vegetarian
Click here for a printable copy of the recipe

1 cup all-purpose flour, plus more as needed
1/2 teaspoon salt
2 tablespoons olive oil or butter
1/2 cup freshly grated parmesan cheese
1-1/2 teaspoons finely chopped fresh rosemary
1/4 cup water, plus extra as needed

Preheat oven to 200 degrees C (400 degrees F).  Lightly dust two baking sheets with flour or line with parchment paper.

Put flour, salt, olive oil and parmesan together in the bowl of a food processor, and pulse until combined.  Add water and let the machine run for a bit, then add extra water a teaspoon at a time until the mixture comes together but is not sticky.  Lastly pulse in the rosemary.

On a lightly floured surface, roll the dough out thinly, adding more flour if needed.

Transfer the rolled out dough to your prepared baking sheet.  Score lightly with a sharp razor or pastry wheel to form squares or rectangles.  (I think that next time I would also prick each of the squares in a couple of places with a fork - you will see why in a moment.)  Sprinkle flaky sea salt over the top.

Parmesan & Rosemary Crackers 4

Bake in the preheated oven until lightly browned, about 10 minutes.  Cool on a wire rack, and store (yeah, right!) in an airtight container.

Notes:

My first sheet of crackers turned into something that looked rather like a giant puff ball, and whilst it was nice and crispy on top was still soft on the bottom - tasted fantastic, but was rather more like very thin pita bread than crispy cracker.

Parmesan & Rosemary Crackers 3

This was where it became obvious to me that I needed to, firstly score the dough a little more firmly than I had originally done, and secondly prick the dough.  I also reduced the temperature of my oven for the second sheet of crackers to 190 degrees C (375 degrees F) - you may need to play around with that according to your oven - and set the oven rack a little lower down in the oven than the first time around.

Final verdict - perfectly crispy little crackers, made in less time than it would take to dash out to the supermarket, and at a fraction of the price.  With numerous variations to explore you can bet that I will be making these again - often!!

Parmesan & Rosemary Crackers 2

Interested in cooking some more with Mark Bittman?  I highly recommend any of these Mark Bittman books:

How to Cook Everything, Completely Revised 10th Anniversary Edition: 2,000 Simple Recipes for Great Food   How to Cook Everything Vegetarian: Simple Meatless Recipes for Great Food   Mark Bittman's Kitchen Express: 404 inspired seasonal dishes you can make in 20 minutes or less

Available from Amazon, Book Depository UK, and Fishpond NZ

This post is my submission to this month's Tackling Bittman blog hop.  If you're a Bittman fan, please come on over and join in the fun.

Bittman Button

This post is also submitted to the Tackling Bittman Giveaway at girlichef - she's giving away a copy of Bittman's "The Food Matters Cookbook" - entries are open until 31 January.

Thursday, December 2, 2010

Tackling Bittman Recipe Hop Volume 2


Bittman Button

If you've been following this blog for a while then you know that I am a big fan of Mark Bittman's, and you will probably have stumbled across several of the dishes I posted while I Heart Cooking Clubs was cooking with Bittman.  You may also recall this post last month, in which I told you about the Tackling Bittman blog hop started up by my friend Alex at A Moderate Life.  I'm very excited to now be able to tell you that I am now joining in with Alex, as well as Christy at Frugality and Crunchiness with Christy, Dr Laura at Who is Laura?,  and Chaya at My Sweet and Savoury to co-host this event.

So drag your copy of How to Cook Everything down off the shelves, and get cooking.  You may of course use any other Mark Bittman book that you can lay your hands on, or even the How to Cook Everything iPhone Application (which I highly recommend).  Other places to source Mark Bittman recipes are here on the How to Cook Everything website and here on the Mark Bittman website.  Post your dish, and then join in the "hop" by linking your post here (or at any one of the other hosts - your link will automatically show up on all four host sites), following the instructions below.  You could of course link up one of your previous posts - it may be an old post to you, but it could well be new to our audience.  I hope you'll join us - we'll be "hopping" the first Thursday of every month, and the linky will be open for one week.

Now for the necessary part - the rules. They are pretty simple, especially if you are familiar with hops.

Rules for linking:

Please use your best blog hop etiquette when linking. The rules are in place to help everyone have the best blog hop experience possible.

If you are new to a blog carnival, or blog hop, it is very easy to learn how to join in the fun! Simply go to the current blog post for the hop and scroll down to the bottom where you will see a small box that will say, "You're next" or "Your link here". When you click on that link, you will be asked to enter the URL of your recipe or article.
  • Please link to your article only and not directly to your blog front page. The linky may ask you to upload a photograph from your computer, then you click next and leave a comment on the blog host's post.
  • We also ask that you place a link back to the blog host at the bottom of your post - this means adding in the URL of the blog hop post, which you can copy from your browser address bar.  You could also choose to place a blog badge into your post, which is explained below. Easy peasy, lemon squeezy!
  • At least one host will visit each link before the next linky period opens, because this is personal for us…we want you to know that we appreciate that you’ve taken the time to create a post, add a link back to the hop, and add your link!  We’ll be sure to acknowledge this with a comment and a tweet on Twitter (using hashtag #bittyhop).
  • One link per blog monthly on the Tackling Bittman Recipe Hop, please.
  • Must include a link back to one/any of the host sites (through worded link or badge) in your actual post, not just on your sidebar…although we love having links on your page as well (this benefits all of us). You will be sent a gentle reminder if no link is added to your post, we understand that sometimes people forget…but if it becomes a regular occurrence, (even though we don’t like to do it) your post may be removed.  It’s just not fair to those who do take the time and show the grace to link back.
  • Linky will stay open from 5:00 AM the first Thursday of Every Month, to 11:59 pm the following Thursday (EST).

If you would like to use a badge, please copy the code in the box beneath the badge below and paste that into your post, and also into your sidebar if you wish:

TacklingBittman


Lets's get cooking and thanks for joining in!
Sue, Alex, Christy, DrLaura, and Chaya

Monday, November 29, 2010

Peanut Butter Granola Bars

Peanut Butter Granola Bars 1

Now, I would be the first to tell you that these are not going to win any beauty contests.  That said, what they lack in looks, they more than make up for in taste.  This week is our monthly Pot Luck at I Heart Cooking Clubs, where we continue to cook with Giada de Laurentiis, and I'm bringing these Peanut Butter Granola Bars to the party.  Once word gets out about the deliciousness lurking behind that rather unattractive looking facade, these little bars will be wallflowers no more.

These have loads of texture - oats, slivered almonds and chunks of chocolate - only just held together with peanut butter, honey and brown sugar (all of which add their own flavour notes).  When Deb at Kahakai Kitchen made these a few weeks ago, she mentioned that she had issues with crumbling, and as she discovered so did many others who commented on the original recipe.  Many people offered all sorts of advice to resolve that - less of this, more of that, etc - but there also seemed to be nearly as many people who didn't have problems.  Lacking the baking savvy (I've told you that before) to start tinkering with the recipe, these sounded good enough to me to risk a bit of "crumblage", so I decided to stick to the original recipe first time around.

The only changes I made to the recipe were:  firstly, I didn't bother pre-toasting the almonds - just seems like a bit of an unnecessary step to me;  secondly, I used a slightly smaller tin than that which was suggested (because that was what I had), so my bars are a little bit thicker than is perhaps intended - not necessarily a bad thing;  and thirdly, and this was more by accident than design, was the cooking time.  The recipe says, "Bake ...... 15 minutes.  Remove from oven ..... cool ... 1 hour."  My mind read "bake for 1 hour", and into the oven it went.  At 30 minutes things were smelling very toasty, and I went to turn it around in the oven - my oven doesn't brown evenly, and everything has to be turned around about half way through cooking.  At this stage, I thought "if this cooks for another 30 minutes it will be burnt to a crisp!"  That was when I read the recipe properly.  So my bars ended up with 30 minutes of baking instead of 15, which I think did firm them up quite a bit.  After cooling at room temperature for about an hour, I then refrigerated for a couple more hours before cutting.  End result - a little bit crumbly, but not too bad.  I have found it necessary to keep them in the fridge though - as soon as they are left out of the fridge for a bit they start to crumble a bit more.  Incidentally, these will not be dry and crisp as you might expect from a granola bar, but are actually more moist and soft - ever so slightly cakey - again, not necessarily a bad thing.

Can't help myself - I have been eating these for breakfast every morning.  What?  Don't raise your eyebrows at me.  This is cereal, nuts, peanut butter, honey, and egg - how is that not breakfast?

Peanut Butter Granola Bars 2

Peanut Butter Granola Bars
Adapted from recipe by
Makes 16-24 bars (depending on size of tin)
Click here for a printable copy of this recipe

vegetable cooking spray
1 egg white (save the yolk for mayonnaise)
1/2 cup crunchy peanut butter
1/3 cup brown sugar
1/4 cup honey
1/2 cup butter, melted
2 cups rolled oats
1/4 cup slivered almonds
1/3 cup chocolate chips

Preheat oven to 180 degrees C (350 degrees F).

Spray a 18cmx27cm (7x10⁻³/4 inch) (I used a 20cm (8 inch) square) non-stick baking tin with cooking spray.  Line with baking paper, allowing excess paper to extend beyond edges of the tin, and spray the paper lightly with cooking spray - don't be tempted to leave this out.

In a medium bowl, beat the egg white until frothy.  Stir in the peanut butter, brown sugar and honey.  Add the melted butter, rolled oats and slivered almonds.  Stir to combine everything, and then stir in the chocolate chips.

Tip the mixture into the prepared baking tin, and spread out, pressing lightly to form an even layer.  Bake until the edge of the mixture begins to brown - about 15 minutes (I baked for 30 minutes).  Remove from the oven, cool for at least an hour, then refrigerate for another 2-3 hours, before cutting into squares.

Store in the refrigerator.

Interested in getting to know Giada a bit better?  Then do go and visit my friends at I Heart Cooking Clubs and see what they've all been cooking up ....

IHCC

.... or check out Giada's Kitchen and many of her other titles, available from Amazon, Book Depository UK and Fishpond NZ

Giada's Kitchen: New Italian Favorites    Giada at Home: Family Recipes from Italy and California    Everyday Italian: 125 Simple and Delicious Recipes

Sunday, November 28, 2010

Pork Chops with Saffron Baked Potatoes

Pork Chops with Saffron Baked Potatoes 1

As I have told you here before, I eat a predominantly vegetable-based diet.  This has more to do with my preference for vegetables over meat, than any opposition to the killing and consumption of animals.  As long as humane practices are observed in the raising and killing of those animals, then I am not opposed to eating them.  I am also convinced that for most of us the consumption of some animal products - meat, fish, eggs and dairy products - are essential to maintain optimal health.  I know all the vegetarians and vegans out there would probably have a lot to say about that - say what you like - that is my belief (based on much research, reading and reflection, I might add) and I'm sticking to it.

Anyhow, I'm not about to turn this post into a lengthy dissertation on the rights-and-wrongs, pros-and-cons of eating anything - I'm just saying that I'm not that much of a meat-lover and I would happily sit down to a big bowl of vegetables or a beautiful bowl of salad, than a big, juicy steak, any night of the week.  I never think of vegetables or salads as side dishes - for me they are definitely the main event.

I've also got to tell you that, as long as pigs roam this earth, even if I wanted to I could never become a vegetarian.  As you already know, I think just about everything can be made a little better with bacon and, whilst that big, juicy steak might not excite me .... dangle a pork chop in front of me and I would willingly give up state secrets, absolutely no torture necessary.  You really need to know, up front, that if your life ever depends on my keeping schtum about something, you sure as heck better hope that my captors don't manage to come up with a pork chop!

I have a few favourite pork chop recipes that I love and frequently come back to.  The first is this recipe for Pistachio and Blue Corn Tortilla Crusted Pork Chops by The Enchanted Cook - I think this might have been the first recipe I discovered on Veronica's beautiful blog, and it was such a big hit around here that, not only have I made it several times since, but I have become a regular visitor at The Enchanted Cook - check it out, I'm sure you'll love it too.  Another favourite pork chop recipe that gets made often around these parts is this one from Nigella Lawson for Mustard Pork Chops with Gnocchi.

The recipe I'm sharing with you today, will definitely be added to that list of favourites, and I know I will be making it again many times over.  Potatoes are baked in a saffron and sage infused broth, while pork chops are baked on top of them allowing all that beautiful "piggy" flavour to permeate the potatoes.  The original recipe called for onions in here as well, but I used wedges of fennel instead, and added a few sage leaves - really, what goes better with pork than fennel and sage? - not much.  The original recipe is by Kate Nichols and comes from the November 2007 issue of Delicious magazine.

Pork Chops with Saffron Baked Potates Recipe
Adapted from recipe in
November 2007 issue of Delicious magazine
Serves 4
Click here for a printable copy of this recipe

1kg potatoes (I used red ones, cut into quarters lengthwise)
2x fennel bulbs, halved (quartered if they are large)
2 tablespoons olive oil
pinch saffron threads, soaked in 2 tablespoons boiling water
1-1/2 cups vegetable or chicken stock
salt & pepper

4x rashers streaky bacon, cut into strips
1 tablespoon olive oil
fresh sage leaves

4 pork chops
salt & pepper
extra sage for garnish

Preheat oven to 180 degrees C (350 degrees F).

Toss together the potato, fennel wedges, olive oil, saffron and its soaking liquid, and stock in a roasting pan.  Season well with flaky sea salt and freshly ground black pepper.

Pork Chops with Saffron Baked Potatoes 4

Heat the 1 tablespoon olive oil in a skillet over high heat, and cook the bacon until crisp.  Remove from the pan, using a slotted spoon, and sprinkle over the top of the potatoes in the roasting pan.  Tuck a few sage leaves in amongst the vegetables.

Pork Chops with Saffron Baked Potatoes 3

Season the pork chops on both sides with flaky sea salt and freshly ground black pepper.  Using the same pan you cooked the bacon in, over high heat, sear the pork chops for 1-2 minutes on each side until lightly browned.  Place the pork chops on top of the potato mixture, and bake until the pork is golden and the potatoes are tender - around 40 minutes.

Pork Chops with Saffron Baked Potatoes 2

Scatter a little extra fresh chopped sage over the top and serve.

I'm submitting this post to Magazine Mondays - mmmm, can't wait to see what else is cooking.  You can find last week's round-up here at "Cream Puffs in Venice".


I'm also submitting this post to the Hearth and Soul blog hop, a place where you'll find lots of wonderful people who are passionate about great food and cooking from the heart - do go and have a look at what they're all cooking this week.

Saturday, November 27, 2010

Roasted Pepper & Sweet Potato Pasta - Quick & Easy # 7

Roasted Pepper & Sweet Potato Pasta 4

Today I have a wonderful pasta dish to share with you - one of those serendipitous discoveries that comes about when an unplanned fridge/pantry raid to come up with a meal without having to run out to the supermarket yields unexpectedly good results.

I had only myself to feed and thought it might be a good opportunity to get creative with a few leftovers.  A scramble around in the fridge unearthed half a yellow pepper, one orange pepper, one lonely little bocconcini, a piece of feta and some olives.  I also discovered a sweet potato, and about three packets of varying pasta shapes, each with just a handful of pasta left in them.

Roasted Pepper & Sweet Potato Pasta 2

First of all preheat the oven to about 220 degrees C (425 degrees F), and set a large pot of water over high heat to boil.

Peel the sweet potato and cut into chunks.  Core and deseed the peppers and cut into thick slices.  Put both the sweet potato and peppers into a roasting pan, drizzle with a little olive oil, sprinkle with some flaky sea salt and freshly ground black pepper.  Cook in the preheated oven until the vegetables have softened and are starting to brown and caramelise - about 20 minutes.

Add pasta to liberally salted boiling water and cook until al dente.

Drain pasta and put into a warmed serving bowl.  Crumble cheese over the pasta and toss through.  Add the hot vegetables, a good handful of olives.  Drizzle liberally with extra virgin olive oil (the best you can lay your hands on) and add a drizzle of pomegranate molasses.  Season with flaky sea salt and freshly ground black pepper.

Toss everything together well, and serve immediately.

Roasted Pepper & Sweet Potato Pasta 1

This was one of the best pasta dishes I've had for ages - I loved the combination of the caramelised peppers and sweet potato with the sweet tartness of the pomegranate molasses, spiked with the saltiness of the feta and olives - I thought this was a winner.  I will definitely be wanting to make this again, and now that I've shared it with you I'll be able to do that.  You see, so often I create something in the kitchen, without keeping any record of it, and then some months later when I want to make it again I can't remember what I did.  Do you do that?

Roasted Pepper & Sweet Potato Pasta 3

I'm also submitting this post to Presto Pasta Nights, which is being hosted this week by Ruth at Once Upon a Feast - you will be able to see a full round-up of all the submissions there on Friday 3 December.   In the meantime, visit Denise at Oh Taste n See on Saturday 27 November to see a round-up of last week's entries.  I'm looking forward to checking out a whole lot of new pasta dishes.