Friday, May 31, 2013

Spice Cookies

Spice Cookies 2

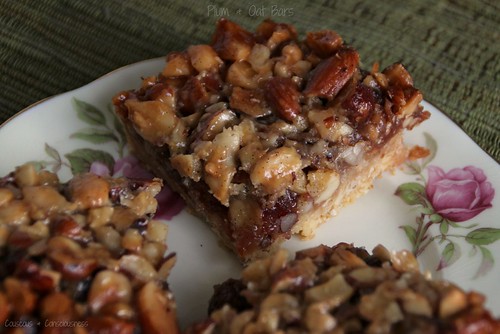
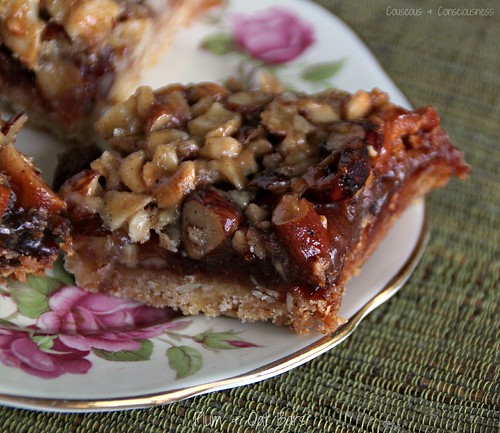
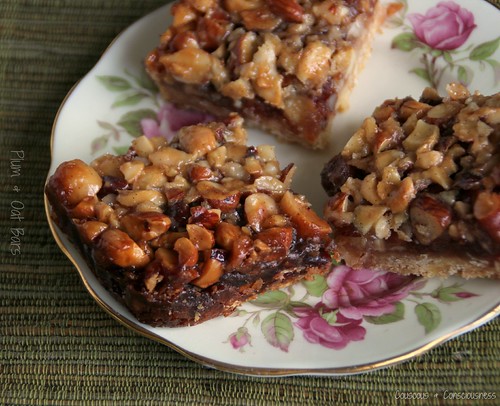
This month at Tasting Jerusalem, we're sampling Ottolenghi's baked goods.  Having recently made (and adored) Ottolenghi's Plum & Oat Bars, I had no hesitation dipping into more of his sweet treats.  Jerusalem: A Cookbook has some positively sensational sweets and desserts, but I figured these Spice Cookies would make a great wee treat to take into the shop for my work friends to enjoy.

We're also dipping into Something Sweet from Ottolenghi at I Heart Cooking Clubs this week, so this post is doing double duty.

In the introduction to this recipe, Ottolenghi says, "These are very loosely inspired by duvshanyot (round iced cookies, made with honey and spices, typically for Rosh Hashana), or pfeffernusse.  They are actually more closely related to an Italian spice cookie and are hugely popular on the sweet counter at Ottolenghi over Easter and Christmas."  In fact, when I shared these at work, the first reaction I got was, "these taste like Christmas".

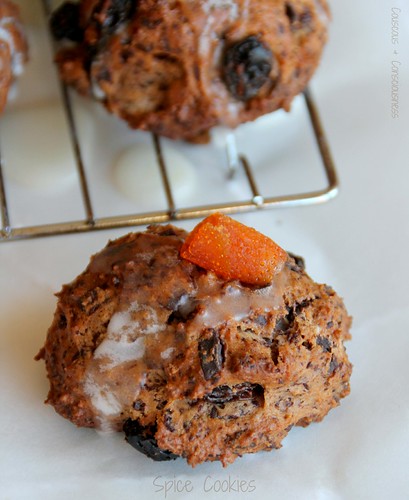
The cookies are crisp on the outside, and slightly softer on the inside, delicately spiced, with lovely hits of chocolate, raisins, and citrus.

I made a few minor changes to the recipe, mostly just to suit what I had on hand.  I used raisins soaked in an orange liqueur, rather than the currants and brandy called for in the original recipe - I think cranberries would be a nice alternative too.  I added in some cardamom, just because I love it, and left out ground allspice which I didn't have.  Also, because I failed to observe baking rule 1.01, I failed to read the recipe through before I started, and then discovered in the midst of everything that I had little more than a tablespoon of butter on hand, instead of the 1/2 cup required by the recipe.  I wasn't going to run out to the supermarket at that stage, so a few tablespoons of yoghurt to the rescue, and things worked out fine.  I can't say what difference the butter would have made to these cookies, but I certainly didn't feel as though the absence was discernible.  Also, the original recipe only asked for 1/2 an egg - as there is no world in which I would measure out 1/2 an egg (and then be left wondering what to do with the other 1/2), I put in the whole egg.  I also thought this might compensate for the lack of butter.  Lastly, I topped them off with some of my homemade Seville Orange Spoon Sweets, instead of the chopped candied peel called for in the original recipe.

I hope you give these a try.  I have to say that I'm not normally a huge cookie lover - given the choice I would usually opt for a piece of slice, or even cake.  These were, however, delicious cookies.  They were easy to make and the house smelled amazing while they were baking.  I would definitely make these again.

Spice Cookies 1


Spice Cookies Recipe
Adapted from recipe by Yotam Ottolenghi & Sami Tamimi
Click here for a printable copy of this recipe

125g (4 oz) raisins
2 tablespoons orange liqueur (I used "44")
240g (8 oz) plain flour
1/2 tablespoon cocoa powder
1/2 teaspoon baking powder
1/4 teaspoon baking soda
1/2 teaspoon cinnamon
1/2 teaspoon ground cardamom
1/2 teaspoon ground ginger
1/2 teaspoon grated nutmeg
1/4 teaspoon salt
150g (5 oz) dark chocolate, finely chopped (I used Whittaker's Dark Ghana)
35g (1 oz) room-temperature butter
3 heaped tablespoons natural yoghurt
125g (4 oz) caster sugar
1 teaspoon vanilla paste (I used Heilala)
grated zest of 1/2 lemon
grated zest of 1/2 orange
1x medium free-range egg
1 tablespoon diced candied citrus peel

Glaze:
3 tablespoons lemon juice
160g (6 oz) icing sugar

Preheat oven to 190 degrees C (375 degrees F).

Soak the raisins in the liqueur for 10 minutes.

Meanwhile, sift together the flour, cocoa, baking powder, baking soda, spices and salt.   Add the chopped chocolate, and mix well.

Cream together the butter and sugar, using an electric beater, just until well combined.  Then add the yoghurt, vanilla paste, and citrus zest. Continue beating for about a minute, then add the egg and beat for a further minute.

Now add the dry ingredients and the raisins, along with their soaking liqueur.  Mix until everything comes together - you might need to use your hands.

Roll spoonfuls of the dough into round balls and place them on baking sheets lined with baking paper, about 2cm (3/4 in) apart. (* See note below)

Bake the cookies in the preheated oven, until the outsides have firmed but the centre is still a little soft - about 15-20 minutes.  Remove from the oven, cool on the baking trays for 5 minutes, then transfer to a cooling rack set over a sheet of parchment paper.

While the cookies are still warm, whisk the glaze ingredients into a thin, smooth icing, and then drizzle a tablespoon of icing over each cookie - it will drip away, leaving a very thin glaze on the cookies.  Finish with a little of the candied peel on top of each one.

Store in an airtight container.

*Note:  The recipe did say at this stage to rest the cookies in the fridge for an hour before baking.  I didn't notice this until after I'd put the cookies in the oven, and I don't think they suffered adversely for this omission.

I am sharing this post at Tasting Jerusalem, a virtual cooking community exploring the vibrant flavors and cuisine of the Middle East through the lens of “Jerusalem: A Cookbook” by Ottolenghi and Tamimi published by Ten Speed Press. You can follow along and cook with us by subscribing to omgyummy.com, following the hashtag #TastingJrslm on Twitter and Instagram, and liking our Facebook page.

If you would like to get to know Yotam Ottolenghi a little better, then do go and visit my friends at I Heart Cooking Clubs and see what they've all cooked up ...

IHCC Ottolenghi Leek Badge resized

... or check out Jerusalem and Ottolenghi's other great titles available from Amazon USA, Amazon UK or Fishpond NZ.

          Jerusalem

I will also be submitting this post to Sweet New Zealand.  Inspired by Alessandra Zecchini, Sweet New Zealand is an event for all Kiwi bloggers (whether living at home or abroad), or all foreign bloggers living in New Zealand, to link up their sweet treats.  During the month of June, I will be hosting Sweet New Zealand right here at Couscous & Consciousness.

Sweet New Zealand Badge A

And, just because I really like to spread the love around, I'm also sharing this post this week at See Ya In the Gumbo hosted by the lovely, and very amusing, Michelle at Ms. enPlace.


See Ya in The Gumbo Badge


Saturday, May 25, 2013

Pasta with Sardines

Pasta with Sardines 4

This week is Pot Luck week at I Heart Cooking Clubs, and this means that we get carte blanche to choose any recipe we like either from our current chef, who as I'm sure you know by now, happens to be the incredibly inspiring Yotam Ottolenghi, or any one of the seven other chefs we have previously featured at IHCC.

I actually had an Ottolenghi dish picked out weeks ago that I was going to make for this week's challenge, but somehow that didn't come to pass and I decided that today was the day to get this post out of draft.  This dish is ever so slightly adapted from a Mark Bitman recipe, and is one of my favourite pasta dishes.  Mark Bitman was actually the featured chef when I first joined the IHCC community, and I loved cooking his dishes.  This recipe was one that I made way back then, with all good intentions for publishing it as my "Farewell to Bitman" post.  Somehow, that didn't happen, and although I've made this dish several times since, the post has continued to languish in draft.  Time for that to change.

This is one of those great "pantry raid" dishes, perfect for using up a few of those store cupboard ingredients - pasta, raisins (original recipe uses currants, but I prefer raisins), pine nuts and tinned sardines.  On the subject of sardines, I actually prefer to use fresh, and I have included a video from YouTube here which shows just how easy they are to clean - I promise that it is totally worth the little bit of effort if you are able to get them fresh.  However, the original recipe calls for tinned sardines, and they will work perfectly well if you either can't lay your hands on fresh ones or can't be bothered to clean them.


Other changes I like to make to this dish, are replacing onion with fennel - I think the "aniseed" flavour is a great complement to the fish and the raisins, and I also like to add in some chopped preserved lemon for its intensely lemony-salty hit.

This dish is incredibly quick to make - once you've prepared the fish (which is itself the work of moments), the rest of the dish pretty much comes together in the amount of time it takes to boil pasta, making it perfect for a quick, mid-week dinner.

Add to this the fact that, from both an ethical point of view and a healthy one, sardines are a great choice, and you have a win:win dish.  Hope you'll try it.

Pasta with Sardines 5

Pasta with Sardines Recipe
Adapted from a recipe by Mark Bitman from
Makes 2 generous servings
Click here for a printable copy of this recipe

6x fresh sardines
1/4 cup flour
flaky sea salt & freshly ground black pepper
olive oil

250g pasta ( I used De Cecco casareccia)
salt

handful of raisins, soaked in warm water while you prepare the sardines
handful of pine nuts, lightly toasted
olive oil
1x fennel bulb, thinly sliced
1/2 a preserved lemon (discard the flesh, and slice the skin thinly)
grated zest of 1x lemon
large handful fresh parsley leaves, coarsely chopped
freshly ground black pepper

Put a large pot of water over high heat and bring to the boil.

Meanwhile, prepare the sardines as per the video above.  Wash thoroughly and use a paper towel to pat completely dry.

Pasta with Sardines 1

Spread flour, seasoned with flaky sea salt and freshly ground black pepper, on a plate.  Dredge the sardines in the flour, shaking off any excess, and set aside.

Pasta with Sardines 2

Heat a tablespoon or so of olive oil in a shallow frying pan over medium heat.  As soon as the oil is hot, add the sardines to the pan, and continue to cook until the fish is golden brown and almost cooked through.  Remove from pan to a plate lined with a paper towel to absorb any surplus oil.  Break into slightly bigger than bite-sized pieces.

Now liberally salt the boiling water, and add the pasta to the water.  Cook according to the packet instructions until al dente.

Meanwhile, heat another tablespoon or two of olive oil in a large skillet over medium heat.  When hot, add the sliced fennel and saute until the fennel has softened - about 6 to 8 minutes.  Add the drained raisins, most of the pine nuts, preserved lemon skin, sardines, and a generous grind of black pepper.  (Because the preserved lemon is salty, you may find that you don't need any additional salt.)  Stirring gently, combine everything well, and cook until everything is heated through and fish is cooked through.

Pasta with Sardines 3

Drain the pasta, reserving a cup of the cooking water.  Add the pasta to the pan containing the fish, and add most of the chopped parsely.  Toss carefully to combine and add a little of the reserved pasta water if necessary.  Taste and adjust seasoning to your liking

Transfer to a warm serving bowl, and sprinkle over the remaining pine nuts and parsley, and the grated lemon zest.

Delicious served immediately or at room temperature. 

If you would like to get to know Mark Bitman a little better, then do go and visit my friends at I Heart Cooking Clubs and see what they've all cooked up ...


or check out some of these great Mark Bitman cookbooks:

How to Cook Everything, Completely Revised 10th Anniversary Edition: 2,000 Simple Recipes for Great Food   How to Cook Everything Vegetarian: Simple Meatless Recipes for Great Food   Mark Bittman's Kitchen Express: 404 inspired seasonal dishes you can make in 20 minutes or less

Available from Amazon, Book Depository UK, and Fishpond NZ

I'm also sharing this post this week at See Ya In the Gumbo, hosted by the very lovely Michelle at Ms. enPlace.

See Ya in The Gumbo Badge


Sunday, May 19, 2013

Lemon & Goat Cheese Ravioli

Lemon & Goat Cheese Ravioli 4

The conversation at our place the other morning went something like this.

He (wandering into the kitchen):  "What are you doing?"

Me:  "Making pasta."

He:  "How come?"

Me:  "It's for this week's blog post."

He:  "What are you going to make it into?"

Me:  "Lemon & Goat Cheese Ravioli"

He:  "Ohhhh!" (This was not a delighted or excited kind of "ohhhh", you understand, but almost verging on an "eeewwww" kind of "ohhhh".  Which was not an altogether unexpected reaction - he is after all a person who is not that fussed on lemon - doesn't mind a bit of it, but not enough for it to be the hero of the dish.)  Actually this was exactly the kind of reaction I was hoping for, because this is the kind of thing I like to make a big batch of, and then stash in the freezer to whip out for what I think of as my "solitary pleasures" dinners when I'm eating alone.

He (knowing that there was already something else planned for dinner):  "When is that going to be for?"

Me:  "It's for my lunch.  Would you like some?"  I wasn't really keen on sharing, but it's the decent thing to offer, isn't it, even if you're secretly hoping the other person will say no.

He:  "Hmmm, I don't think so.  I was thinking about maybe barbequing a bit of fish for my lunch."

I breathed a quiet sigh of relief, and offered up a silent prayer of thanks to the gods of solitary pleasures diners.  And then ... next minute ...

He:  "No, actually, I'll give it a try."  How did I not see that coming??!  Clearly there was some shortcoming in aforementioned prayer.

Fast forward a couple of hours, and lunch is served.

He (taking a big mouthful):  "Ohhhhhh!"  This time, however, that "ohhhhh" was more a deep sigh of satisfaction than an "eeewwww" kind of "ohhhhh".

Need I say more?  Give this a try.  If you're a lemon lover you will adore it.  Even if you're not, chances are you'll still get quite a lot of satisfaction out of it.

This is another recipe from the inspirational Yotam Ottolenghi, from his book Plenty, which I'm sharing at I Heart Cooking Clubs where our theme this week is "Use Your Noodle".

I used my own basic pasta recipe for the dough, because that's the one I've worked with for so long now, and I know it really works.  I did add in the lemon zest and turmeric that Ottolenghi suggests.  While I'm on that subject - I know that there are at least a couple of you who don't like turmeric.  Let me assure you that it is such a tiny amount that you really don't taste it at all, but it does give a lovely colour to your pasta, so I highly recommend that you take the leap of faith and leave it in if you're making this recipe.

I also found that the amount of filling in this recipe only filled half of my pasta, which was fine with me as I just rolled out the rest of the pasta, cut it into tagliatelle, and popped it into the freezer for another day.  By all means cut back the pasta quantity to suit if you feel so inclined, but in all honesty if you're going to go to the trouble of making pasta, you might as well go all out and make a decent batch of it to use at a later date.

Lemon & Goat Cheese Ravioli 5

Lemon & Goat Cheese Ravioli Recipe
Adapted from a recipe by Yotam Ottolenghi
from Plenty
Serves 4 as a starter or 2 as a light meal
Click here for a printable copy of this recipe

Pasta:
basic pasta dough (see below)
1/4 teaspoon turmeric
grated zest of 3 lemons

Filling:
300g (11oz) soft goat cheese
flaky sea salt
pinch of chilli flakes
freshly ground black pepper

To serve:
2 teaspoons pink peppercorns, lightly crushed
fresh tarragon, roughly chopped
grated zest & juice of 1x lemon
extra virgin olive oil

Make pasta dough as recipe below, adding the turmeric and lemon zest to the flour before adding the eggs.

While the pasta dough is resting, prepare the ravioli filling.  Place the goat cheese and seasonings in a small bowl, and mash with a fork to combine.  Taste and adjust seasonings to your liking.

After resting the pasta dough, divide into six equal sized pieces.  Working with the first piece of dough (keeping the remaining dough covered with plastic wrap while you work), roll it out according to the instructions below to the thinnest setting on your pasta machine.

Once rolled out, lay the strip of pasta flat, then place teaspoons of filling (about 2 to 3 cm apart) down one side of the strip.  Brush one long edge of the pasta strip, and in between each spoonful of filling, with water.  Fold other side of the pasta over the filling, and cut in between each one.  Make sure all air is pushed out around the filling and each square is well sealed.

Lemon & Goat Cheese Ravioli Collage

Now repeat with the remaining pieces of dough until all the filling has been used.  Leave the filled ravioli on a cloth, lightly dusted with flour, to dry for about 10-15 minutes.  (At this stage you could freeze your ravioli if you like - cook from frozen when you want to use them.) 

While the pasta is drying, bring a large pot of water to a rapid boil.  Salt the water liberally, and add ravioli to the pan.  Cook until al dente - about 3 minutes.

Drain and arrange ravioli on serving plates.  Sprinkle with the grated lemon zest, chopped tarragon and crushed pink peppercorns.  Drizzle generously with extra virgin olive oil, and finish with a squeeze of lemon juice.  Serve immediately.


Basic Pasta Dough Recipe

3-1/2 cups high grade flour, plus extra for kneading & rolling
5x large, free-range eggs

Sift flour into food processor.

Break eggs into a jug and lightly whisk together.

Set the food processor running, and pour the eggs in through the feed tube.  Mix until it clumps together into a ball.

Remove from food processor to a lightly floured bench, and knead for a full 10 minutes, dusting with extra flour as necessary.  Final dough should be elastic and silky.

Wrap the dough in plastic wrap and allow it to rest for 30 minutes at room temperature.

After resting the pasta dough, unwrap the dough ball and cut it into six pieces.  Work with one piece at a time, keeping the other pieces wrapped in plastic or covered with a damp tea towel while you work.

Take the first piece of dough, and using your hands flatten it out into a disc, then run the disc through the pasta machine on its widest setting.  Fold the dough into thirds, flatten it slightly with your hands, then roll through the machine again.  Repeat a further 5 times.

Now, set the rollers to the next thinnest setting, and repeat the rolling and folding process 6 times.

Set the rollers to the next setting, and this time repeat the rolling and folding just 3 times.

Then roll the dough through progressively thinner settings, without further folding, until you reach the thinnest or second to thinnest setting, depending on your intended use - for this ravioli recipe, roll it to its thinnest setting.

As you roll, dust the pasta lightly with flour from time to time if it seems to be sticking.

If making a filled pasta such as ravioli, tortellini, etc, work with each piece of dough as it is rolled.  If making noodles such as fettucine or spaghetti, roll out all the dough strips, lay them flat, side by side on kitchen towels or a sheet, and allow them to dry for 10-30 minutes before cutting.

If you would like to get to know Yotam Ottolenghi a little better, then do go and visit my friends at I Heart Cooking Clubs and see what they've all cooked up ...

IHCC Ottolenghi Leek Badge resized

... or check out Plenty and Ottolenghi's other great titles available from Amazon USA, Amazon UK or Fishpond NZ.

          Plenty: Vibrant Recipes from London's Ottolenghi

I will also be sharing this post at See Ya In the Gumbo hosted by the lovely Michelle at Ms. enPlace.

See Ya in The Gumbo Badge

Looking for other great Ottolenghi "noodle" dishes, check out this Roasted Aubergine, Mango & Soba Noodle Salad I've shared before - it's a winner.

Roasted Eggplant, Mango & Soba Noodle Salad 1

Monday, May 13, 2013

Butternut Squash & Tahini Spread

Butternut Squash & Tahini Spread 3

This week at I Heart Cooking Clubs, where we continue our journey with the wildly inspirational Yotam Ottolenghi, we're cooking squash.  There were so many recipes that I wanted to try this week - I've been hanging out to make the Turkey & Zucchini Burgers, served up by Michelle at Ms. enPlace;  this Zucchini & Hazelnut Salad made by Deb at Kahakai Kitchen is one that I've had bookmarked for ages;  and this dish of Roasted Butternut Squash with Sweet Spices, Lime & Chilli that Mairi at Toast produced also took my fancy (Mairi and I seem to have pretty much matching tastebuds, so when she tells me "it's another winner from Ottolenghi" I know it's going to be good).  In the end, however, even though I really wanted to do something with the last of the season's zucchini, it was the butternut squash taking up real estate in my vege drawer that won out, and this Butternut Squash & Tahini Spread was one that I'd had bookmarked ever since I purchased my copy of Jerusalem.

Until now, hummus has pretty much always been my go-to recipe when something "spreadable" is called for to go with a platter full of nibbly things, but I can definitely see this spread making an appearance on a regular basis in the future.  The sweetness of the butternut, combined with the warmth of the cinnamon and garlic, the earthiness of the tahini, topped off with the fragrant intensity of the date syrup makes for a pretty exotic taste explosion.  In the introduction to the recipe, Ottolenghi says, "This dip seems to be fantastically popular with anyone who tries it", and I can see why.  By the way, if you can't get hold of the date syrup to drizzle over at the end, don't worry - this is still fantastic without it.

Butternut Squash & Tahini Spread 2

Butternut Squash & Tahini Spread Recipe
Adapted from a recipe by Yotam Ottolenghi & Sami Tamimi
Vegetarian
Click here for a printable copy of this recipe

1 large butternut squash, peeled & cut into chunks
olive oil
1/2 teaspoon ground cinnamon
flaky sea salt
2 tablespoons tahini
1/2 cup Greek-style natural yoghurt
2x cloves garlic, crushed
black sesame seeds
white sesame seeds
date syrup

Preheat the oven to 200 degrees C (390 degrees F).

Spread the butternut out in a single layer in a roasting dish.  Drizzle liberally with olive oil and sprinkle over the cinnamon and a generous pinch of flaky sea salt.   Toss to make sure all the butternut is well coated.

Butternut Squash & Tahini Spread 1

Cover the dish with tin foil and bake in the preheated oven for 70 minutes, turning once or twice during that time.  Remove from the oven, remove the foil and leave to cool.

Put the cooled butternut into a food processor.  Add the tahini, yoghurt and garlic, and blitz until you achieve a coarse paste.  The spread should retain a bit of texture and not be completely smooth.

Put the spread into a serving dish or on a platter.  Sprinkle over the black and white sesame seeds - about 1/2 teaspoon or so of each - and drizzle over the date syrup (this has quite an intense flavour, so don't go nuts with it - about a teaspoon will be plenty).

Serve as an appetiser with some bread.

If you would like to get to know Yotam Ottolenghi a little better, then do go and visit my friends at I Heart Cooking Clubs and see what they've all cooked up ...

IHCC Ottolenghi Leek Badge resized

... or check out Jerusalem and Ottolenghi's other great titles available from Amazon USA, Amazon UK or Fishpond NZ.

          Jerusalem

I will also be sharing this post at See Ya In the Gumbo hosted by the lovely Michelle at Ms. enPlace.

See Ya in The Gumbo Badge


Sunday, May 5, 2013

Plum & Oat Bars

Plum & Oat Bars 5

This week on our journey with Yotam Ottolenghi at I Heart Cooking Clubs, we're Going With The Grain.  I love all kinds of grains, and they form a significant part of my regular diet.  Flicking through my Ottolenghi cookbooks (Ottolenghi: The Cookbook, Plenty and Jerusalem: A Cookbook), all manner of quinoa, rice, farro, barley, freekah and bulgur wheat dishes appealed, but somehow this week I felt I wanted to get a little sweet with Yotam.

His recipe for Raspberry and Oat Bars from Ottolenghi: The Cookbook is one that I've had bookmarked for about three years and, deciding that oats were going to be my grain of choice, this seemed like the perfect opportunity to make it.

In the absence of some raspberry jam, I subbed in some of my homemade plum jam, and I found the tartness of the plum jam to be a good foil to the sweetness of the caramel nut topping.  Oh yes, there is caramel and there are nuts!  Came as something of a surprise to me too.  

Plum & Oat Bars 7

Now I don't know about you, but when I come across something labelled as an "(anything) and Oat Bar", I'm mentally imagining something that has some kind of "oaty" topping, or which is vaguely akin to a muesli (granola) bar.  Even when I read through the recipe, I still didn't quite get what this was going to be like - quite possibly because I am not really a baker.  So when Ottolenghi says in the recipe introduction "Wonderful with a strong after dinner coffee", I was thinking "No way!"  Granola bars with morning coffee (possibly even for breakfast), yes, but with after dinner coffee, definitely not.  Were YO and I about to have our first disagreement - surely not.  Now, don't get me wrong, I was not for one moment doubting that these were going to be great, I just envisaged something that didn't quite fit with my idea of a postprandial sweet treat.

Plum & Oat Bars 1

The end result is a light, shortbready, oaty base, topped with a layer of sweet-but-tart plum jam, and then the whole thing is topped off with a thick layer of nuts and caramel.  Oh, that topping!!  Gooey caramel and a mixture of macadamias, hazelnuts, almonds and cashews.  Seriously, this slice is all about the topping, so don't let that title confuse you - this is no dull little "health" bar - this is definitely a decadent little treat, and definitely lives up to its promise of being a great after-dinner treat.  I thought about changing the title to something which might more fairly represent what these bars really are, but then it occurred to me that, as long as I keep calling them "Plum & Oat Bars", I can convince myself that it's ok to eat them for breakfast!

I don't do a lot of baking, and so I don't have an extensive repertoire in that department.  I'm also a fairly "apprehensive" baker, so when something turns out great it both surprises and delights the heck out of me in equal measure.   Well let me tell you that these bars might just be the best thing I've ever baked, and it's exciting to discover that Ottolenghi can surprise and delight me in the sweet department as well as all the savoury dishes I've come to love.

I made a few small changes to this recipe.  Firstly, as mentioned I used plum jam instead of raspberry.  I adjusted quantities to fit the slice tin that I wanted to use, as opposed to the small square tin used in the original recipe.  And, I used a different combination of nuts:  the original recipe called for flaked almonds, pecans, hazelnuts and Brazil nuts.  Really you could use any combination you like.

Plum & Oat Bars 2

Plum & Oat Bars Recipe
Adapted from a recipe by Yotam Ottolenghi
Click here for a printable copy of this recipe

For the base
170g (6 oz) plain flour
1/2 teaspoon baking powder
140g (5 oz) butter, cut into cubes
80g (3 oz) caster sugar
pinch of salt
110g (4 oz) rolled oats

For the filling
1-1/2 cups plum jam (I used homemade)

For the topping
400g (14 oz) assorted nuts, roughly chopped
(I used a combo of macadamias, almonds, cashews & hazelnuts)
140g (5 oz) butter
100g (3-1/2 oz) caster sugar
60ml (2 fl oz) milk
1 teaspoon vanilla

Preheat the oven to 170 degrees C (340 degrees F).  Lightly grease the base and sides of an 18cm x 32cm (7in x 12in) slice tin, and line it with baking paper.

Begin by making the base.  Sift the flour and baking powder together and put into your food processor.  Add the cubed butter, and blitz together until the mixture resembles breadcrumbs.  (You could rub the butter into the flour by hand, but I'm an inherently lazy cook, so I'm happy for the food processor to do the work).  Remove to a bowl, add the salt, sugar and rolled oats, and mix to combine everything well.

Press this mixture (though not too hard) into the base of your tin, and bake in the preheated oven until lightly golden - about 20 minutes.  Remove from the oven and allow to cool.

Once the base has cooled, spread with the jam.

Now make the topping.  Place the chopped nuts in a bowl and set aside.  Put the butter, sugar, milk and vanilla paste in a small saucepan set over medium heat.  Stir constantly until the butter is melted and the sugar has dissolved.  Remove from heat, pour over the nuts and mix well.

Spread the nut mixture over the jam and return the pan to the oven until the nuts are golden brown - about 30 minutes.

Remove from the oven and leave to cool completely before removing from the tin.

Slice into bars or squares and serve.

If you would like to get to know Yotam Ottolenghi a little better, then do go and visit my friends at I Heart Cooking Clubs and see what they've all cooked up ...

IHCC Ottolenghi Leek Badge resized

... or check out Ottolenghi: The Cookbook and Ottolenghi's other great titles available from Amazon USA, Amazon UK or Fishpond NZ.

          Ottolenghi: The Cookbook

And while we're on the subject of Going With The Grain, check out these other grain-filled recipes from Ottolenghi I've shared before:

Aubergine & Lemon Risotto 3

Fried Zucchini, Pea & Quinoa Salad 2

This will be my submission this month to Sweet New Zealand, inspired by Alessandra Zecchini and hosted this month by Bridget at After Taste - can't wait to see what sweet treats everyone has come up with this month.

Sweet New Zealand Badge A


I will also be sharing this post at Food on Friday hosted by Carole at Carole's Chatter and at See Ya In the Gumbo hosted by the lovely Michelle at Ms. enPlace.

See Ya in The Gumbo Badge