Thursday, November 28, 2013

Roasted Strawberry Custard Tarts

Roasted Strawberry Custard Tarts 1

This week at I Heart Cooking Clubs, we continue cooking with the gorgeous Donna Hay, and our theme for the week is Easy Entertaining ... or, put another way, how to entertain effortlessly without finding yourself crying over spilt custard.

Now let me begin by telling you that I actually love to entertain.  The nurturer in me, the one who loves to feed others, enjoys nothing more more than a group of friends or family around my dinner table, and the opportunity to fill them with as much food as I can manage.  There is no amount of effort that seems like too much trouble to me.

Where it all goes off the rails for me is dessert.  No matter how much I love to cook and entertain, I hate making dessert.  There are people I know who see this part of the meal as the opportunity to really shine, to pull out all the stops and go for something truly spectacular ... I'm not one of them.  Dessert terrifies me.  It definitely has to be something which can be made the day before, so that a fall-back position can be found if it all goes wrong.  So dessert at my house will usually be some homemade ice cream or sorbet (one of the few things I'm actually quite good at, thanks to the trusty ice cream machine), maybe a pavlova (yes, on a good day, I can manage to turn out a passable pav, though I've had my failures there too), or a simple fruit platter.  Anything else really ... forget it.  My hands down favourite dessert is a Citron Tart - never made one, as there is way too much that can go wrong with that.  Second favourite dessert is my Dad's steamed pudding - never made that either, since there is the terrifying possibility that it will be either under cooked or over cooked, and worse still might completely fall apart when turned out of the pudding basin.  And that would just be downright embarrassing, especially when you're going for that "Ta Dah" moment.

So, although there were literally dozens of "Easy Entertaining" meal ideas I could have chosen from any one of my Donna Hay books (in fact nearly everything Donna produces fits that criteria perfectly), I thought that I might challenge myself, and Donna, to see if she could come up with an easy entertaining dessert idea that I could manage to put together without it all going horribly wrong.  It had to be suitable for preparing the day ahead;  it had to be easy enough for even a "dessert-dunce" to create;  and it needed to look spectacular, or impressive, or at the very least pretty.  And, I've got to say, between us we very nearly pulled it off ...

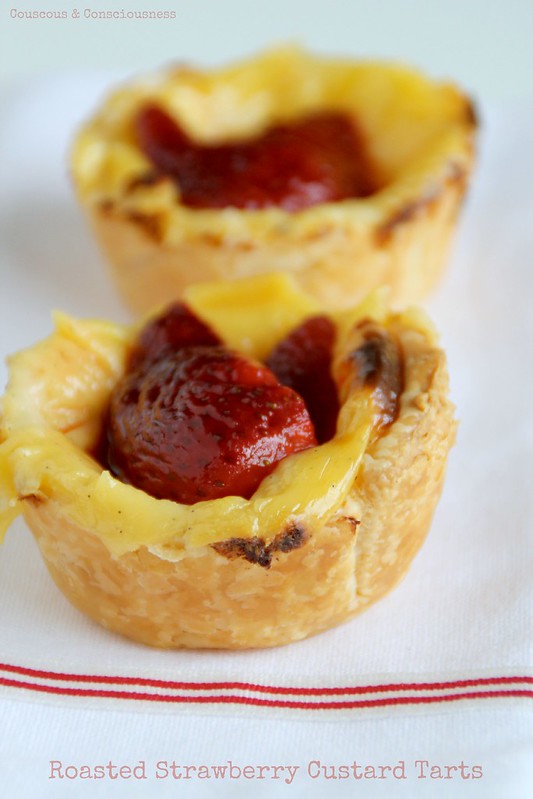
Flicking through my copy of Marie Claire Dining by Donna Hay (now published as Donna Hay Entertaining), I came across her recipe for Portugese Custard Tarts.  The recipe sounded achievable (even for me) ... store-bought flaky pastry, so no making pie crust (always a bonus);  the custard filling seemed simple enough;  and I could see that these could be made the day before - in fact you could even make the tarts the day before you want them, and make the custard the day before that if you wanted.  Recipes which can be broken down into several prepare ahead stages are always winners for me.   They sure looked kind of cute ...

Portugese Custard Tarts

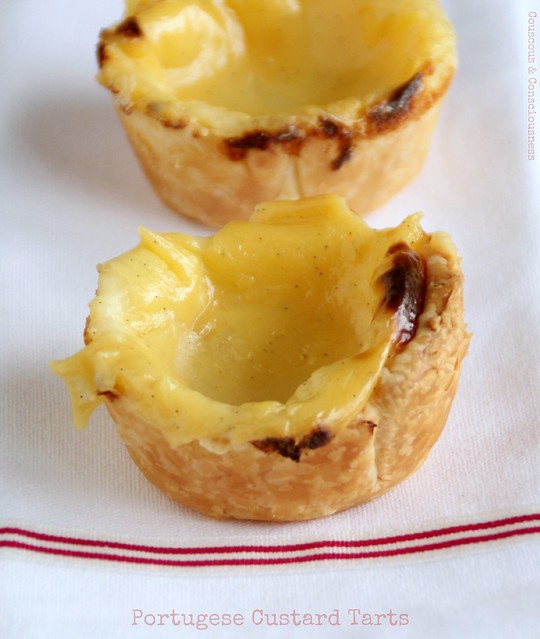
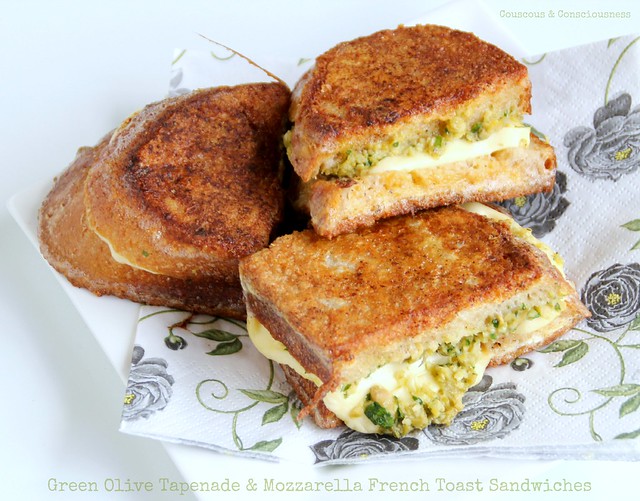
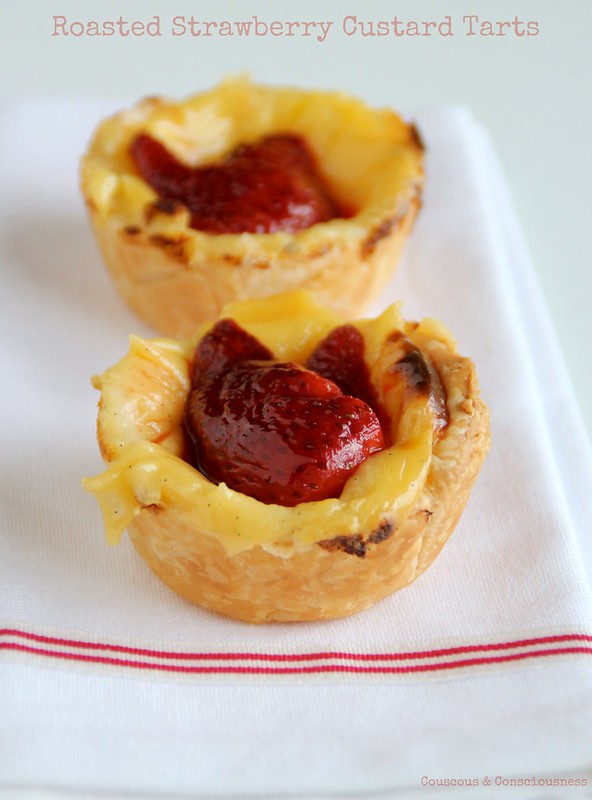
... and, in fact, they also tasted pretty good just like this too, but somehow these just seemed like a little treat to enjoy with a cup of coffee, and not quite dessert.  A little something else was needed.  And then I cast my eye over the punnet of fresh strawberries I'd just brought home from the market, and remembered back to the Honey Roasted Strawberry Compote I made a while back to go over French toast.  I also remembered my lovely friend, Beth, at OMG! Yummy recently making some roasted fruit with pomegranate molasses, and thought that swapping out the balsamic vinegar in my compote for some pomegranate molasses, and adding a shot of orange liqueur, would make a wonderful topping for these little tarts and magically transform afternoon tea into dessert.

Roasted Strawberry Custard Tarts 2

The only thing that prevented this from being completely effortless was having to clean the oven afterwards ...

Custard Tart Cook's Tip

... 'Nough said.  I know you won't make the same mistake.

Roasted Strawberry Custard Tarts 3

Roasted Strawberry Custard Tarts Recipe
Adapted from a recipe by Donna Hay
Makes 8
Click here for a printable copy of this recipe

2x sheets ready rolled puff pastry, thawed

for custard filling
1/3 cup sugar
1/3 cup water
2 cups milk
2 tablespoons cornflour
2 egg yolks
1x vanilla bean

for strawberry topping
1x punnet strawberries
2 tablespoons honey
1 tablespoon pomegranate molasses
1 tablespoon orange liqueur, such as cointreau (I used "44")

To make the custard filling, put sugar and water into a small saucepan, set over low heat, and stir constantly until the sugar has dissolved.  Increase heat until syrup is boiling, reduce heat and simmer for 1 minute.  Remove from heat.

Place cornflour in a medium sized bowl, and add just enough of the milk to mix the cornflour to a smooth paste.  Once completely dissolved, slowly add the remainder of the milk, whisking constantly.  Whisk in the egg yolks.  Slowly pour in the sugar syrup, again making sure that you whisk constantly to avoid curdling the eggs.

Return everything to the saucepan.  Split the vanilla bean lengthwise, scrape out the seeds, and add both seeds and bean to the saucepan.  Set pan over gentle heat, and stir constantly until the mixture thickens.

Remove from heat and pour into a clean bowl.  Allow to cool slightly, then cover the surface of the custard with a piece of plastic wrap - this will avoid a skin forming on the surface of the custard.  Now leave to cool completely, leaving the vanilla bean in the custard to allow maximum flavour to be infused from the bean.  (You could easily do this a day in advance.)

To make the tarts, preheat the oven to 200 degrees C (400 degrees F), and lightly grease a muffin or patty tin.  Cut pastry into 10cm (4 inch) circles, and use to line the muffin or patty tins.  Remove vanilla bean from custard, and spoon custard into the pastry shells, no more than 2/3 full.  Bake in the preheated oven until the custard is golden and firm - about 20 minutes, depending on the depth of your tins and filling.  Remove from the oven and cool slightly before removing tarts from the tin and leaving on a wire rack to cool completely.

Vanilla Pod Cook's Tip

To make the strawberry topping.  Cut strawberries in half (or quarters if they are very large), and place in an ovenproof dish which is only just big enough to fit all the strawberries snugly but in a single layer.  Drizzle over the honey, pomegranate molasses and orange liqueur, and stir gently to combine everything.  Bake in a preheated oven at 180 degrees C (350 degrees F), until the strawberries have softened slightly, but still retaining their shape, and juices have begun to run and become syrupy.  Remove from oven and cool completely.

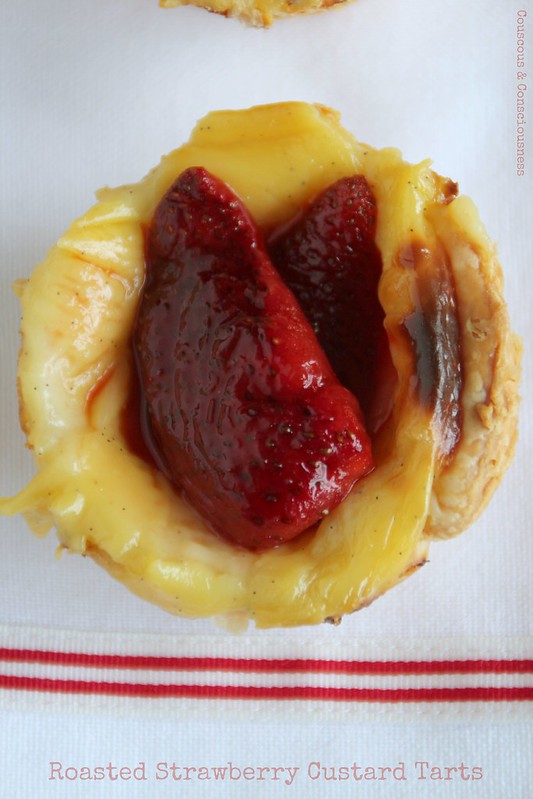
To complete the tarts, arrange two or three pieces of strawberry in the centre of each tart and drizzle over a little of the strawberry syrup.  Serve immediately.

If you would like to get to know Donna Hay a little better, and to see all the fabulously "easy entertaining" dishes my friends have come up with, then do go visit I Heart Cooking Clubs and check out the links.

IHCC Donna Hay Badge resized

I will also be submitting this post to Sweet New Zealand.  Inspired by Alessandra Zecchini, Sweet New Zealand is an event for all Kiwi bloggers (whether living at home or abroad), or all foreign bloggers living in New Zealand, to link up their sweet treats.  This month, Sweet New Zealand is hosted by my very lovely friend Mairi at Toast.

Sweet New Zealand Badge A

I'll also be sharing this post this week at See Ya In the Gumbo hosted by the lovely Michelle at Ms. enPlace, Weekend Cooking hosted by Beth at Beth Fish Reads, and at Foodie Fridays hosted by Designs by Gollam.

See Ya in The Gumbo Badge     Weekend Cooking Badge     Foodie Friday Badge

Friday, November 22, 2013

Pearl Barley Salad with Pistachios, Fava & Pomegranate

Pearl Barley Salad with Pistachios, Favas & Pomegranate 2

This week is Pot Luck week at I Heart Cooking Clubs.  That means we get to choose and post any dish we like from either our current IHCC chef, the lovely Donna Hay, or any one of our previous eight chefs, which includes my personal favourite, the highly inspirational Yotam Ottolenghi.

Donna, meet Yotam ... Yotam, meet Donna.


I was a bit torn between two different recipes.  In her latest issue spring issue of Donna Hay magazine, Donna has a recipe for a Pearl Barley, Asparagus and Egg Salad.  It's so delicious I've made it a couple of times and wanted to share it with you.  With no "wilty stuff", it's the perfect salad for picnics and barbeques that can be made in advance and won't mind sitting around for a while.  With pistachios being our ingredient of the month at Tasting Jerusalem**, I was also quite keen to try Yotam Ottolenghi's recipe for Saffron Rice with Barberries, Pistachio & Mixed Herbs.

In the end, I took inspiration from both recipes, and came up with a dish which is a happy marriage of both.  I ran with the pearl barley used in Donna's recipe as opposed to the basmati rice in Ottolenghi's recipe - I love the nutty, chewy flavour and texture of the barley and found that it stands up well to plenty of bold flavour additions, like the saffron called for in the Ottolenghi recipe.  We don't have barberries here in New Zealand (leastwise not that I've found anywhere), but with the abundance of pomegranates available at the moment I decided they would make a great substitute.  Donna's recipe called for the inclusion of almonds, but the pistachios included in the Ottolenghi recipe seemed like the obvious choice.  I would have loved to use the mixture of fresh herbs, suggested by Ottolenghi, of dill, chervil and tarragon, but as I couldn't find any of those, I ran with flat leaf parsley.  I omitted the asparagus used in Donna's recipe in favour of fava (broad beans) picked fresh from the garden, and inspired by so many Ottolenghi dishes I've enjoyed, I added a generous slosh of pomegranate molasses to the dressing.  In hindsight, I'm thinking that some finely slice preserved lemon would also make a great addition to this salad.

Now, digressing for a moment, can you guess what this is?

Greece 259

I actually ran this photo a bit over three years ago, and there were numerous guesses for olives and grapes.  In actual fact it's pistachios.  I took this photo while I was holidaying on Paros in the Greek islands, and was fascinated to come across a whole field of pistachio trees.

Back to the recipe.  The final addition is a couple of soft boiled eggs.  I know not everyone likes runny eggs, but to be perfectly honest, if you don't like eggs with ooey, gooey, runny yolks, I would forget about adding them to this dish - I think it's the contrasting texture of the soft eggs with the chewy barley and crunchy nuts and pomegranate, as well as the oozing egg yolk combining with the other dressing ingredients that makes this dish.  I don't think a hard boiled egg would really add anything to the mix.

Boiled Eggs Cook's Tip

I hope you give this salad a try.  I found it substantial enough to make a meal of it, but with plenty of robust flavour it would also make a great accompaniment to roasted or barbequed meat dishes.  It also keeps well and leftovers are great for a "take-to-work" lunch the next day.

Pearl Barley Salad with Pistachios, Favas & Pomegranate 1

Pearl Barley Salad with Pistachios,
Favas & Pomegranate Recipe
Inspired by recipes from both
Donna Hay & Yotam Ottolenghi
Makes 2 substantial servings
Click here for a printable copy of this recipe

3/4 cup pearl barley
1-1/2 cups vegetable stock
generous pinch saffron threads
flaky sea salt & freshly ground black pepper
1/2 cup shelled pistachios
large handful pomegranate seeds
1 cup fava (broad) beans, blanched and skins removed
generous handful flat leaf parsley leaves, finely chopped
juice of 1x lemon
1 tablespoon pomegranate molasses
1 tablespoon extra virgin olive oil
2x soft boiled eggs

Put barley, saffron threads, stock, salt and pepper into a small saucepan.  Set pan over high heat and bring to the boil.  Reduce heat to very low, cover with a tight-fitting lid and cook for 40 minutes.  Remove from the heat, without removing the lid, and allow to stand for 10 minutes.  Rinse under cold water and drain thoroughly.

Place favas, parsley, barley, most of the pistachios, and most of the pomegranate seeds in a bowl and gently mix together.  Add lemon juice, pomegranate molasses and olive oil to the bowl and toss gently until everything is well combined.  Taste and adjust any of the flavourings and seasonings to suit your personal taste.

To serve, arrange a few peppery salad greens on a platter, and spoon the barley mixture over the top.  Finish by sprinkling over the remaining pistachios and pomegranate seeds, and the halved eggs.

If you would like to get to know Donna Hay or Yotam Ottolenghi a little better, or one of our other IHCC chefs, and to see all the wonderful pot luck dishes my friends have come up with, then do go visit I Heart Cooking Clubs and check out the links.

IHCC Donna Hay Badge resized

**Tasting Jerusalem is a virtual cooking community exploring the vibrant flavors and cuisine of the Middle East through the lens of Jerusalem: A Cookbook by Ottolenghi and Tamimi published by Ten Speed Press. You can follow along and cook with us by subscribing to omgyummy.com, following the hashtag #TastingJrslm on Twitter and Instagram, liking our Facebook page or joining our Google+ Community and finally checking out all of our groups’ dishes on Pinterest.

I'll also be sharing this post this week at See Ya In the Gumbo hosted by the lovely Michelle at Ms. enPlace, Weekend Cooking hosted by Beth at Beth Fish Reads, Souper (Soup, Salad & Sammie) Sundays hosted by my special friend Deb at Kahakai Kitchen, and at Foodie Fridays hosted by Designs by Gollam.

See Ya in The Gumbo Badge     Weekend Cooking Badge     Souper Sundays Badge     Foodie Friday Badge


Saturday, November 16, 2013

Prawn & Chilli Pot-Sticker Dumplings

Prawn & Chilli Pot Sticker Dumplings 3

I may have mentioned here before that, in my real life … that is the one that pays the bills and keeps a roof over my head, I work in a kitchenware shop.  This can be dangerous territory for the avid cook, surrounded on a daily basis by beautiful crockery, cutlery, glassware, pots and pans, and a gadget for just about any purpose you might care to mention - many of them useful, others … well, maybe not so much.  To be perfectly honest (and in saying this I mean no disrespect to my employer whatsoever), I don't personally see the point of accumulating an egg slicer, a strawberry slicer, a mushroom slicer and a banana slicer, when one good chef's knife will do the job of all four gadgets and a whole lot more besides.  But there are people out there who clearly have bigger drawers and deeper pockets than I do, as these are all popular products, and who am I to knock it?!

You can imagine that, working in this environment, it would be easy to be splashing out on a whole lot of unnecessary gadgets, and who amongst can say (no matter how discerning) that we don't have at least one such item gathering dust in the deepest recess of a kitchen drawer.  So generally my rule of thumb for purchasing a new gadget is that its primary function has to be something that I would use a lot, or that it should be capable of performing a variety of tasks.

One gadget that I've had my eye on, since it came into stock a month or so ago, is this Chef'n Pocket Maker.  This little gadget is used for making little pies, empanadas, gyozas, etc, and the minute I saw this my mind was abuzz with possible fillings and uses.  As luck would have it, I got to trial one yesterday, and I'm so in love with this product I can't wait to get back to work tomorrow to buy one.  Yes, really, and no one has paid me to tell you this!!

Chef'n Pocket Maker
The Chef'n Pocket Maker is available in New Zealand from Stevens Homewares stores nationwide, elsewhere from Amazon.  Want to see it in action?  Check out this video.

Aside from the little pot-sticker dumplings I'm sharing with you today, you could also use this gadget for these Fig & Blue Cheese Wontons, these Spicy Vegetable Samosas, individual versions of this Greek Spinach & Feta Pie or this Broccoli, Leek & Blue Cheese Pie, even a variation on these Lemon & Goat Cheese Ravioli.

As luck would have it our theme this week at I Heart Cooking Clubs is tarts and pies, and I have liberally interpreted this to include anything enclosed in some kind of pastry.  Leafing through my collection of Donna Hay books, there was all manner of delicious tarts and pies to tantalise the tastebuds, but it was the Prawn & Chilli Pot-Sticker Dumplings from marie claire dining (which I believe has now been republished as Donna Hay Entertaining) that really took my fancy, as well as providing the perfect opportunity for test driving this great little "gizmo".

I made only a couple of small changes to the recipe, really just adjusting a few quantities to suit what I had on hand and my tastes, and also leaving out shallots as I didn't feel they were necessary and really there is more than enough flavour comes through from the coriander and chilli jam.  I think the addition of shallot would completely kill the delicate flavour of the prawns.  Speaking of the chilli jam, I used my own homemade chilli jam which you can find here, but I have also used this chilli paste in soy oil before which is readily available in most Asian shops and which I think would work well.


These dumplings were incredibly delicious, and although we ate them as a meal accompanied by an Asian-style slaw, they would also be great to serve as an appetiser or party-pass-around, or even to take for a picnic.  Served with a dish of chilli jam, your favourite Asian-style dipping sauce, or even sweet chilli sauce, these make a truly delightful snack or light meal.

Prawn & Chilli Pot-Sticker Dumplings Recipe
Adapted slightly from recipe by Donna Hay
from marie claire dining

Note:  using the pocket maker this quantity of filling made 30 dumplings, but if you were making them by hand I imagine you would probably get a few less

300g (10-1/2 oz) raw prawn meat
1 tablespoon freshly grated ginger
small bunch coriander, leaves & stems, roughly chopped
1 tablespoon chilli jam
2 tablespoons cooking sake
1 tablespoon soy sauce

30 wonton wrappers
1 tablespoon cornflour *
2 tablespoons water *
* Note:  the cornflour and water are not necessary to seal the dumplings
if you are using the pocket maker

1 tablespoon oil
1 cup vegetable stock

Place prawn meat, ginger, coriander, chilli jam, sake and soy sauce in the bowl of a food processor, and pulse a few times until everything is coarsely chopped.  Take care not to overdo it - you don't want to end up with fish paste - your filling should still have a little bit of texture to it.

If making dumplings by hand, place a small spoonful of filling on each wonton wrapper.  Mix the cornflour and water together to make a paste, and brush paste around the edges of the wrapper.  Fold the wrapper in half, and then pleat the edges into form a fan shape, pinching the edges firmly to seal in the filling.

If using the pocket maker, proceed according to the following illustrations:  Place wonton wrapper on the pocket maker and press down gently in the centre to create the pocket for the filling;  place a scant teaspoon of filling in the cavity, taking care not to overfill;  bring the sides of the pocket maker together to enclose the filling, squeeze firmly, and peel off the excess dough;  open the pocket maker and remove the filled dumpling.

Dumpling making

Set aside until you have filled all the wrappers.  (If desired, you could actually freeze completed dumplings at this stage)

Prawn & Chilli Pot-Sticker Dumplings 1

Set a large frypan over high heat, and add oil to the pan.  Once oil is hot, add the dumplings to the pan, in a single layer, and cook until the bases are golden brown.  Carefully pour the stock into the pan and cover.  Steam the dumplings in the stock until the dough is tender and cooked through - about 5 minutes.  Remove lid from the pan and continue to cook for a couple more moments until all the stock has evaporated.  Remove from the pan and serve immediately.

Prawn & Chilli Pot-Sticker Dumplings 2

If you would like to get to know Donna Hay a little better, and to see all the scrumptious pies and tarts and pies my friends have cooked up, then visit I Heart Cooking Clubs and check out the links.

IHCC Donna Hay Badge resized

I'll also be sharing this post this week at See Ya In the Gumbo hosted by the lovely Michelle at Ms. enPlace, Weekend Cooking hosted by Beth at Beth Fish Reads, at Cook Your Books hosted by the lovely Joyce at Kitchen Flavours, and at Foodie Fridays hosted by Designs by Gollam.

See Ya in The Gumbo Badge     Weekend Cooking Badge     Cook Your Books Badge     Foodie Friday Badge


Friday, November 8, 2013

Green Tea Soba Noodles with Soy-Roasted Salmon and Broad Bean & Radish Salad

Green Tea Soba Noodles with Soy-Roasted Salmon and Broad Bean & Radish Salad 3

"In Season" is our theme this week at I Heart Cooking Clubs, where we continue our journey with Donna Hay, the queen of wonderfully quick and simple, yet sensationally flavoured food.  This is our opportunity to prepare a dish which represents the best of local, seasonal produce, wherever in the world you might live.

I have to confess this leaves me feeling a little smug, because right now in my part of the world it's spring.  Now I know that there is almost no limit to the wonderful and imaginative things that those of you living in the northern hemisphere can do with a pumpkin and pot roast, but really is there anything more exciting than fresh, crisp, green spring produce.  To me the joy of spring food lies not only in all its glory in its own right, but somehow also as the harbinger of what's to come in the summer ahead.  Quintessential spring food in my part of the world includes asparagus, broad beans, radishes, new potatoes, juicy Nelson scallops and West Coast whitebait.  If you were a keen fisherman that might also include salmon, the season beginning in spring and running through to autumn.

After picking up a well-priced side of salmon at the fishmonger's the other day, and some new season broad beans at the market, I knew my dish would have to include these two ingredients.  After searching through my copy of Donna Hay's "Fast, Fresh, Simple", I came across a recipe for Salmon & Soy Bean Noodle Salad with Wasabi Dressing.  In the latest issue of Donna Hay magazine I also came across a recipe for Green Tea Noodle and Smoked Salmon Salad with Pickled Ginger Dressing.  Both looked wonderful, and what I finally decided on was something of a marriage of the two.  In one recipe Donna used raw, sashimi-style salmon, in the other smoked salmon - I went with my own favourite way of preparing salmon, oven-roasted in a soy marinade.  I also mixed together a dressing which included the pickled ginger from one of Donna's recipe and the wasabi from the other.  The final dressing packed a real flavour punch.

This dish was the perfect combination of fresh spring ingredients, put together in a light and healthy way, and best of all ... preparation was quick and simple - whole thing on the table in less than 30 minutes.  I'll definitely be making this again a few times before spring passes into summer.

Green Tea Soba Noodles with Soy-Roasted Salmon and Broad Bean & Radish Salad 2

Soy-Roasted Salmon Recipe
A Couscous & Consciousness original
Serves 2
Click here for a printable copy of this recipe

2x pieces of salmon fillet (skin on, pin bones removed)
1 tablespoon olive oil
1 tablespoon light soy sauce
freshly ground black pepper

Preheat oven to 180 degrees C (350 degrees F).

While oven is heating, mix oil, and soy together in a shallow, ovenproof dish which is big enough to hold both pieces of fish in a single layer.  Add salmon to the dish and turn it over in the oil and soy mixture several times, until it is thoroughly coated on all sides.  Add a liberal grinding of black pepper over the top, and set aside to "marinate" until the oven is hot.

Once oven is ready, put the dish of salmon into the oven, reduce heat to 160 degrees C (320 degrees F), and cook for around 8 minutes or until done to your liking.

Green Tea Soba Noodles and
Broad Bean & Radish Salad with
Wasabi Ginger Dressing Recipe
Adapted from recipe by Donna Hay
Serves 2
Click here for a printable copy of this recipe

100g (3-1/2 oz) green tea soba noodles
1x cup broad beans, blanched, refreshed & skins removed
2x medium-sized radishes, very thinly sliced
generous handful of peppery salad greens & edible flowers
black sesame seeds (optional)

Dressing:
2 tablespoons sunflower oil
1 teaspoon sesame oil
2 tablespoons rice wine vinegar
1 teaspoon honey
1 teaspoon light soy sauce
1/2 teaspoon wasabi paste
1 tablespoon finely chopped pickled ginger

Set a medium sized pan of water over high heat and bring to the boil.  Once boiling add the soba noodles to the water, and cook according to packet directions (usually around 5 minutes).

Note:  This would also be the ideal time to put the salmon in the oven.

While noodles and salmon are cooking, prepare dressing by simply whisking all ingredients together in a small jug.

Once noodles are cooked (like pasta, they should be al dente), remove from the heat, drain and refresh under cold running water.  Drain well and toss noodles with half of the dressing.

To serve arrange noodles in a serving bowl or platter, and strew liberally with broad beans, radishes and salad greens.  Add salmon, pour over the remaining dressing, and finish with a sprinkle of black sesame seeds (if using).

Green Tea Soba Noodles with Soy-Roasted Salmon and Broad Bean & Radish Salad 1

If you would like to get to know Donna Hay a little better, and to see all the wonderful seasonally inspired dishes my friends have come up with, then do go visit I Heart Cooking Clubs and check out the links.

IHCC Donna Hay Badge resized

I'll also be sharing this post this week at See Ya In the Gumbo hosted by the lovely Michelle at Ms. enPlace, Weekend Cooking hosted by Beth at Beth Fish Reads, Souper (Soup, Salad & Sammie) Sundays hosted by my special friend Deb at Kahakai Kitchen, at Cook Your Books hosted by the lovely Joyce at Kitchen Flavours, and at Foodie Fridays hosted by Designs by Gollam.

See Ya in The Gumbo Badge     Weekend Cooking Badge     Souper Sundays Badge     Cook Your Books Badge     Foodie Friday Badge


Saturday, November 2, 2013

Green Olive Tapenade & Mozzarella French Toast Sandwiches

Green Olive Tapenade & Mozzarella French Toast Sandwiches 1

I know there are people out there who love a good sandwich, and whose imagination knows no bounds when it comes to dreaming up creative things to put into said sandwich.  I'm not one of them.  It might be a throw-back to all those school lunches I hated, but I confess to a certain amount of ambivalence towards sandwiches.

Should I happen to go into a cafe for lunch, the rest of what they have on offer would have to totally suck before I would choose a sandwich, and chances are, if the sandwich is the only appealing thing they have on offer, I would get up and leave.  My one exception to dining out on a sandwich is the classic BLT - who doesn't love that? - however, my rule for that is it's room service food called for in the middle of the night, and must be accompanied by a big bowl of french fries.

Likewise, it would be a rare thing for me to make a sandwich at home.  A slice of fresh bread or toast, with something delicious atop ... sure, but a sandwich ... no.

And there's an art to composing a sandwich, don't you think?  Someone round here loves a sandwich, which should contain ham, mustard, beetroot, cheese, tomato, lettuce, boiled egg, and mayonnaise.  Being asked to make said sandwich fills me with anxiety.  For a start, should the ham be at the bottom or the top?  In what order should the remaining ingredients be added?  Then, how on earth do you get all that to stay together, without everything collapsing out the sides as soon as you put the top layer of bread on?  It's all just fraught with difficulty.

I can, however, manage to pull off a "chip buttie", the obligatory accompaniment to fish and chips - take two slices of soft white bread, slather generously with butter, select half a dozen or so of the best, fattest chips, and envelop them between the two slices of bread.  Ditto the "bacon sarnie" - as above, but replace the chips with two or three rashers of bacon straight from the pan.

I do have a couple of other sandwiches in my repertoire ... these gorgeous little hearts of lemon, cream cheese and basil (the perfect pass around with a glass of bubbles), and these Chocolate Panettone French Toast Sandwiches (just the thing for a decadent Sunday brunch) ...

Sandwich Collage

... or these Orange Mango French Toast Sandwiches served with a Honey Roasted Strawberry Compote.  Now, that's my kind of sandwich!

Orange Mango French Toast with Honey Roasted Strawberry Compote 3

Which, at last, brings me to my point - if you want to get me to eat a sandwich, try soaking it in egg, frying it in butter, and calling it french toast.  You can guarantee I won't be turning my nose up at that.

So, with out theme this week at I Heart Cooking Clubs of Sandwich Sensations, the hunt was on through my Donna Hay books to come up with a sandwich that was going to excite me.  I did give more than passing thought to the idea of ice cream sandwiches, but in a time deprived week baking cookies and making ice cream was just not going to happen.  Of course, I know that Donna wouldn't blink twice at the idea of using store-bought cookies and ice cream, but somehow that just didn't exactly seem blogworthy.  Flicking through my books, I found all manner of steak sandwiches, burgers, baguettes filled with chicken or prosciutto, but that just wasn't what I was looking for.  I was after french toast, but I felt more inclined towards something savoury, than the sweet direction my french toast usually takes.  And then I found it ... on the Donna Hay website, this recipe for Fried Mozzarella & Olive Finger Sandwiches.

I began by making my own tapenade, using green olives and capers, rather than the store-bought black olive tapenade in the original recipe, and my tapenade recipe follows.  Realistically, if you can't be bothered, a store-bought tapenade is fine, but in defence of making your own - this will make more than you need for a sandwich, the leftover will keep for ages and makes a great addition to an antipasto platter, and homemade works out at a fraction of the price of store-bought.  Oh, and did I mention it really only takes about five minutes to make, using ingredients you probably already have on hand - you couldn't run out to the store and buy some in that time.

I hope you'll give this sandwich a try.  The tart, briny, lemony, herbaceous flavours of the tapenade are a great foil to the creamy mozzarella, and there is no better way I know to encase such a filling than with soft-on-the-inside-crunchy-on-the-outside french toast with a parmesan crust.  Yes, that's right ... parmesan crust ... didn't see that coming, did you?!

Green Olive Tapenade 1

Green Olive Tapenade Recipe
A Couscous & Consciousness original
Makes about 1-1/2 cups
Click here for a printable copy of this recipe

1 cup green olives
(do yourself a favour and buy stone-in olives - pitting them is not difficult and the flavour is superior)
1-1/2 tablespoon capers
1/4 of a preserved lemon (skin and flesh)
(or substitute grated zest of a lemon and lemon juice to taste)
1x clove garlic
handful flat leaf parsley
freshly ground black pepper
extra virgin olive oil

Remove pits from olives and put them into your food processor - if your processor has a small bowl attachment that will be ideal.

Add capers, preserved lemon, garlic, parsley and pepper to the food processor.  Pulse a few times until everything is roughly chopped.  Now, with the motor running, add olive oil in a thin stream until you achieve a coarse paste.

Taste.  With the brininess of the olives and capers, as well as the salty preserved lemon, it is unlikely you will want to add any salt.  However, if you've used fresh lemon instead, you may feel the need to add a tiny bit of salt.

Store in the refrigerator.  Will keep at least a couple of weeks.

Green Olive Tapenade & Mozzarella French Toast Sandwiches 3

Green Olive Tapenade &
Mozzarella French Toast Sandwiches Recipe
Adapted from a recipe by Donna Hay
For one sandwich
Click here for a printable copy of this recipe

2x slices wholemeal sourdough bread
1 tablespoon green olive tapenade (see recipe above, or store-bought)
3x slices of mozzarella
1x egg
2 tablespoons milk
flaky sea salt & freshly ground black pepper
1 cup Parmesan cheese, freshly grated
1 tablespoon butter

Spread one slice of bread with the tapenade, top with the mozzarella, and then the remaining slice of bread.  Cut sandwich into three even-sized pieces.

In a shallow dish, whisk together the egg, milk, salt and pepper.  Spread the Parmesan out on a plate.

Melt the butter in a non-stick frying pan set over medium heat.

Meanwhile, dip the sandwiches in the egg mixture, leaving them a good minute on each side to soak up all the egg mixture.

Remove sandwiches from the egg mixture and press them into the Parmesan, coating both sides.

Transfer sandwiches to the hot frying pan, and cook until golden brown on both sides and the mozzarella is melting and gooey.

Serve immediately.

Green Olive Tapenade & Mozzarella French Toast Sandwiches 2

If you would like to get to know Donna Hay a little better, and to see all the Sandwich Sensations my friends have come up with, then visit I Heart Cooking Clubs and check out the links.

IHCC Donna Hay Badge resized

I'll also be sharing this post this week at See Ya In the Gumbo hosted by the lovely Michelle at Ms. enPlace, Weekend Cooking hosted by Beth at Beth Fish Reads, Souper (Soup, Salad & Sammie) Sundays hosted by my special friend Deb at Kahakai Kitchen, and at Foodie Fridays hosted by Designs by Gollam.

See Ya in The Gumbo Badge        Weekend Cooking Badge         Souper Sundays Badge         Foodie Friday Badge