Sunday, September 1, 2013

How to Make Labneh

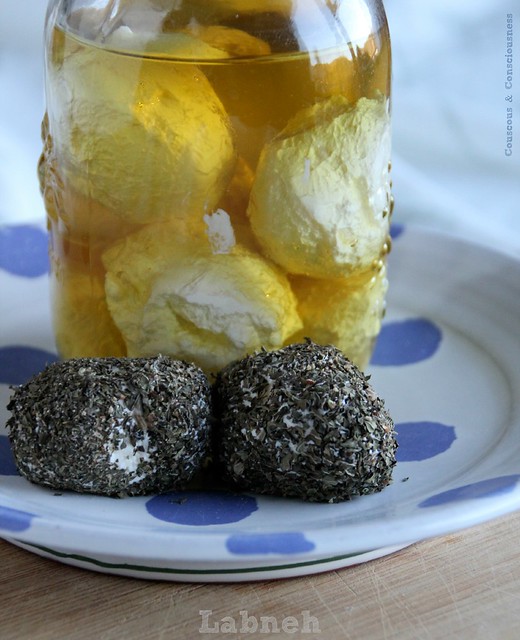
Labneh

Our Optional Monthly Community Challenge at I Heart Cooking Clubs this month is the making and using of labneh (a strained yoghurt cheese, popular in the Middle East), a la Ottolenghi.

Well, because I procrastinate so much, I've managed by the skin of my teeth to get the making of labneh nailed by the end of the month ... using it, other than just smearing it on a cracker (which should not, I might add, be underrated), not so much.

I had all good intentions for using my labneh in the same way that Zosia from Are You Cooking? did in this Couscous & Mograbieh Salad with Oven Dried Tomatoes and Labneh, from Ottolenghi: The Cookbook.  This would have been the perfect use for some of the slow roasted tomatoes I have stashed in the freezer.  However, I left making my labneh a bit later than intended, and then it took longer to strain than I anticipated (when the recipe says it takes 24-36 hours, I always think mine will be the 24 hour one - in actual fact mine took a full 48 hours to reach the desired consistency).  So that  isn't going to happen ... or not this week, anyway.

I could have gone the awesomely delicous-looking route my lovely IHCC co-host, Deb from Kahakai Kitchen, took and smothered my labneh in a topping of kalamata olives and pistachio nuts, and indeed that may well be the way in which much of my labneh meets its final fate.  But tonight I had a big dinner planned, and I rather feared that I could easily end up making a meal of a pre-dinner snack such as this, and then what to do with that big dinner?!

Some of my labneh will almost certainly go into a salad for my lunch tomorrow - I'm thinking of a take on this Grilled Pineapple and Gorgonzola Salad that my friend, Mairi from Toast, made a while back, using some rocket and walnuts and swapping the gorgonzola out for the labneh.  However, as I'm likely to be throwing that together first thing in the morning before I rush out the door, a pretty photo seems unlikely.

So tonight I'm going to leave you with just the labneh, and hope that you find one of those suggestions inspiring.  There are also plenty of other recipes in all of Ottolenghi's books using this wonderful ingredient, so I hope you'll give this a try.  It could not possibly be simpler to make and, if like me, you're not ready to use it straight away, simply roll into balls and pop into a jar full of olive oil - it will keep for weeks.

Labneh Recipe
Adapted from a recipe by Yotam Ottolenghi

2 cups unsweetened Greek yoghurt
1/2 teaspoon salt

Optional:
olive oil
dried mint
freshly ground black pepper

In a small bowl mix the yoghurt and salt together until the salt is thoroughly combined.

Line a sieve with a piece of muslin or cheesecloth (or even a paper towel will do), set the sieve over a bowl, and pour the yoghurt into the cloth.  Bring up the edges of the cloth and tie into a bundle around the yoghurt with a piece of string.

Place in the fridge and leave to strain for 24 to 48 hours.  By this stage, almost all the liquid will have drained away, and the yoghurt will be the consistency of thick cream cheese.

The labneh can be used straight away as a spread, or stored in olive oil for later use.  Roll the labneh into small balls.  Pour some olive oil into a sterilised jar, then carefully lower in a few of the labneh balls, add some more olive oil, then more labneh balls.  Continue layering in this way until all the labneh balls are fully immersed in oil.  Store at room temperature in a cool dark place - will keep for several weeks.

When you're ready to use the labneh, remove the balls from the oil, roll in a mixture of dried mint and freshly ground black pepper, and serve in salads, or as part of a mezze platter, or just with a couple of crackers.

The resulting cheese has a delicious, delicate, citrusy/yoghurty tang, and the dried mint is the perfect complement to it.  Although there are a couple of days involved in making this, most of that time it's just taking care of itself in the fridge.  The actual effort you have to put in is about 5 to 10 minutes max, and results in a great store cupboard ingredient to have on hand.  Definitely making this again.

If you would like to get to know Yotam Ottolenghi a little better, then do go and visit my friends at I Heart Cooking Clubs and see what they've all cooked up ...
IHCC Ottolenghi Leek Badge resized

... or check out Ottolenghi: The Cookbook and Ottolenghi's other great titles available from Amazon USA, Amazon UK or Fishpond NZ.

          Ottolenghi: The Cookbook

I'll also be sharing this post at See Ya In the Gumbo hosted by the lovely, and very amusing, Michelle at Ms. enPlace, at Weekend Cooking hosted by Beth Fish Reads, at Foodie Friday hosted by Designs by Gollam, and at My Meatless Mondays hosted by Chaya at My Sweet and Savory.

See Ya in The Gumbo Badge      Weekend Cooking Badge          MyMeatlessMondays

Friday, August 30, 2013

Roasted Pepper & Baked Egg Galette aka Simply Sensational Lunch for One

Roasted Pepper & Baked Egg Galette 2

The beginning of September is just days away now, and in my part of the world that means the start of spring (yay! happy dance).  I always feel so much better about life in general once we cross that threshold from winter into spring ... days get longer and warmer, and all my favourite leafy greens and vegetables (asparagus and broad beans) are on the horizon.

It's a great time of year to recharge one's batteries.  It's a time when I find some renewed vigor for my yoga practice, and don't mind dragging myself out of bed at 5.30am to do a practice before heading off to work.  It's also a great time for a bit of an internal spring clean too - reboot the digestive system, liver function, etc, which can all get a bit sluggish after all the comfort eating of winter.

So, starting next week, I'm going to do a bit of a cleanse/detox for the next month.  For the first week, at least, that's going to mean no coffee, no alchohol, no meat, no shellfish, no wheat, no dairy (with the exception of natural yoghurt), no sugar, no salt, no soy (except for miso).  On the plus side, it's also going to mean loads of fresh fruit and vegetables, legumes, nuts, oily fish, juices and salads.  After the first week, I'll be slowly reintroducing small quantities of unrefined sweeteners (such as honey), seasonings and soy products, shellfish and eggs, but I'm planning to stay completely caffeine, alchohol, meat, wheat and dairy free for the whole month - you have no idea what a challenge that is going to be for me!!

Until then, I'm spending the next few days making the most of what will shortly become forbidden foods, and using up a few ingredients that might be too tempting to have hanging around.  Pies and Tarts (our theme this week at I Heart Cooking Clubs) will definitely be on the forbidden list, but until then this Roasted Pepper and Baked Egg Galette seemed like a good way to use up the last sheet of ready-rolled puff pastry kicking about in the freezer, along with some sour cream which might prove to be too much of a temptation for me next week.

I adapted this recipe from one by Yotam Ottolenghi from his stunning book "Jerusalem: A Cookbook", adjusting quantities to make a stunning (but incredibly simple) lunch for one, and to suit ingredients I had on hand.

The original recipe called for roasting fresh red peppers, together with onions and herbs, for the topping for the tarts.  This of course adds considerable time and effort to the final dish (not ideal for a quick lunchtime fix).  Couple this with the fact that fresh peppers are out of season and astronomically expensive in the southern hemisphere right now, and the whole freshly roasted pepper thing was just not going to fly.  As luck would have it though, back when they were in season, I had roasted several batches of red peppers and preserved them in olive oil with garlic and bay leaves.  These then made the perfect, fuss-free topping for my galette.

I don't know about you, but lunch is frequently a meal that I consume on my own, and I sometimes feel a bit stuck for interesting lunch ideas.  Sure, soup or cheese on toast, or even a simple salad are great fall-backs, but sometimes I want something a little more interesting.  This galette was the perfect answer, and very simple to make.  It was utterly delicious, and the combination of flaky pastry, sour cream, garlic infused peppers and creamy egg actually tasted and felt quite decadent.  It definitely tasted like something that had required a whole heap of effort, not just the five minutes it took to put together.  It was wonderful on its own, but you could certainly make a more substantial meal out of this by adding a salad on the side.  This would be great for a picnic too if you feel moved to take lunch outdoors, and of course you could easily make this for a crowd just by multiplying the ingredients to suit.  I'm certainly making this again - I hope you'll give it a try too.

I've kept things pretty loose in this recipe - use your discretion.  For example, how many roasted peppers you use will depend, firstly on their size to begin with, and also whether you are roasting them fresh or using bottled ones.  You could also swap out the dried oregano for some other herb that takes your fancy - maybe some fresh thyme or flat-leaf parsley.  You could use creme fraiche or even ricotta instead of the sour cream or mascarpone.  You could add some toasted nuts for a little extra texture if you felt like it.  Really this recipe is just a suggestion - interpret it anyway you like.

Roasted Pepper & Baked Egg Galette 1

Roasted Pepper & Baked Egg Galette
Adapted from a recipe by Yotam Ottolenghi & Sami Tamimi
Makes one sensational serving
Click here for a printable copy of this recipe

1x sheet of ready-rolled puff pastry
1x free-range egg, lightly beaten
sour cream or mascarpone
roasted red peppers
1x free-range egg, whole
flaky sea salt & freshly ground black pepper
dried oregano

Preheat oven to 220 degrees C (425 degrees F).

Trim pastry to a 15cm x 15cm (6" x 6") square.

Set pastry square on a parchment lined baking sheet, and prick all over with a fork.  Brush pastry square all over with the lightly beaten egg.

Spread sour cream or mascarpone over the pastry, leaving a 1cm (1/2") border free around the edges.  Arrange roasted peppers over the sour cream (pile on as many as you like), leaving a shallow well in the centre for the egg to be added later.

Put pastry into the preheated oven for 12-15 minutes, until the pastry is puffed and golden.  Remove from oven, and break the whole egg into the well in the middle of the peppers.  Sprinkle over sea salt and freshly ground black pepper, and a sprinkling of oregano.

Return to the oven for approximately 5 to 8 minutes, until the egg is set to your liking - set white with runny yolk is ideal.

Remove from the oven and devour immediately, relishing every solitary moment - do not share!!

If you would like to get to know Yotam Ottolenghi a little better, then do go and visit my friends at I Heart Cooking Clubs and see what they've all cooked up ...

IHCC Ottolenghi Leek Badge resized

... or check out Jerusalem and Ottolenghi's other great titles available from Amazon USA, Amazon UK or Fishpond NZ.

          Jerusalem 

I'll also be sharing this post at See Ya In the Gumbo hosted by the lovely, and very amusing, Michelle at Ms. enPlace, at Weekend Cooking hosted by Beth Fish Reads, at Foodie Friday hosted by Designs by Gollam, and at My Meatless Mondays hosted by Chaya at My Sweet and Savory.


See Ya in The Gumbo Badge      Weekend Cooking Badge          MyMeatlessMondays


Saturday, August 24, 2013

Tahini Soup

Tahini Soup 1

This week is Pot Luck week at I Heart Cooking Clubs, and just as I was sitting at the table this morning pondering which one of our wonderful chefs I would choose to cook with, my copy of Food From Many Greek Kitchens by Tessa Kiros leapt out at me from the bookshelf - figuratively, you understand ... thus far, my cookbooks have not taken to actually jumping around the kitchen, which, although potentially interesting, is probably a good thing.

Anyhow, this is a book which I acquired towards the end of our time spent cooking with Tessa, and given how much I like this book I'm a little surprised that I haven't dipped into it more often.  Maybe it's because I always think of Greek food as being quintessentially summer food.  Still, with summer now just around the corner, there's a good chance this book will spend a little less time on the bookshelf and a bit more time out on the kitchen bench over the next few months.

Thumbing through the book, I came across this recipe for Tahini Soup.  I almost passed it by.  It seemed too simple, too unimpressive, and I wasn't even sure that I would like it.  Don't get me wrong, I love tahini, but I do find that in large doses it can be a little overwhelming.  I was certainly prepared not to be wowed by this dish, but it seemed quick and easy and just what I needed for a quick, late-lunch fix today.

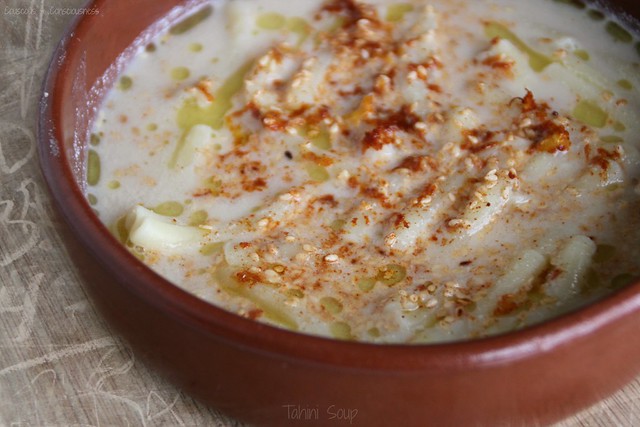
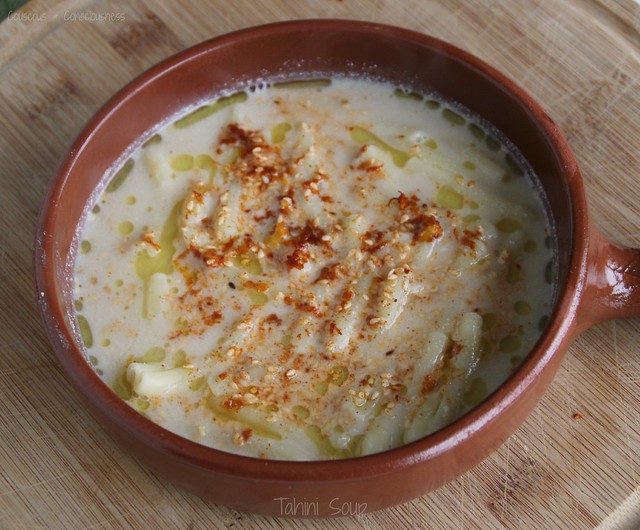
This soup truly is the work of moments - in the time it takes to boil pasta it's done - seriously.  Despite the pasta, it is not a heavy or stodgy soup - instead it has lightness, and warmth, and is deliciously comforting.  My first impression when I tasted for seasoning before serving it was "pleasant enough, nice nutty flavour, but somewhat ordinary".  But, don't be fooled ... add the topping of toasted sesame seeds, smoky paprika, warming cayenne, and zesty lemon, along with a drizzle of the best quality extra virgin olive oil you can lay your hands on, and all of a sudden you have wow factor in spades.

In her introduction to the recipe, Tessa says, "This is a very simple soup that can be made in minutes.  Traditionally it's from the Cycladic Islands and is eaten in the week leading up to Easter, or on Good Friday when simple meat-free foods are eaten."  I say, eat this delicious soup any time you want maximum flavour for minimum effort.  I will definitely be making this again, in fact I think this just became my "go-to" soup.

Tahini Soup 2

Tahini Soup
Adapted from recipe by Tessa Kiros from
Makes 2 generous servings
Click here for a printable copy of this recipe

4 cups boiling water
1 cup pasta shapes (I used casareccia)
salt
juice of 1-1/2 lemons
1/2 cup tahini

2 teaspoons sesame seeds
1/2 teaspoon smoky paprika
pinch cayenne pepper
grated zest of 1 lemon

extra virgin olive oil
freshly ground black pepper

Bring water to the boil in a medium sized saucepan.  Salt the water, but not quite as generously as you normally might for boiling pasta, as this water will form the basis of your soup - about 1 heaped teaspoon should do it. Add pasta to the boiling salted water  Cook according to packet instructions until al dente.

Meanwhile, heat a small frying pan over moderate heat, and toast the sesame seeds in the dry pan until golden.  Add the paprika, cayenne pepper, and lemon zest.  Stir until everything is combined, and remove immediately from the heat.  Remove to a small bowl so that the seeds don't continue cooking.

In another small bowl combine the lemon juice and tahini, add a ladleful of the boiling pasta water, and whisk until the mixture is smooth.

As soon as the pasta is cooked, add the lemon-tahini mixture to the pan and continue to stir over heat for a couple of minutes, until the tahini mixture has been fully combined.  Taste and add a little more salt if necessary.

Ladle into serving bowls, sprinkle over some of the sesame and paprika mixture, add a little freshly ground black pepper, and finish with a drizzle of extra virgin olive oil.

If you would like to get to know Tessa a little better, check out Food From Many Greek Kitchens and many of Tessa's other great titles available from Amazon or Fishpond NZ.


Do go and see what else my friends at I Heart Cooking Clubs have cooked up for this week's Pot Luck ...

IHCC Ottolenghi Leek Badge resized

I'm also sharing this post this week at See Ya In the Gumbo hosted by the lovely Michelle at Ms. enPlace, at Souper (Soup, Salad & Sammies) Sundays hosted by my good friend Deb at Kahakai Kitchen, at Cook Your Books, hosted by the lovely Joyce at Kitchen Flavours, and at Weekend Cooking, hosted by Beth Fish Reads.


See Ya in The Gumbo Badge          Souper Sundays Badge          Cook Your Books Badge          Weekend Cooking Badge


Sunday, August 11, 2013

The Best & Worst of the Internet and Gorgeously Green with Ottolenghi

Me & Beth Collage

As the title of this post suggests, this week I've experienced the very best and worst of what the internet has to offer.  I've been the victim of some unwanted and rather "creepy" attention - a sad reminder that not everyone out there uses the internet with the same decency and respect that you or I might.  However, I'm not going to dwell on that.  At the same time, I've been reminded just how much the internet in general, and the food blogging community in particular, can enrich our lives.

When I first started my blog, a little over four years ago, it was really to find an outlet for expressing my food and travel experiences, and a place to record the food that I love to share with family and friends, so that others may be able to share it too.  It never for one moment occurred to me that this would become an avenue for meeting some truly wonderful people and developing great friendships.

The very first time I arranged a meeting with a fellow blogger, it seemed a little strange.  The lovely Sasa and I had been visiting each other's blogs for a little while, and exchanged a few tweets.  When we both happened to be visiting family in Auckland at the same time we decided to meet for a coffee.  I have to say, I hadn't gone out to meet a complete stranger since the last time I'd gone on a blind date (most unsuccessfully I might add), almost 30 years earlier.  So I was nervous.  What would she be like?  Would we find plenty to talk about?  You know ... the usual stuff.  I needn't have worried.  From the instant we met there was never an awkward moment.  And what do two food bloggers meeting for the first time talk about?  Well, you might reasonably expect that it would be about food, right?  But no.  We talked about relationships, both past and present;  our families, and our relationships with them;  travel;  yoga;  studying and making a new start;  old jobs and old habits;  hopes for the future;  and so on.  In short, all the things that a couple of friends who'd known each other for years might talk about.

And so it has been with every food blogger that I have gone on to meet since.  I know now, without a shadow of a doubt, that a passion for food and generosity of spirit go hand in hand.  I know now that the common denominator in this food blogging community is not just the obvious love of good food - it's warmth, passion, kindness, compassion, generosity, a zest for life, humour, creativity, and so much more.

Through my love of all things Ottolenghi, which you're all by now very well aware of, I came across Beth Corman Lee's blog OMG! Yummy and, through her blog, discovered the wonderful Tasting Jerusalem community, hosted by Beth and her long-time friend Sarene Wallace.  From the outset, I was impressed not just with Beth's lovely food, but also her warmth and enthusiasm, her genuine excitement at discovering and experimenting with new ingredients as we cook together, and her very obvious hunger (pardon the tragic food pun) to learn more.

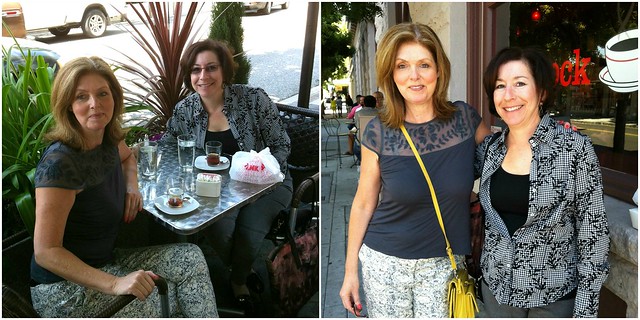
So, once I planned this trip to the Bay Area of San Francisco, and discovered that Beth lived nearby, I knew that I wanted to meet her.  And, despite her busy family life, and my fairly busy holiday schedule, we managed to connect this week and arrange to meet for lunch in Mountain View (the small city in Silicone Valley where I am staying).

Castro Street Mountain View

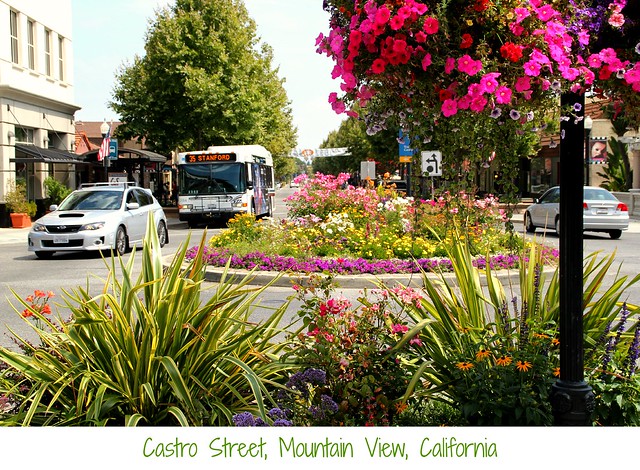
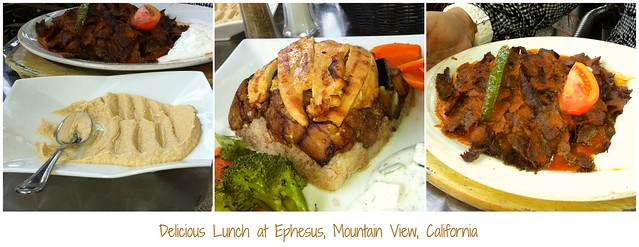
The main street of Mountain View is a lovely tree-lined boulevard, with probably half a mile of side by side cafes (both sides of the street), covering just about every type of cuisine you can imagine.  I can tell you that the smells wafting up the street, come midday, are absolutely amazing.  So as you might expect, we agreed to meet outside a cafe, and then we strolled, eyeing up the many choices on offer.  It didn't take us long to discover a Mediterranean cafe called Ephesus, with predominantly Greek and Turkish influences, that looked promising.  When the menu revealed to us a number of dishes that, through our shared love of Ottolenghi's food, we had either tried or have on the "must try" list, we knew this was the place for us.

Ephesus Lunch Collage

Of course, starting our meal with the hummus was a no-brainer, and discussion of its merits by comparison to those of Ottolenghi's naturally ensued.  On the recommendation of our waiter, Beth opted for The Alexander - a veritable mountain of shaved lamb and beef in a rich tomato sauce, served over chunks of bread, with a cooling pool of yoghurt on the side.  As soon as I noticed Maqluba on the menu, I couldn't not have it.  Maqluba is a layered savoury "cake" of tomatoes, aubergine, chicken, cauliflower, rice and spices, and I've had this one marked to try in my Jerusalem book since the day I bought it.  I loved the way at Ephesus they had made the dish in individual moulds, and now I can't wait to get home and try making this dish.

So, food aside, just as in the case of every other food blogger I've ever met, my conversation with Beth revolved around family, children, growing up, our travels - places we've been and places we hope to go, work history, our hopes for the future, and our time together ran out long before we ran out of things to talk about.  It was such a joy to meet Beth and lovely to make a new friend.

Speaking of Ottolenghi, at I Heart Cooking Clubs this week our theme is Gorgeously Green.  Now I've been cooking like a mad thing this week - lasagne, shepherds pie, fish and caper kebabs, Jamie Oliver's fantastic fish pie, a batch of Nigella's flourless chocolate brownies, a batch of chocolate caramel crispy cakes, a batch of these divine raw lemon & coconut truffles, and numerous big batches of roasted tomato pasta sauce - all to stock up the freezer for my daughter before I head back home to New Zealand.  But in terms of coming up with something gorgeously green to share with you this week, well I'm afraid I just dropped the ball and somehow it didn't happen.  To compensate, however, I thought I'd give you a little bit of a round-up of a few gorgeously green Ottolenghi dishes I've made and shared in the past.  Hope you find something you enjoy.

Baked Artichokes with Broad Beans 1, cropped

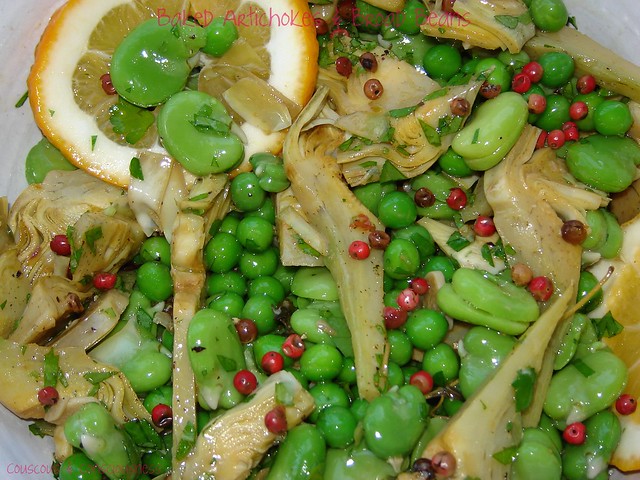
Baked Artichokes & Broad Beans:  This was one of the first Ottolenghi dishes I ever made, and still one of my favourites.  The use of artichokes and broad beans makes this a quintessentially spring dish, but with both vegetables being readily available jarred and frozen this is a great dish to bring a little bit of the lightness of spring to the table any time of the year.  Leftovers I found kept well for a couple of days.

Broccoli, Leek & Blue Cheese Pie 1

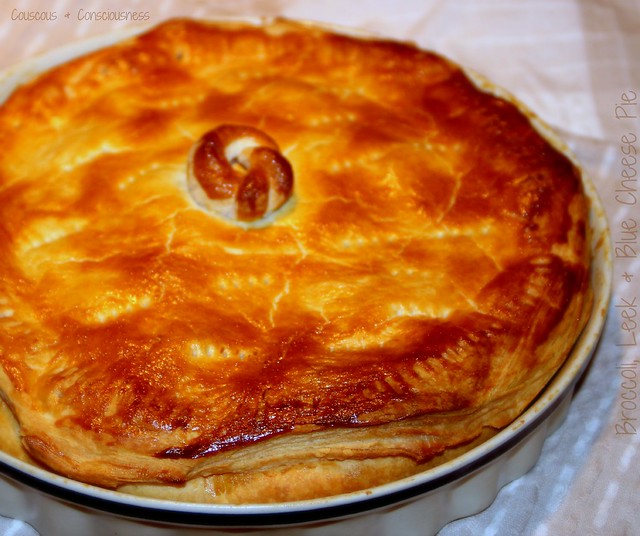
Broccoli, Leek & Blue Cheese Pie:  This pie got rave revues in my house when I first made it - so much so that I was called upon to make it twice in one week.  It is both easy and economical to make, tastes great both hot and cold, and reheats well should you be lucky enough to have leftovers.  In actual fact the leek filling tastes so good that half of it usually doesn't even make it into the pie, and I imagine it could be used as a great accompaniment to some grilled or roasted chicken.

Fried Zucchini, Pea & Quinoa Salad 2

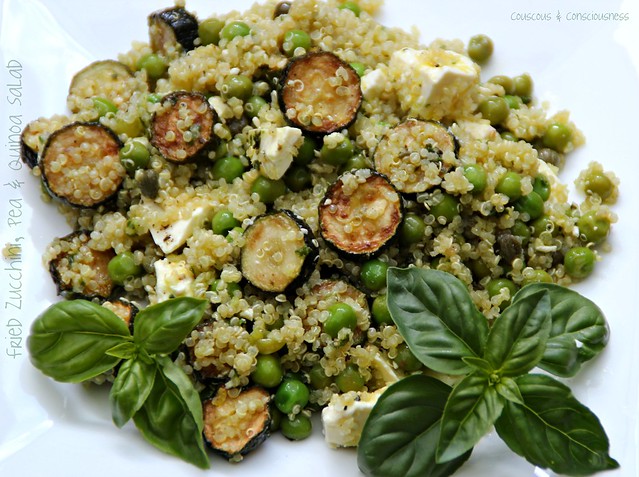
Fried Zucchini, Pea & Quinoa Salad:  This is one of those great recipes that you can play around with to suit what you have on hand.  Apart from the fried zucchini, which is really the hero of the dish, anything else goes.  In this instance I used peas instead of edamame, quinoa instead of pasta, and feta instead of buffalo mozzarella.  Get the picture?! 

If you would like to get to know Yotam Ottolenghi a little better, then do go and visit my friends at I Heart Cooking Clubs and see what they've all cooked up ...

IHCC Ottolenghi Leek Badge resized

... or check out Jerusalem and Ottolenghi's other great titles available from Amazon USA, Amazon UK or Fishpond NZ.

          Jerusalem 


Sunday, August 4, 2013

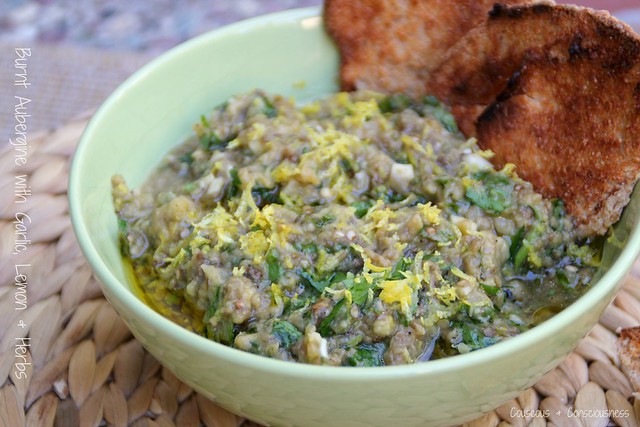
Burnt Aubergine with Garlic, Lemon and Herbs

Burnt Aubergine with Garlic, Lemon & Herbs 3

This week at I Heart Cooking Clubs, we're all about Mezze - those delicious "small plates", which might be served on their own as a single appetiser, or as part of a whole spread of small dishes.  Such eating lies at the very heart of many Mediterranean and Middle Eastern food cultures and is, to my way of thinking, a sublime way to eat.  Dish after dish of wonderful flavours and textures;  hours of conviviality around the "shared table";  what's not to love?!

No such repast would be complete without a bowl of hummus or some of this deliciously smoky, garlicky, lemony, herby aubergine dip.

Now, I'll be the first to admit, that this dish wins no prizes in the looks department - in fact it bears more than a passing resemblance to something the cat brought up.  Serve this up and, to a person, everyone will regard the bowl somewhat suspiciously before recoiling in horror and asking "What. Is. That?!!"  Of course, I know that this is not really the kind of reaction with which you want your food to be met.  But it's worth it to see that look of disgust transformed into a look of transcendent joy, and sighs of deep satisfaction, at the first mouthful.  I promise you, before you know it, the bowl will be empty and everyone will be fighting over the last mouthful.  I have even known those who claim to not really like aubergine, to be amongst those trying to just about scrape the pattern off the bowl in their efforts to get every last morsel of this.

This recipe is adapted, only slightly from Ottolenghi's recipe for Burnt Eggplant with Garlic, Lemon & Pomegranate Seeds from Jerusalem: A Cookbook.  The garnish of pomegranate seeds would be a wonderful addition, and one I would definitely have gone for, but for the fact that they are out of season right now.  And since I am presently holidaying in California (yes, I know, pinch me), I didn't have ready access to the stash of pomegranate seeds I keep in my freezer for dipping into in the off-season.

Burnt Aubergine with Garlic, Lemon & Herbs 2

Burnt Aubergine with Garlic, Lemon & Herbs
Adapted from a recipe by Yotam Ottolenghi & Sami Tamimi
Click here for a printable copy of this recipe

3 large aubergine
2 cloves garlic, finely chopped
1x lemon, finely grated zest and juice
3 tablespoons extra virgin olive oil
generous handful flat-leaf parsley, finely chopped
generous handful mint, finely chopped
flaky sea salt & freshly ground black pepper

Begin by burning the aubergines.  Cut a few long slashes through the skin of each one,  and put onto the grill of a hot barbeque.  Turn regularly and cook until the skin is black and flaky, and the flesh is soft - about 15- 20 minutes.  This is my preferred method for doing this - by far the easiest and least messy.  Alternatively, after slashing the aubergine skins, place them on a baking sheet in the oven under a hot grill (you may call it a broiler in your part of the world).  This will take about an hour in the oven, and you should turn them every 15 to 20 minutes so that they become blackened all over.

Remove the aubergines from the heat and leave until cool enough to handle.  Cut in half lengthwise, scoop out the soft flesh in long strips and discard the blackened skin.  Put the flesh into a sieve set over a bowl and leave to drain for at least an hour - longer if you have the time.

Put the drained flesh into a medium-sized bowl, mash with a fork, and add in the chopped garlic, grated lemon zest (reserving a little for garnish), lemon juice, olive oil, a generous pinch of flaky sea salt and a good grind of black pepper.  Set aside and allow to stand for a good hour or more at room temperature for the flavours to develop.

Stir in the herbs, adjust the seasoning as necessary, and pile into a serving bowl.  Drizzle over a little extra olive oil and garnish with the remaining lemon zest.

If you would like to get to know Yotam Ottolenghi a little better, then do go and visit my friends at I Heart Cooking Clubs and see what they've all cooked up ...

IHCC Ottolenghi Leek Badge resized

... or check out Jerusalem and Ottolenghi's other great titles available from Amazon USA, Amazon UK or Fishpond NZ.

          Jerusalem 

I'm also sharing this post this week at See Ya In the Gumbo hosted by the lovely, and very amusing, Michelle at Ms. enPlace.


See Ya in The Gumbo Badge


Saturday, July 20, 2013

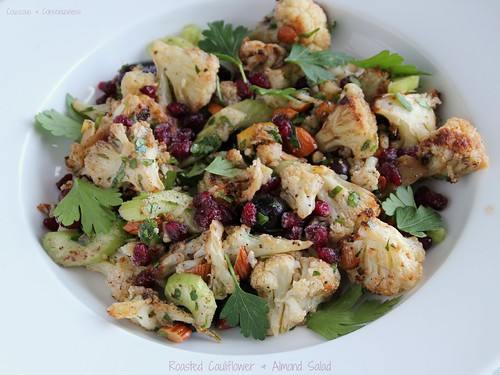
Roasted Cauliflower & Almond Salad

Roasted Cauliflower & Almond Salad

This post is going to be brief, very brief.  Right now I'm packing to go on holiday for a month and, as is my usual bent, I have left just about everything to the last minute ("why do today what you can put off till tomorrow?" has long been my motto), so the fact that I'm doing a post at all is something of a miracle.

This week at I Heart Cooking Clubs our theme is Pot Luck - normally a week when I like to go a bit "all out" and do something special - but for reasons mentioned above that's just not happening.  Over the last week, as I get myself ready for departure, quick and easy has most times been the order of the day.  And this roasted cauliflower salad from Ottolenghi's Jerusalem: A Cookbook has become a regular stand-by in my kitchen of late.  It's no secret, if you visit here regularly, that one of my favourite meals (summer or winter) is a salad, and in the middle of the southern hemisphere winter this salad is easy to put together (in the absence of leafy greens), and substantial enough for the cooler weather.  It also just so happens that at Tasting Jerusalem this month our theme is salads, so this post is doing double duty.

This quantity would probably feed four people as a side dish, and indeed I think it would be delicious with a bit of lightly roasted salmon or grilled lamb chops, but I love it as a meal all on its own and, as such, this makes two fairly substantial meal sized portions.

Ever one to gild the lilly, I've tricked the original recipe up a little with the addition of some preserved lemon and black olives, as well as a touch of pomegranate molasses.  I also used salted almonds instead of the roasted hazelnuts called for in the original recipe.  I've made it with the hazelnuts too, and even though hazelnuts are frequently my "preferred" nut in so many salads, somehow in this one I think I like the almonds just a little better.

Like every Ottolenghi recipe I've tried so far, this one offers a sensational combination of flavours and textures.  I urge you to try it.  'Nuff said ... I need to get on with the packing.  

Roasted Cauliflower & Almond Salad 2

Roasted Cauliflower & Almond Salad
Adapted from recipe by Yotam Ottolenghi & Sami Tamimi
Serves 2 to 4 people
Click here for a printable copy of this recipe

1x head cauliflower, cut into small florets
olive oil
flaky sea salt & freshly ground black pepper
1x large stick of celery, thinly sliced
generous handful roasted, salted almonds, roughly chopped
generous handful flat-leaf parsley leaves, finely chopped
1/4 of a preserved lemon, flesh discarded & skin finely chopped
handful kalamata olives
1/2 teaspoon ground cinnamon
1/2 teaspoon ground allspice
1 tablespoon red wine vinegar
1 teaspoon pomegranate molasses
extra parsley leaves to garnish
handful pomegranate seeds

Preheat oven to 220 degrees C (425 degrees F).

Toss cauliflower florets with a generous slosh of olive oil (2-3 tablespoons), and season liberally with flaky sea salt and freshly ground black pepper.  Tip into an oven dish, ideally in a single layer, and put into the preheated oven.  Cook until the cauliflower is tender and golden (about 25 minutes).  Remove from the oven, transfer to a large bowl, and set aside to cool.

Add another 2 tablespoons of olive oil to the cauliflower, along with the celery, almonds, parsley, preserved lemon, olives, cinnamon and allspice, vinegar, and pomegrante molasses.  Toss to combine everything well.  Taste and adjust seasoning to your taste. 

If you would like to get to know Yotam Ottolenghi a little better, then do go and visit my friends at I Heart Cooking Clubs and see what they've all cooked up ...

IHCC Ottolenghi Leek Badge resized

... or check out Jerusalem and Ottolenghi's other great titles available from Amazon USA, Amazon UK or Fishpond NZ.

          Jerusalem

I am also sharing this post at Tasting Jerusalem, a virtual cooking community exploring the vibrant flavors and cuisine of the Middle East through the lens of “Jerusalem: A Cookbook” by Ottolenghi and Tamimi published by Ten Speed Press. You can follow along and cook with us by subscribing to omgyummy.com, following the hashtag #TastingJrslm on Twitter and Instagram, and liking our Facebook page.

I'm also, because it would be rude not to, I'm sharing this post this week at See Ya In the Gumbo hosted by the lovely, Michelle at Ms. enPlace, at Souper (Soup, Salad & Sammies) Sundays hosted by my good friend Deb at Kahakai Kitchen, at Cook Your Books, hosted by the lovely Joyce at Kitchen Flavours, and at My Meatless Mondays hosted by Chaya at My Sweet and Savory.


See Ya in The Gumbo Badge            Souper Sundays Badge            Cook Your Books Badge

Monday, July 15, 2013

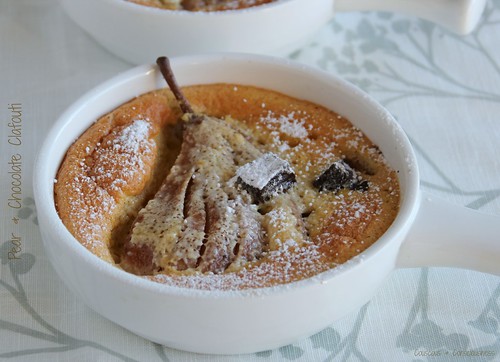
Pear & Chocolate Clafouti

Pear & Chocolate Clafouti 1

This week at I Heart Cooking Clubs, where we continue our journey with the highly inspirational Yotam Ottolenghi, our theme is "Fruitfull".   Time to choose an Ottolenghi dish which features fruit, whether it be fresh, dried or frozen, and let me tell you there are many.  I love the way in which Ottolenghi combines fruit with savoury ingredients in many of his dishes - it's one of the many things that I find incredibly appealing about his food - but this week I just decided to run with dessert.

When it comes to dessert, much as I like to eat a nice "fancy-schmancy" dessert, making them is not my idea of fun ... no latent pastry chef in this girl.  No, dessert making for me has to be simple and fuss-free - the kind of thing that you can knock together in a few minutes, but which still looks elegant and most of all tastes great.  And one of my favourite desserts, both to make and to eat, is a clafouti - after all, what's not to love about fruit baked in a light and delicate egg custard?  Although it is traditionally made with cherries, and only cherries, you can really use any fruit which is seasonal - I know French housewives everywhere are probably throwing their hands up in horror at this suggestion, but really you can.  I was inspired by the recipe for Individual Plum Clafoutis in Ottolenghi: The Cookbook, but with stone fruit being out of season here right now, pears seemed like a good option.  And, of course, if you're having pears, you might as well have chocolate, right?  The two are after all made for each other.

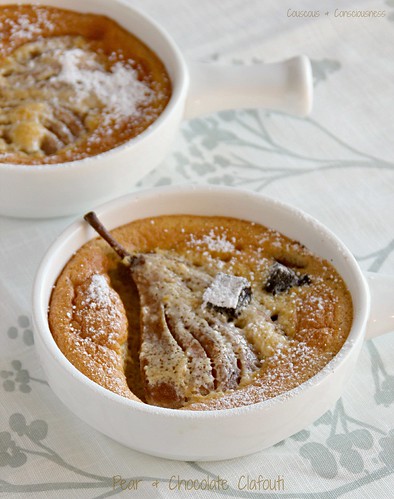
This dessert is a doddle to make, and although these servings look quite substantial, the clafouti is in fact quite light, so this is certainly not the kind of dessert that is going to weigh you down at the end of a meal.  A nice alternative to a fruit tart or crumble in that regard I think, and infinitely quicker and easier to make.  At the risk of shocking a few French housewives, I hope you'll throw caution to the wind and give this a try.

Pear & Chocolate Clafouti 2

Pear & Chocolate Clafouti
Adapted from a recipe by Yotam Ottolenghi & Sami Tamimi
Makes 4 large individual servings
Click here for a printable copy of this recipe

2x large ripe, but not soft, pears (I used Beurre Bosc)
3x large free-range eggs
70g (2-1/2 oz) caster sugar
70g (2-1/2 oz) plain flour
1 teaspoon vanilla paste (I used Heilalla)
150ml (5 fl oz) cream
pinch of salt
100g (3.5 oz) dark chocolate, roughly chopped (I used Whittaker's Dark Ghana)
icing sugar to dust

Preheat the oven to 170 degrees C (340 degrees F).  Use medium sized individual, ovenproof dishes or tins - I used some gratin dishes which were 14 cm (5-1/2 in) in diameter, and 4 cm (1-1/2 in) deep.  Lightly brush the insides of the dishes with a little vegetable oil and set aside.

Peel the pears, cut in half, and remove the cores.  Now slice thinly lengthwise, without slicing all the way through, so that the slices remained attached to each other at the stem end.  Fan out the slices from the stem and place half a pear in the base of each dish.  Sprinkle one quarter of the chocolate over each one.

Separate the eggs, placing the yolks in a medium sized mixing bowl and the whites in a small one.

Add the caster sugar to the egg yolks and, using an electric mixer, beat until the mixture is thick and pale.  With a rubber spatula, fold in the flour, then gently mix in the vanilla paste, cream and salt.

Whisk the egg whites to stiff, but not dry, peak stage.  Then gently fold the egg whites into the batter.

Pour the mixture over the pears and chocolate, and bake in the preheated oven until puffed and golden, and skewer inserted into the middle comes out clean - about 20 minutes.

Dust with icing sugar just before serving.

If you would like to get to know Yotam Ottolenghi a little better, then do go and visit my friends at I Heart Cooking Clubs and see what they've all cooked up ...

IHCC Ottolenghi Leek Badge resized

... or check out Ottolenghi: The Cookbook and Ottolenghi's other great titles available from Amazon USA, Amazon UK or Fishpond NZ.

          Ottolenghi: The Cookbook

I will also be submitting this post to Sweet New Zealand.  Inspired by Alessandra Zecchini, Sweet New Zealand is an event for all Kiwi bloggers (whether living at home or abroad), or all foreign bloggers living in New Zealand, to link up their sweet treats.  This month, Sweet New Zealand is hosted by my friend Nicola at Homegrown Kitchen.

Sweet New Zealand Badge A

I will also be sharing this post at See Ya In the Gumbo hosted by the delightful Michelle at Ms. enPlace.

See Ya in The Gumbo Badge