Saturday, February 4, 2012

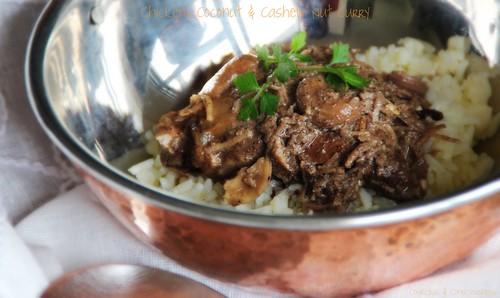
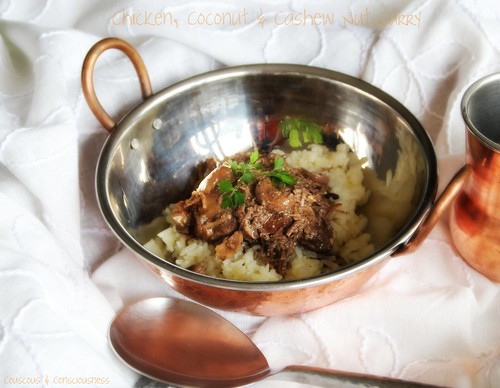
Chicken, Coconut & Cashew Nut Curry

Chicken, Coconut & Cashew Nut Curry 1

It was bound to happen sooner or later - a Tessa Kiros recipe that left me feeling a little disappointed.

Our theme this week at I Heart Cooking Clubs, where we are spending six months cooking the recipes of Tessa Kiros, was "Some Like it Hot ... and Spicy!" - an opportunity to heat things up with a bit of chilli, or introduce some warming spices to a heart-warming dessert or sweet treat.

I toyed with the idea of making Tessa's Cinnamon & Cardamom Buns, a recipe which has been on my radar ever since Kim made them right back in week one, and Natashya made them last week.  But in the end Tessa's recipe for Chicken, Coconut & Cashew Nut Curry, which I'd had bookmarked ever since I bought the book Falling Cloudberries, seemed like just the thing for a quick, flavourful, mid-week dinner.


Falling Cloudberries: A World of Family Recipes

To be honest, I wish I'd stuck with the buns, since both Kim and Natashya raved about them, and I find myself falling a long way short of being able to rave about this recipe.  Now don't get me wrong - it wasn't terrible or objectionable - but when you are used to eating and making a lot of Indian food, as I am, it just fell rather short.  Despite the variety of spices in here, the flavours were somehow not fully rounded out and felt a little unbalanced, and the gravy failed to thicken and emulsify as it should have.

I think, however, the recipe is not beyond redemption.  I would make this again, but there are a number of modifications that I would make which I think would improve it considerably.  Below I have recorded the recipe from the book, as that is what I made, and then at the end I have included my notes for what I would do to improve this.  I'm going to make my improved version next week, so I'll be sure to let you know how that goes.
Chicken, Coconut & Cashew Nut Curry 2

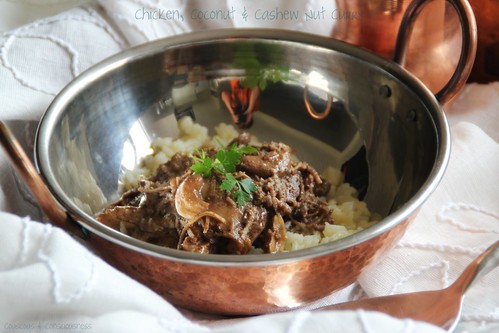
Don't you love the way I managed to capture my own reflection in the bowl - try cloning that out!!

Chicken, Coconut & Cashew Nut Curry
Recipe by Tessa Kiros from
Serves 3-4

1 teaspoon ground coriander
1 teaspoon ground cumin
pinch freshly grated nutmeg
1/2 teaspoon ground cardamom
4 cloves
1 bay leaf
1 heaped tablespoon garam masala
pinch freshly ground black pepper
3 tablespoons vegetable oil
1.25 kg (2lb 12oz) chicken thighs, skinned, boned & flesh diced
(use bone-in thighs for better flavour)
2 onions, finely diced
salt
45g (1-1/2 oz) dessicated coconut
70g (2-1/2 oz) roasted, unsalted cashews
1 cup plain yoghurt

Dry roast the coriander, cumin, nutmeg, cardamom, cloves, bay leaf and garam masala and black pepper in a non-stick pan set over high heat.  Stir-fry until fragrant - just a couple of minutes, then remove from the pan and set aside.

Heat the oil in a large saucepan, and brown the chicken and onions (you may have to do this in batches).  Add the spices, stirring until fragrant, and making sure all the chicken and onions are well coated with the spice mix.  Season generously with the salt.  Add the coconut and 2 cups water, bring to the boil.

Reduce the heat, cover the pan, and simmer for about 30 minutes, stirring from time to time.  Cut the cashew nuts in half, add to the pan and cook for a further 10 minutes.  (Tessa suggests adding more water, if it looks as though it needs it - I think that's unlikely, if anything I found it too watery)

Lastly, stir in the yoghurt.  Simmer for another minute or two without allowing it to come to a boil.  Serve with steamed, buttered, basmati rice.

My recommended changes:
  1. Replace ground spices with whole spices
  2. I would suggest replacing the nutmeg with a cinnamon stick, and substituting the ground pepper with half a dozen dried red chillies.
  3. Cut the onion back to just one, but add a dozen garlic cloves and a knob of ginger, to round out the flavour a bit more.
  4. Increase the amount of coconut - probably about double, and increase the amount of cashew nuts - again probably at least double.
  5. Dry roast the wholes spices, along with the coconut, ginger and garlic over low heat for about 5 minutes, and then add about a third of the cashews and the onion, and continue to roast for maybe another 10-15 minutes.  Allow to cool completely, and then grind up in a blender with some water until you have a smooth, fine paste.  This should extract maximum flavour and help to get a thick, emulsified gravy.
  6. Then heat oil in a large pot, and fry this spice paste for around 10 minutes, before seasoning with salt, add the chicken, and fry for a few minutes making sure chicken is well coated with spice mixture.
  7. Add water, and simmer for about 10 minutes before adding the rest of the cashew nuts, and continue simmering until the chicken is cooked through.
  8. I would leave the yoghurt out, but maybe add some lemon juice and grated lemon zest to the rice.
As I mentioned earlier, I'm going to try out these changes next week, so I'll let you know how it works out, but I feel pretty confident it will deliver I better balanced flavour, and a good, thick gravy.
Chicken, Coconut & Cashew Nut Curry 3

If you would like to get to know Tessa a little better, then do go and visit my friends at I Heart Cooking Clubs and see what they've all cooked up ...

IHCC Tessa Kiros Button

... or check out Falling Cloudberries and many of Tessa's other great titles available from Amazon or Fishpond NZ.


CookbookSundays

I'm also sharing this at Cookbook Sundays, where my friends are delving into their cookbook collections and sharing some of their recipes.  Do stop by to see what they're cooking - you might even feel inspired to link up a recipe from one of your own cookbooks.

Sunday, January 29, 2012

Almond, Citrus & "44" Cake

Almond, Citrus & "44" Cake 3

If you visit here regularly, then you will know that coming across anything baked is a bit of a rarity here.  There's good reason for that.  Firstly, I'm just not very good at it - simple as that!  And secondly, I have an absolute horror of ending up with a backside that is three axe handles across, and so having tins full of baked goods kicking around the place to tempt me seems to be not such a good idea.

However, I was visiting friends for dinner last night and I offered to bring a cake for dessert.  Quite what possessed me to offer to bring a cake, given my lack of "baking pedigree" I'll never know, but the words had unbidden tumbled out of my mouth, and there was no taking them back.  What's more, I had the added challenge of having to come up with something gluten free to suit the intolerances of one of the guests.

River Cafe Italian Kitchen

Since I needed to dive into one of those seldom-used cookbooks languishing on my bookshelves for my contribution this week to Cookbook Sundays, I thought that I might try the Chocolate Nemesis cake from the River Cafe Italian Kitchen by Rose Gray and Ruth Rogers - a recipe I've had bookmarked to try for ages.  However, once I had the book down off the shelf and was flicking through it I came across this recipe for Almond, Orange, Lemon and Whiskey Cake.  Since I love just about anything lemony, and ground almonds took the place of flour this seemed like an an obvious choice. 

Unfortunately, citrus fruit is not really at it's best here right now, so a bit of improvisation was called for.  The cooked cake is dredged in a syrup made up of, amongst other things, the juice of 3 oranges and 4 lemons, each of which should yield approximately 320 ml (10-1/2 fl oz) of juice.  Well, with the best will in the world, and even after microwaving them for a minute to release the juice a little more, the lemons which are available here right now are never going to surrender that much juice.  In fact my oranges also didn't deliver as much juice as expected either, so I padded the whole lot out with some tangelo juice.

The syrup recipe also called for the inclusion of whisky, which I didn't have on hand.  I did have, however, have a couple of bottles of "44".  You may remember me telling you about this orange & coffee flavoured liqueur  about a year ago, when I first set it to steep.

"44" 1

In short, an orange is poked all over with 44 holes.  Each of those holes is then studded with a coffee bean.  The coffee studded orange is then put into a large glass jar, to which 44 sugar cubes are then added, and the jar topped up with a litre of vodka.   The jar is then stored in a dark place, and given a bit of a shake every day for 44 days.  Now this is where I departed from the original instructions.  I gave it a shake every day for 10 days.  It was then subjected it to a 6.3 earthquake, causing the bottle to be jettisoned like a missile across the room with great force.  The bottle was then left to roll around the floor, miraculously unbroken, and subjected to a further 2641 after shocks.  Next it was packed into a box, and transported to a dark storage place.  It was then subjected to a further 1107 after shocks, before being put onto a truck and transported 600 kilometres across the South Island.  Finally, after six months, and way more shaking than was originally intended, it was ready to unpack, decant and enjoy - it was definitely worth the extra effort, but hard to imagine being able to recreate that.  The resulting liqueur is a beautiful pale caramel colour, deliciously syrupy and "orangey", and the coffee adds a delicious almost "chocolatey" complexity to the flavour and a certain "warmth".  I like to store it in the fridge and drink over ice, and I have used it in many instances where an orange flavoured liqueur has been called for.

Anyway, I have digressed.  In the absence of whisky I chose to use this in the syrup for the cake.  It was a perfect match to the almond and citrus notes of the cake, both in terms of flavour and aroma.  This cake is an absolute breeze to make;  and it is wonderfully moist and intensely flavourful after its syrup bath.  This is also quite a large cake and easily gives 8 generous pieces - could probably even serve 10 to 12 people at the end of a large meal.  That said, it is actually a very light cake, and three of us had no problem polishing off a large piece each.  I served it with creme fraiche, garnished with some of my Seville Orange Spoon Sweets and some fresh cherries.

This is one of those wonderful cakes that actually makes me feel like perhaps I can bake after all, and it will definitely be at the top of my list next time I need to bring cake.  I hope you'll give this a try.

Almond, Citrus & "44" Cake 1

Almond, Citrus & "44" Cake Recipe
Adapted from recipe by Rose Gray & Ruth Rogers from
Serves at least 8
gluten free, vegetarian
Click here for a printable copy of this recipe

For the cake:
8 large free-range eggs, separated
200g (7 oz) caster sugar
grated zest of 2x oranges
grated zest of 2x lemons
300g (10 oz) ground almonds

For the syrup:
600ml citrus juice 
(any combination of oranges, lemons, tangelos)
75g (3 oz) caster sugar
1 cinnamon stick
500ml (17 fl oz) orange liqueur or whisky

To serve:
creme fraiche or mascarpone

Preheat the oven to 180 degrees C.  Grease a 25cm (10 inch) diameter cake tin, and line the base with baking parchment.

In a large bowl, beat the sugar and egg yolks together until pale and fluffy.  Add the grated orange and lemon zest, and the ground almonds.  Stir until just combined.  In another large bowl, beat the egg whites to soft peaks.  Add a couple of large spoonfuls to the almond and egg yolk mixture, and stir quite vigorously to loosen the mixture.  Then add the rest of the egg whites and gently fold in.

Pour the mixture into the cake tin, and bake in the preheated oven for about 35-40 minutes until set.

Meanwhile, make the syrup.  Put the citrus juices, sugar and cinnamon into a pan, set over medium heat, and simmer until slightly reduce.  Add the liqueur or whisky.  Simmer for another minute or two, then remove from the heat.

Once the cake is ready, remove from the oven and, while still hot, prick the entire surface with a pointed knife.  Pour the syrup over the cake, making sure all the liquid is absorbed into the cake.  You may not use all the syrup (I used about two thirds of it).

Leave in the tin until completely cooled before turning out.

Serve with creme fraiche or mascarpone.

I'm sharing this recipe with Cookbook Sundays - I hope you'll stop by and see what my friends are cooking.  Maybe you'd even like to dust off some of your own cookbooks and join in.

Cookbook Sundays Badge Resized

Saturday, January 28, 2012

Cookbook Sundays # 8


Cookbook Sundays Badge 

If you're anything like me you have dozens of cookbooks gathering dust on your bookshelves, some of which have never even been cooked from.  Sure I spent hours browsing through them when I first bought them, marking all the recipes I was going to make with little post-it notes, and yet still those books languish in the bookcase and never make it to the kitchen.  There are others from which I have made but one recipe which was such a resounding success that I've made it over and over again, and yet somehow I've never made anything else from that book.  Sound a bit familiar?!

Take comfort - you are not alone, and now Cookbook Sundays is your opportunity to change that.  Every Sunday I'm going to share with you a recipe that I haven't made before from one of my ever expanding collection of cookbooks.  And, because I know that if you have read this far then you are guilty of this too, I'm inviting you to join in with me.  Each week my Cookbook Sundays post will have a linky for you to share something you've cooked from one of your cookbooks.

The rules for joining in are simple:
  1. Your post must state the author and the title of the book your recipe has come from.
  2. Your post must mention Cookbook Sundays and link back to this post.  Including the Cookbook Sundays badge is optional, but always appreciated.
  3. You may submit as many entries as you like, and you may use the same cookbook as many times as you like.  Old posts are also welcome.
  4. Lastly,  remember that what goes around, comes around - one of the reasons you are participating in this is because you want people to read your posts, so do the right thing and go and visit a few of the other participants - you can even "Like" your favourites. 
Now, go and dust off those cookbooks and get cooking!  Use the linky tool at the end of this post to submit your entry/entries - simply scroll down to where it says "You are next ... Click here to enter", and then follow the instructions.  The linky will be open for one week.

Lastly, if you would like to use the Cookbook Sundays badge in your post, simply copy the code in the box beside the badge below and paste it into your post.  Feel free to also use it in your sidebar if you wish.

CookbookSundays

By the way ... come visit again tomorrow - I'll be sharing a fabulous Almond, Orange, Lemon & "44" Cake from the River Cafe Italian Cookbook.  See you then.

Sunday, January 22, 2012

Crisp Pork Belly with Sweet Peach Salsa

Crispy Pork Belly

Poking around in my fruit bowl yesterday, I found a few peaches which needed using with a degree of urgency, so in trying to decide on my contribution for this week's Cookbook Sundays I turned to Nigel Slater's Tender, Volume II, A Cook's Guide to the Fruit Garden for inspiration.


This is a wonderful book, divided in to chapters according to fruit varieties.  Each chapter offers:  firstly, some general information about the seasonality, origins and history of the particular variety;  secondly, some information about growing the particular fruit and available varieties;  then, using the said fruit in the kitchen - how to ripen it, cook with it, and other great flavour companions;  and lastly, a selection of recipes.  Recipes are generally relatively simple and uncomplicated (my kind of food), photographs are gorgeous, and everything is written in Nigel Slater's inimitable style, which makes you feel as though he is right there in the kitchen having a chat with you.

Leafing through the chapter on peaches and nectarines, I found myself wishing that I had several kilos of peaches kicking around the house, as there wasn't a single recipe that I didn't want to try.  However, as I had just three peaches on hand, I had to narrow the search somewhat and, given my weakness for porcine flesh, I just knew that I was going to love this Crisp Pork Belly with Sweet Peach Salsa.

Pork belly is marinated in a paste of garlic, soy, chilli and Chinese five-spice, then roasted in a hot oven until the skin is crispy.  Nigel suggests marinating the pork for at least four hours, and maybe even overnight.  As it turned out, I only had two hours, but the flavour was still exceptional.  For the salsa, peaches (I used a combination of yellow and white peaches) and cherry tomatoes combine with chillies, limes and coriander, to make the perfect accompaniment to the pork.

Sweet Peach Salsa

Crisp Pork Belly with Sweet Peach Salsa Recipe
Adapted from Nigel Slater's
Serves 4
Click here for a printable copy of this recipe

1 to 1.5kg (2 to 3 lb) pork belly, skin finely scored

Marinade:
3x cloves garlic
2 tablespoons soy sauce
1 tablespoon sunflower oil
2 teaspoons salt
generous pinch dried chilli flakes
1 teaspoon Chinese five-spice powder

Peach Salsa:
2x spring onions
1x small red chilli
3x peaches (white, yellow or a mixture of both)
(nectarines would be a good substitute if peaches were not available)
8x cherry tomatoes
small bunch of coriander (cilantro)
2x limes
3 tablespoons olive oil

Put the piece of pork belly into a shallow glass or china dish.

Peel the garlic, put into a mortar and pestle, sprinkle over the salt, and crush to a paste.  Add the soy sauce, oil, chilli flakes and Chinese five-spice, and combine everything well.  Spread this paste liberally over the skin and underside of the pork belly, rubbing it in well.  Cover with cling film and set in the fridge to marinate for at least two hours - longer if possible  Overnight is good if you have the time.

Preheat the oven to 220 degrees C (425 degrees F).  Place the pork in a roasting tin, skin side up, and cook in the preheated oven for about 20-25 minutes.  Reduce the oven temperature to 200 degrees C (400 degrees F), and cook for a further 40-50 minutes, until the skin is dark and crispy.  Remove from oven, and allow to rest for at least 10 minutes before carving.

Meanwhile, make the salsa.  Finely chop the chilli (feel free to de-seed first if you don't want the heat).  Finely chop the spring onions.  Peel the peaches, slice the cheeks off the stones, and finely chop the flesh.  Finely chop the cherry tomatoes and coriander.  Gently mix everything together in a bowl.  Squeeze over the juice of the limes and add the olive oil.  Toss everything again to combine.

Serve with the pork belly.  Steamed rice and bok choy make great additional accompaniments.

I'm sharing this recipe with Cookbook Sundays - do stop by and see what else is cooking.  Maybe you'd even like to dust off some of your own cookbooks and join in.

Cookbook Sundays Badge Resized

Saturday, January 21, 2012

Cookbook Sundays # 7


Cookbook Sundays Badge 

If you're anything like me you have dozens of cookbooks gathering dust on your bookshelves, some of which have never even been cooked from.  Sure I spent hours browsing through them when I first bought them, marking all the recipes I was going to make with little post-it notes, and yet still those books languish in the bookcase and never make it to the kitchen.  There are others from which I have made but one recipe which was such a resounding success that I've made it over and over again, and yet somehow I've never made anything else from that book.  Sound a bit familiar?!

Take comfort - you are not alone, and now Cookbook Sundays is your opportunity to change that.  Every Sunday I'm going to share with you a recipe that I haven't made before from one of my ever expanding collection of cookbooks.  And, because I know that if you have read this far then you are guilty of this too, I'm inviting you to join in with me.  Each week my Cookbook Sundays post will have a linky for you to share something you've cooked from one of your cookbooks.

The rules for joining in are simple:
  1. Your post must state the author and the title of the book your recipe has come from.
  2. Your post must mention Cookbook Sundays and link back to this post.  Including the Cookbook Sundays badge is optional, but always appreciated.
  3. You may submit as many entries as you like, and you may use the same cookbook as many times as you like.  Old posts are also welcome.
  4. Lastly,  remember that what goes around, comes around - one of the reasons you are participating in this is because you want people to read your posts, so do the right thing and go and visit a few of the other participants - you can even "Like" your favourites. 
Now, go and dust off those cookbooks and get cooking!  Use the linky tool at the end of this post to submit your entry/entries - simply scroll down to where it says "You are next ... Click here to enter", and then follow the instructions.  The linky will be open for one week.

Lastly, if you would like to use the Cookbook Sundays badge in your post, simply copy the code in the box beside the badge below and paste it into your post.  Feel free to also use it in your sidebar if you wish.

CookbookSundays

Sunday, January 15, 2012

Artichoke & Italian Sausage Risotto

Artichoke & Italian Sausage Risotto 1

You may recall that last week I brought you coffee, when I had really been planning to bring you risotto.  Since then, I was flooded with comments from so many of you saying that you still wanted to see the risotto, and as our theme for this week at I Heart Cooking Clubs is Rice is Nice this seemed like the perfect time to share this dish.

This is another recipe from Tessa Kiros' book Falling Cloudberries, though to be honest I used her recipe more as inspiration than following it too closely.  Risotto is one of those things that I make so often that I can pretty much make it with my eyes closed.  I have my own tried and true "method" for making risotto and seldom use a recipe other than for inspiration.  So it was with this recipe - I took Tessa's idea for artichokes and Italian sausages, but departing somewhat from her method I incorporated them into my usual risotto base.  I found a great Italian sausage with plenty of fennel and little hits of chilli which brought loads of flavour to the risotto, and I used bottled char-grilled artichokes instead of the fresh artichokes Tessa used.  There are no fresh artichokes available here right now - in fact, even in the season here, they are both hard to come by and ridiculously expensive - and I have never come across frozen ones here in New Zealand either.  Bottled ones work just fine, however, and I simply put them in right at the end so that they wouldn't break up too much.

I have always loved the combination of sausage with pasta or rice, and the spiciness of these sausages with the smoky char-grilled artichokes, combined with creaminess of the rice amounted to the ultimate in comfort food.  Kim at Stirring the Pot made this last week and said it was one of her favourite Tessa Kiros recipes so far, and I would have to agree - this was definitely one of my favourites.  I urge you to try it.
Artichoke & Italian Sausage Risotto 3

Artichoke & Italian Sausage Risotto
Inspired by a recipe by Tessa Kiros from
Makes 3 generous servings
Click here for a printable copy of this recipe

4x char-grilled bottled artichokes, drained & cut into quarters
3x medium sized Italian sausages
olive oil
1 shallot, finely chopped
2 garlic cloves, minced
small bunch of thyme
4 generous handfuls arborio rice
1/2 cup white wine or juice of 1 lemon
3 to 4 cups vegetable stock, hot
pinch of saffron threads, infused in the hot stock
2 tablespoons butter
3/4 cup Parmesan, freshly grated
flaky sea salt & freshly ground black pepper

Remove the casings from the sausages - just run a sharp knife down the full length of the sausage, peel off the casing and discard - it will come off very easily.  Heat a tablespoon or two of olive oil in a large skillet, set over high heat.  Add the sausages to the hot oil and using a wooden spatula break the sausages up into smallish pieces.  Cook, stirring from time to time, until the pieces of sausage are cooked through and lightly golden all over.  Remove from the pan and set aside on some paper towels to drain any excess fat.

Return the pan to the heat.  With fat that has come out of the sausages, you shouldn't need any more oil in the pan, but by all means add more if necessary - you should have about 2-3 tablespoons of oil.  Add the shallot, garlic and thyme to the pan - cooking until the shallot has softened and the garlic is fragrant, taking care not to burn the garlic.  Almost as soon as you can smell the garlic it is time to add the rice to the pan.  Continue cooking the rice with the shallot and garlic, stirring constantly, until every single grain of rice is coated with the oil - it will take on a kind of translucent look around the edges and will start to "squeak".

Now is the time to add the wine or lemon juice - I used lemon juice on this occasion, which I thought worked really well with the artichokes.  Continue stirring until virtually all the wine or juice has been absorbed by the rice.  Then begin to add the stock and saffron, one ladleful at a time - stirring constantly until each ladleful has been absorbed before adding the next. The rice will swell up considerably as it absorbs the stock, and when you get to the point where you think the rice will only take one or two more additions of stock, add in the pieces of cooked sausage.  Continue adding the stock until the rice is cooked through.  Remove the pan from the heat.

Add the artichokes to the rice, along with the butter, two-thirds of the parmesan, a generous pinch of flaky sea salt, and some freshly ground black pepper.  Stir well, cover the pan, and set aside for about 5 minutes for all the flavours to infuse.  Taste and adjust the seasoning as necessary.

Spoon the risotto into serving bowls, sprinkle over the the remaining Parmesan and serve immediately.

Artichoke & Italian Sausage Risotto 2

If you would like to get to know Tessa a little better, then do go and visit my friends at I Heart Cooking Clubs and see what they've all cooked up ...

IHCC Tessa Kiros Button

... or check out Falling Cloudberries and many of Tessa's other great titles available from Amazon or Fishpond NZ.


CookbookSundays

I'm also sharing this at Cookbook Sundays, where my friends are delving into their cookbook collections and sharing some of their recipes.  Do stop by to see what they're cooking - you might even feel inspired to link up a recipe from one of your own cookbooks.

Saturday, January 14, 2012

Rosy Plum Crumbles and Cookbook Sundays # 6

Rosy Plum Crumble 3

I've been loving hosting Cookbook Sundays over the last few weeks.  It's really had me diving into all those cookbooks that I haven't used nearly enough.  Though I seem to be going through a pad of Post-It Notes nearly every second day, tagging all the things I want to make.

High on the list of possibilities for my contribution this week were a pumpkin curry from the Wagamama Cookbook, roasted pork belly with a roasted peach salsa from Nigel Slater's Tender I, and a cherry cheesecake from Nigel Slater's Tender II.  However, when I picked up some plums at the supermarket today, the look and feel of which held such promise, but which turned out on first bite to be less than perfect, I knew that they would have to be cooked in some way to really get the best out of them, and that they would have to be the object of this week's post.

I had several plum recipes bookmarked - pies, tarts, and galettes (mmm, you know that I'm still a bit nervous about making pastry);  cakes (but who wants to make a whole cake for one person);  jams and chutneys (I didn't have a big enough quantity of plums for any of those);  ice cream (would have been a possibility, but in order to get the best results I like to leave my ice cream base to chill overnight, so not good timing for that).  But the recipe which gave me my Goldilocks moment, the one which was just right, was this recipe for Rosy Plum Crumbles from the Marie Claire, Luscious book by Michele Cranston.  These were quick and easy to make from ingredients I had in my pantry, and the great thing I love about crumble is that, with a generous blob of yoghurt, leftovers make great breakfast food.


I adjusted the recipe slightly to suit the quantity of plums that I had.  You could make this in one dish, or in individual serving dishes.  I used these two little vintage, enamel pie dishes I stumbled across recently.  If served with a generous blob of good vanilla ice cream this would be enough for four people, or on its own (with perhaps a drizzle of cream) it would give three generous servings.  I actually had this with some of my home made Christmas mince ice cream which married beautifully with the rosewater infused plums and crunchy, caramelly crumble topping.

Rosy Plum Crumble 1

Rosy Plum Crumbles
Adapted from a recipe by Michele Cranston from
Serves 3-4
Click here for a printable copy of this recipe

450g plums (16 oz) plums
45g (1-1/2 oz) caster sugar
1/2 teaspoon rosewater
65g (2-1/4 oz) dark Muscovado sugar
35g (1-1/4 oz) all purpose flour
25 g (1 oz) dessicated coconut
80g (2-3/4 oz) soft butter
whipped cream or yoghurt or vanilla ice cream to serve

Preheat the oven to 180 degrees C (350 degrees F).

Cut the plums in half, remove the stones, and then cut into slices.  Put the slices into a bowl with the caster sugar and rosewater.  (Note - measure the rosewater carefully and don't be tempted to increase the quantity or you will end up with something that tastes like perfume.)  Mix everything together well until the plums are well coated in the sugar.  Set aside for 10 minutes.

In another bowl, mix the Muscovado sugar, flour and coconut together.  Add the butter, and rub the butter in with your fingertips, until the mixture looks like breadcrumbs.

Stir the plums again, then put into an ovenproof dish, or individual ovenproof dishes.  Top with the crumble mixture, place dish (or dishes) on a baking tray, and bake for 30 minutes - until the topping is golden and crisp and the fruit juices are bubbling up around the sides.

Rosy Plum Crumble 2

Serve warm with ice cream, cream or yoghurt.

Cookbook Sundays Badge 

Earlier I mentioned Cookbook Sundays.  What is that all about, you are perhaps wondering.  Well, if you're anything like me you have dozens of cookbooks gathering dust on your bookshelves, some of which have never even been cooked from.  Sure I spent hours browsing through them when I first bought them, marking all the recipes I was going to make with little post-it notes, and yet still those books languish in the bookcase and never make it to the kitchen.  There are others from which I have made but one recipe which was such a resounding success that I've made it over and over again, and yet somehow I've never made anything else from that book.  Sound a bit familiar?!

Take comfort - you are not alone, and now Cookbook Sundays is your opportunity to change that.  Every Sunday I'm going to share with you a recipe that I haven't made before from one of my ever expanding collection of cookbooks.  And, because I know that if you have read this far then you are guilty of this too, I'm inviting you to join in with me.  Each week my Cookbook Sundays post will have a linky for you to share something you've cooked from one of your cookbooks.

The rules for joining in are simple:
  1. Your post must state the author and the title of the book your recipe has come from.
  2. Your post must mention Cookbook Sundays and link back to this post.  Including the Cookbook Sundays badge is optional, but always appreciated.
  3. You may submit as many entries as you like, and you may use the same cookbook as many times as you like.  Old posts are also welcome.
  4. Lastly,  remember that what goes around, comes around - one of the reasons you are participating in this is because you want people to read your posts, so do the right thing and go and visit a few of the other participants. 
Now, go and dust off those cookbooks and get cooking!  Use the linky tool at the end of this post to submit your entry/entries - simply scroll down to where it says "You are next ... Click here to enter", and then follow the instructions.  The linky will be open for one week.

Lastly, if you would like to use the Cookbook Sundays badge in your post, simply copy the code in the box beside the badge below and paste it into your post.  Feel free to also use it in your sidebar if you wish.

CookbookSundays

Sweet New Zealand Badge 

I am also sharing this post with Sweet New Zealand, a monthly blog event created by the very lovely Alessandra Zecchini, and which this month is hosted by the equally lovely and incredibly talented Arfi at HomeMadeS. This is an opportunity for all Kiwi bloggers (whether you are living in New Zealand or overseas), as well as for non-Kiwi bloggers living in New Zealand, to connect and share some of those sweet treats from your kitchen.  So, head on over to Arfi's and share something sweet.